Guide
This guide describes how to create a new texture atlas, and add new icons for skills and/or items.
Making a New Atlas
In the Editor, open the Texture Atlas Editor from the main toolbar.

To create a new atlas in the Texture Atlas Editor, either click on the paper icon or go to File > New.

This will open the Create new texture atlas dialogue box.
-
File path to .lsx: There is no reason to change the actual path, but you can click on the “…” button beside the field to rename the new atlas to something more informative than
newAtlas.lsx. -
File path to .dds: This is the .dds file that will contain the grid with the icon images. Again, no need to change the path, only the filename.
-
Icon size: Keep to 64x64.
-
Texture size: This is the total size of the texture atlas image. The sizes can only be powers of 2, from 32x32 to 4096x4096. We recommend sticking to 512x512 or 1024x1024.
-
512x512: a grid of 8x8 spaces to house 64 icons (of 64x64)
-
1024x1024: a grid of 16x16 spaces to house 256 icons (of 64x64)
-
-
Square icons: Keep this enabled. All of our skill and item icons are 64x64 squares.
-
Custom: This option lets you create texture atlases that are not square. We do not recommend this; please keep it disabled.
-
Package: This is your mod package.
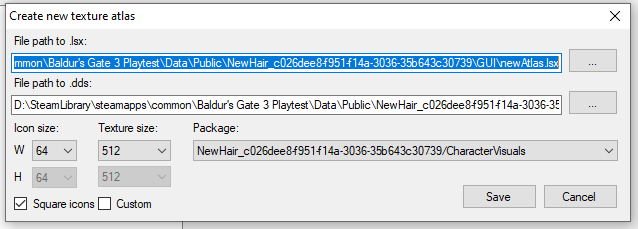
Click Save.
Your new atlas should automatically open in the Texture Atlas Editor. You can confirm this by resizing the window to view the full filepath in the title:
![]()
Adding New Skill or Item Icons
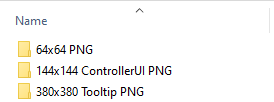
The process is almost identical for adding both skill and item icons. You will need three versions of each icon:
|
Size |
Details |
|---|---|
|
64x64 PNG |
Used on the hotbar. |
|
144x144 PNG |
Should have a transparent background. Used in the ControllerUI menu. |
|
380x380 PNG |
Should have a transparent background and a fade effect. Used in tooltips. |
We recommend organising the above assets under /Data/Public/[modname]/GUI/ in the folder structure pictured below, but it’s not a requirement.
Adding the 64x64 Icon
In the Editor, open the Texture Atlas Editor from the main toolbar.
Open an atlas (or create a new one following the steps above). We will use newAtlas.lsx, created in the section above.
To add a new icon, click on the Add Entries button.
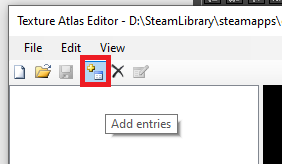
It will open a dialogue box that defaults to the /GUI/ folder inside your /Data/Public/[modname]/ path. Select your desired 64x64 PNG file, and press Open.
If your icon is not added, and you have a message along the lines of
The icon ID "[icon name]" already exists in the atlas "[filepath]" in the Message Log of the Editor, it means that your icon PNG’s filename is identical to an existing one. You’ll need to rename your icons to something that doesn’t already exist in the game.
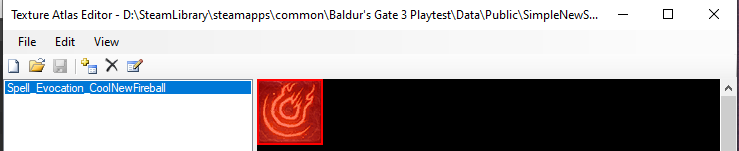
If all’s gone well, you should see your icon appear in the atlas!
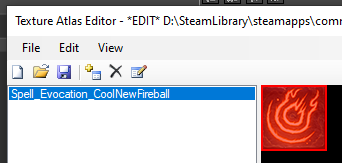
Make sure to Save. This will update the following files:
-
/Data/Public/[modname]/Assets/Textures/Icons/[youratlasname].dds -
/Data/Public/[modname]/GUI/[youratlasname].lsx
Adding the 144x144 ControllerUI Icon
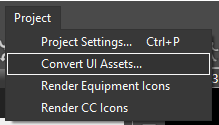
In the Editor, go to Project > Convert UI Assets…
This will open the UI Assets Converter.
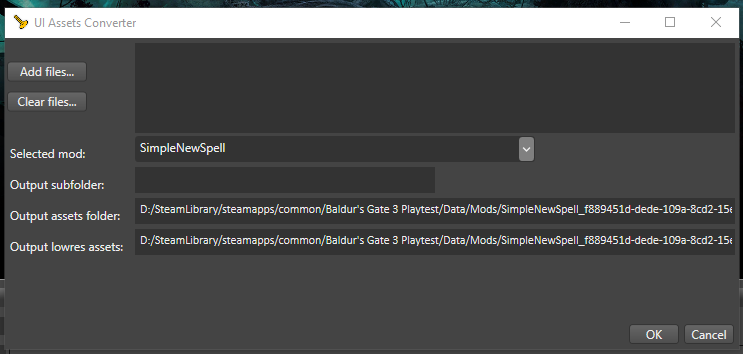
Click on the Add files… button to open a system dialogue. Select the 144x144 PNG file(s) you organised earlier.
Verify that the Selected mod is correctly set to your currently open mod project.
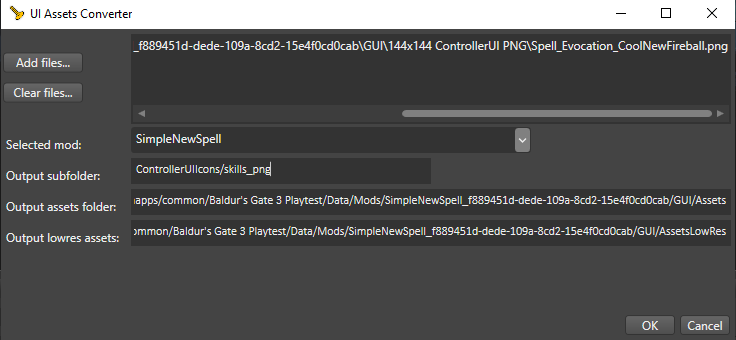
Fill in the Output subfolder according to whether you’re adding a skill or an item icon.
|
Icon Type |
Output Subfolder |
|---|---|
|
Skills |
ControllerUIIcons/skills_png |
|
Items |
ControllerUIIcons/items_png |
Then, click on either of the twin input bars below (Output assets folder or Output lowres assets) to make both bars automatically update to the correct filepath. You can scroll to the end of the filepath to verify that they’ve updated correctly.
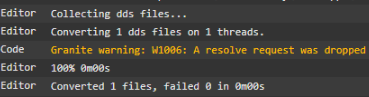
Click OK and wait for the conversion to complete. You should see a success message in the Message Log that looks something like ‘Converted 1 files, failed 0 in 0m00s’.
For skills, the generated 144x144 DDS files are automatically placed into these folders:
-
/Data/Mods/[modname]/GUI/Assets/ControllerUIIcons/skills_png/ -
/Data/Mods/[modname]/GUI/AssetsLowRes/ControllerUIIcons/skills_png/
For items, the generated 144x144 DDS files are automatically placed into these folders:
-
/Data/Mods/[modname]/GUI/Assets/ControllerUIIcons/items_png/ -
/Data/Mods/[modname]/GUI/AssetsLowRes/ControllerUIIcons/items_png/
Adding the 380x380 Tooltip Icon
Once again, open the UI Asset Converter. This time, select the 380x380 PNG file(s).
Fill in the Output subfolder according to whether you’re adding a skill or an item icon.
|
Icon Type |
Output Subfolder |
|---|---|
|
Skills |
Tooltips/Icons |
|
Items |
Tooltips/ItemIcons |
After filling it in, click on either of the twin input bars below (Output assets folder or Output lowres folder) to make both bars automatically update to the correct filepath.
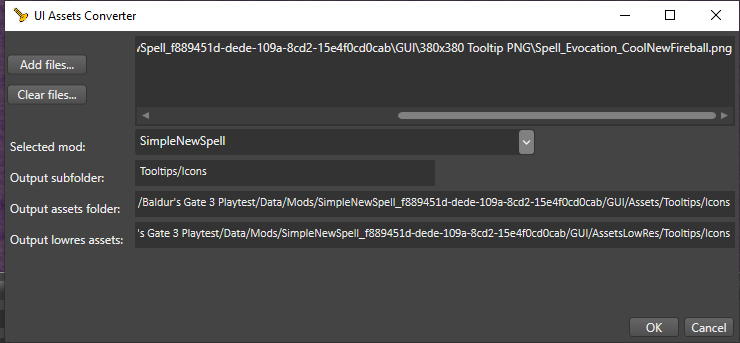
Click OK.
For skills, the generated DDS files are automatically placed into these folders:
-
/Data/Mods/[modname]/GUI/Assets/Tooltips/Icons/ -
/Data/Mods/[modname]/GUI/AssetsLowRes/Tooltips/Icons/
For items, the generated DDS files are automatically placed into these folders:
-
/Data/Mods/[modname]/GUI/Assets/Tooltips/ItemIcons/ -
/Data/Mods/[modname]/GUI/AssetsLowRes/Tooltips/ItemIcons/
Hooking Up the Icons
Your icons are now in atlases and in the correct folders. Now, in order for them to actually appear in-game, you’ll need to make sure your skill or item is correctly referencing those icons.
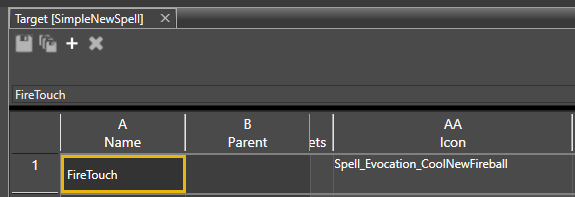
Skills
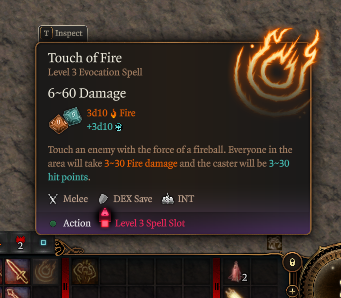
For skills (or 'spells'), icons need to be defined via the Stats Editor. For example, if you followed the Adding a New Spell (Simple) guide, you’d define the icon for the spell in the Target file. The icon name referenced below is identical to the icon’s filename, and also what you would see if you opened the atlas.
Testing in the Game
To quickly test how the icons look on your spell, load into Basic_Level_A. Once the level is loaded, enter Game Mode, then use Ctrl+Shift+F11 to open the console window.
Use the addDebugSpell %name% command to add the spell to the player character. For example, for the FireTouch spell above, we would type addDebugSpell Target_FireTouch.
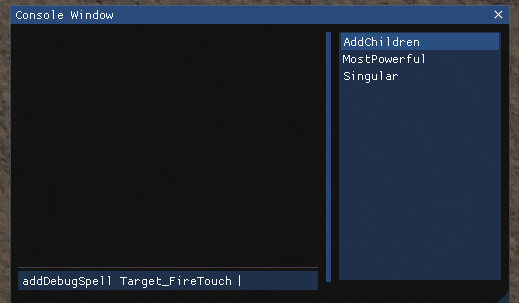
Press Enter, and the spell will appear on the hotbar.
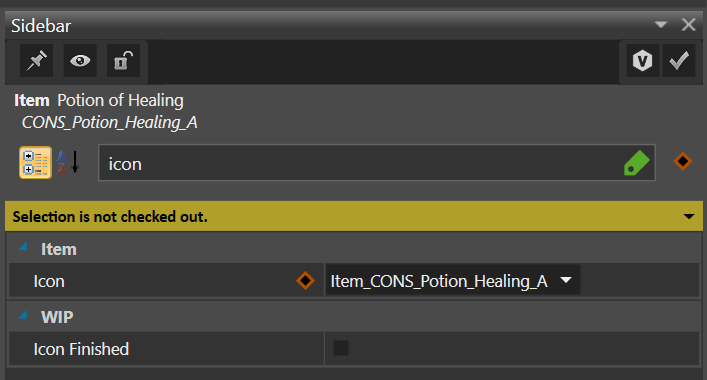
Items
Item icons are instead set on the root template of the item, in the Item > Icon property field of the Root Templates Manager.
Troubleshooting
Icons aren't showing up when testing
If everything appears to have imported correctly when following the above steps, but the icons don’t appear when testing in-game, make sure you have all of your work saved and restart the Editor. This usually fixes the issue.
Discussion 18 comments


Overview on the assets required, how to create a new atlas, and how to add the necessary icons.

mod.io uses essential cookies to make our site work. With your consent, we may also use non-essential cookies to enhance your experience and understand how you interact with our services. The latter will be set only upon approval. or read our Cookies Policy.