"Keep the enemy busy while a fellow Tenno operative raids this ship for supplies. Ready? Trigger the alarms.
Life support has been cut off. They're trying to choke you out. Hold on, I'm sending auxiliary life support."Survival is a mission type where players will have to fight an endless, steady stream of enemies to survive for as long as possible while slowly losing life support, distracting enemies as a Tenno operative secretly gathers supplies behind the scenes.
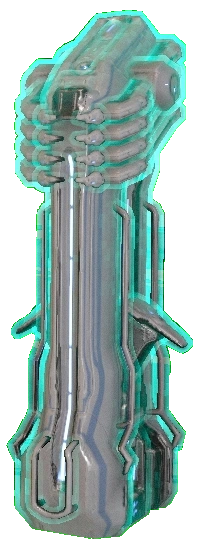
Life Support Tower

Life Support Tower UI Icon
Mechanics[]
At the start of the mission, there is a single terminal. Hacking this terminal will begin the objective, alerting an endless wave of enemies as life support begins to decay from a maximum value of 100% to a minimum value of 0% at a rate of 1% per 1.5 seconds.
Each kill will have a chance to drop personal life support modules that restore 5% of the life support system, up to the maximum value of 100%. These modules may also be obtained from Storage Containers and lockers after the alarm has been triggered.
Immediately upon triggering the alarm and every 90 seconds afterward (with notice given 30 seconds prior), the Lotus will drop off life support capsules that restore 30% life support on activation (up to the maximum value of 100%), spawn a health orb and grant 20 objective affinity to the Tenno that activated the capsule. The amount of life support capsules that can be on the map is capped at 8; another capsule will not be given until one has been opened and the drop delay passed.
After 5 minutes, a mission reward is given to the squad and the extraction point will be enabled and marked on the minimap. The squad can then choose between heading to extraction to complete the mission, or staying on for a longer period of time to receive additional mission rewards every 5 minutes.
Players may choose to extract individually at any time beyond the initial 5 minutes. Any player entering the extraction zone will trigger a countdown timer, at the end of which all players in the extraction zone will be extracted while remaining players continue playing and can extract later any time they choose.
When the life support system reaches 0%, if extraction is not available yet, the mission ends in failure. Otherwise, all squad members' health will start draining for 5 minutes, in a manner similar to a hull breach but at a much faster rate. The health drain will stop at 5 HP – making any damage lethal – and teammates who are killed can be revived normally. No more life support capsules will be dropped, rewards will no longer be given, enemies will stop dropping the life support modules, and all remaining life support modules on the map will become unusable. After this point, the mission can still be completed if at least one player reaches Extraction before the 5 minutes are up. The mission will fail once the timer ends or all players are killed.[1]

Survival diorama from Update 9
During Nightmare Mode or Void Fissure Survival missions, players will receive Nightmare Mode or Void Fissure rewards and the normal Survival mode reward when completing the mission. Note that even though Nightmare Mode and Void Fissure enemies are usually higher level, the Survival mode rewards will be based on the mission's original enemy levels.
During Arbitration survival, normal Survival mode rewards are replaced by Arbitration rewards. In addition, life support capsules grant 25% less life support (multiplicative) in Arbitration Survival missions.
Treasure rooms on Deimos and in the Void are inaccessible. However, on the former unique Derelict Vaults exist, and accessing them will spawn Corrupted enemies.
Kuva Survival[]
The Survival mission Taveuni in the Kuva Fortress has the unique distinction "Kuva Survival". Access to this node requires completion of The War Within.
During the mission, the Lotus notifies players that the Grineer are harvesting ![]() Kuva which can be intercepted if players so choose. When a life support capsule is deployed, an Eximus unit will spawn, which will drop a Kuva Catalyst when killed, which resembles a red-colored power cell from Excavation missions. Bringing this Catalyst near any life support capsule will automatically turn it into a Kuva Harvester, and a 1 minute timer will count down. This tower, which has 4,000 health, can be targeted and must be defended while also keeping life support above 1% until the timer is over, after which all players will receive 200 Kuva.
Kuva which can be intercepted if players so choose. When a life support capsule is deployed, an Eximus unit will spawn, which will drop a Kuva Catalyst when killed, which resembles a red-colored power cell from Excavation missions. Bringing this Catalyst near any life support capsule will automatically turn it into a Kuva Harvester, and a 1 minute timer will count down. This tower, which has 4,000 health, can be targeted and must be defended while also keeping life support above 1% until the timer is over, after which all players will receive 200 Kuva.
- Kuva Towers will only reward 10% to the Life Support when complete, instead of the usual 30%. This means players must be either tactical and only turn some capsules into harvesters, or have Warframes that can quickly kill or farm enemies for life support drops.
- The Eximus unit carrying the Kuva Catalyst can have its corpse looted again with
 Hydroid's
  Pilfering Swarm,
  Khora's Pilfering Strangledome (if caught in the first place before dying), or
  Nekros'
  Desecrate, allowing another Catalyst to drop for converting another tower when it spawns.
 - The 200 Kuva per tower is affected by the Resource Booster, which doubles this amount to 400.
- If the Life Support on the level depletes to 0% before the Kuva harvesting is complete, the tower will vanish along with the Kuva players would have received.
Conjunction Survival[]
The Survival missions Yuvarium and Circulus on Lua have the unique distinction "Conjunction Survival". Access to these nodes requires completion of The War Within.
In this Survival type, a Lone Guardian, a colorless Void Dax will appear, wandering between Life Support Capsules while projecting a 20m radius field that increases Ability Strength by 100% and Casting Speed by 50%. The buff lasts for 5 seconds and begins to count down upon leaving the field. The Lone Guardian will not engage in combat and cannot be attacked.
Once every 5 minutes when a reward rotation completes, Thrax Centurion and Thrax Legatus (Hollow variants on Yuvarium, Eclipse Centurion and Lua Legatus on Circulus and The Steel Path nodes) will spawn, whose presence will cause Life Support to drain 50% faster. The Eclipse and Lua variants will enter a spectral form when they die, and can only be finished off using the Operator's Void Beam. 2 Thrax spawn, increasing by 1 per additional squad member.
If the player owns a Necramech, the Necramech Summon can be used in these missions. However, it possesses a duration of 2 minutes and has a 10 minute cooldown (7 minutes and 30 seconds with Tactical Intrinsic Rank 8) from when the gear item was first used.
Locations[]
| Planet | Mission Name | Faction | Credit Reward | Addtional Credit Reward | Wiki's DropTableAlias | Level | Tileset |
|---|---|---|---|---|---|---|---|
| Venus | V Prime | Corpus | 1,200 | 0 | Survival1 |
3 - 8 | Corpus Ship |
| Mercury | Apollodorus | Infested | 1,500 | 0 | Survival1 |
6 - 11 | Grineer Galleon |
| Venus | Malva (Dark Sector) | Infested | 1,700 | 10,000 | DSSurvival1 |
8 - 18 | Corpus Ship |
| Phobos | Stickney | Corpus | 1,900 | 0 | Survival1 |
10 - 15 | Corpus Ship |
| Mars | Wahiba (Dark Sector) | Infested | 1,900 | 14,000 | DSSurvival2 |
10 - 20 | Corpus Ship |
| Ceres | Draco | Grineer | 2,100 | 0 | Survival2 |
12 - 17 | Grineer Asteroid |
| Jupiter | Elara | Corpus | 2,400 | 0 | Survival2 |
15 - 20 | Corpus Gas City |
| Ceres | Gabii (Dark Sector) | Infested | 2,400 | 20,000 | DSSurvival1 |
15 - 25 | Grineer Galleon |
| Phobos | Zeugma (Dark Sector) | Infested | 2,400 | 16,000 | DSSurvival2 |
15 - 25 | Grineer Asteroid |
| Void | Ani | Corrupted | 2,900 | 0 | VoidSurvival2 |
20 - 25 | Orokin Tower |
| Jupiter | Cameria (Dark Sector) | Infested | 2,900 | 14,000 | DSSurvival2 |
20 - 30 | Corpus Gas City |
| Saturn | Titan | Grineer | 3,000 | 0 | Survival2 |
21 - 26 | Grineer Galleon |
| Venus Proxima | Luckless Expanse | Corpus | 3,100 | 41,250 | VenusProximaSurvival |
22 - 25 | Free Space |
| Uranus | Ophelia | Grineer | 3,300 | 0 | Survival3 |
24 - 29 | Grineer Sealab |
| Lua | Yuvarium | Corrupted | 3,400 | 0 | ConjunctionSurvival1 |
25 - 30 | Orokin Moon |
| Lua | Tycho | Corpus | 3,400 | 0 | Survival3 |
25 - 30 | Orokin Moon |
| Europa | Archaeo-freighter | Corpus | 3,400 | 0 | |
25 - 30 | Corpus Ice Planet |
| Uranus | Assur (Dark Sector) | Infested | 3,400 | 16,000 | DSSurvival3 |
25 - 35 | Grineer Galleon |
| Deimos | Terrorem | Infested | 3,400 | 0 | DerelictSurvival |
25 - 35 | Orokin Derelict |
| Saturn | Piscinas (Dark Sector) | Infested | 3,500 | 14,000 | DSSurvival2 |
26 - 36 | Grineer Asteroid |
| Neptune Proxima | Enkidu Ice Drifts | Corpus | 3,800 | 62,500 | NeptuneProximaSurvival |
29 - 32 | Free Space |
| Pluto | Palus | Corpus | 3,900 | 0 | Survival3 |
30 - 40 | Corpus Ship |
| Sedna | Selkie | Grineer | 3,900 | 0 | Survival3 |
30 - 40 | Grineer Asteroid |
| Neptune | Kelashin (Dark Sector) | Infested | 3,900 | 18,000 | DSSurvival3 |
30 - 40 | Infested Ship |
| Eris | Nimus | Infested | 3,900 | 0 | Survival3 |
30 - 40 | Infested Ship |
| Kuva Fortress | Taveuni | Grineer | 4,100 | 0 | KuvaSurvival3 |
32 - 37 | Grineer Asteroid Fortress |
| Eris | Zabala (Dark Sector) | Infested | 4,400 | 18,000 | DSSurvival4 |
35 - 45 | Infested Ship |
| Sedna | Amarna (Dark Sector) | Infested | 4,400 | 16,000 | DSSurvival3 |
35 - 45 | Grineer Galleon |
| Pluto Proxima | Fenton's Field | Corpus | 4,900 | 100,000 | PlutoProximaSurvival |
40 - 43 | Free Space |
| Void | Mot | Corrupted | 4,900 | 0 | VoidSurvival4 |
40 - 45 | Orokin Tower |
| Veil Proxima | Lu-yan | Corpus | 6,400 | 150,000 | VeilProximaSurvival |
55 - 59 | Free Space |
| Deimos | Persto | The Murmur | 6,400 | 0 | EntratiSurvival |
55 - 60 | Albrecht's Laboratories |
| Lua | Circulus | Corrupted | 8,900 | 0 | ConjunctionSurvival2 |
80 - 100 | Orokin Moon |
Enemies[]
This is a list of possible enemies and their respective "wave" they will start to appear. Note that this is based on the lowest level of each faction, at higher level survival missions enemies may come out sooner but usually in the same order.
Grineer Survival[]
Corpus Survival[]
Infested Survival[]
- Charger, Leaper - 0+ minutes
- ?? - 5+ minutes
- ?? - 9+ minutes
- ?? - 10+ minutes
- ?? - 15+ minutes
- ?? - 19+ minutes
Orokin Survival[]
Eximus Spawn[]
As players advance through the survival, the amount of Eximus spawns will steadily increase from 0% at 5 minutes, to 20% at 60 minutes.
Rewards[]
Besides the bonus amounts of resources, affinity, and mods from the increase in enemies compared to normal missions, certain rewards can be awarded at the end of the mission if the mission is a success. Mission rewards will vary depending on the level of the mission's enemies (the starting level; this tier does not scale during a mission as higher level enemies spawn) and also depends on the amount of time spent.
- Enemy level tier (on average):
- Tier 1: Level 1 - 10
- Tier 2: Level 10 - 20
- Tier 3: Level ≥ 20
- Note: While most missions obey these enemy level tiers, there are a few exceptions, such as Hymeno and Cambria. Refer to the table above for a more accurate list of mission enemy level tiers.
- Time spent Drop Rotation (rewards cycles every 20 minutes: A->A->B->C):
- Rotation A: 5, 10 minutes; 25, 30 minutes; etc.
- Rotation B: 15 minutes; 35 minutes; etc.
- Rotation C: 20 minutes; 40 minutes; etc.
- Conjunction Survival guarantees
 Lua Thrax Plasm per rotation, in addition to the normal rewards:
| A | B | C | |||
|---|---|---|---|---|---|
| 14.29% | 7.69% | 11.28% | |||
| 14.29% | 7.69% | 11.28% | |||
| 14.29% | 7.69% | 11.06% | |||
| 14.29% | 7.69% | 11.06% | |||
| 14.29% | 7.69% | 11.06% | |||
| 14.29% | 7.69% | 11.06% | |||
| 14.29% | 7.69% | 11.06% | |||
| 7.69% | 11.06% | ||||
| 7.69% | 11.06% | ||||
| 7.69% | |||||
| 7.69% | |||||
| 7.69% | |||||
| 7.69% |
| A | B | C | |||
|---|---|---|---|---|---|
| 16.67% | 7.14% | 11.28% | |||
| 16.67% | 7.14% | 11.28% | |||
| 16.67% | 7.14% | 11.06% | |||
| 16.67% | 7.14% | 11.06% | |||
| 16.67% | 7.14% | 11.06% | |||
| 16.67% | 7.14% | 11.06% | |||
| 7.14% | 11.06% | ||||
| 7.14% | 11.06% | ||||
| 7.14% | 11.06% | ||||
| 7.14% | |||||
| 7.14% | |||||
| 7.14% | |||||
| 7.14% | |||||
| 7.14% |
| A | B | C | |||
|---|---|---|---|---|---|
| 25% | 14.29% | 12.5% | |||
| 25% | 14.29% | 12.5% | |||
| 25% | 14.29% | 12.5% | |||
| 25% | 14.29% | 12.5% | |||
| 14.29% | 12.5% | ||||
| 14.29% | 12.5% | ||||
| 14.29% | 12.5% | ||||
| 12.5% |
Dark Sector Survival[]
Survival missions that take place in Dark Sectors always involve the Infested. These Survival missions have a higher level range (and thus, higher difficulty) than the planet they're found on, but give out larger quantities of experience, including the experience bonuses inherent in Dark Sectors. There are currently 10 Dark Sector Survival Missions, one each for every planet except Mercury, Earth, Europa and Pluto.
Notes[]
- Each Life Support Capsule tends to be placed in each section of a map roughly around every 2 minutes and 30 seconds (150 seconds) before another capsule is dropped off by the Lotus. This is after the 5-minute start of the Survival.
- This delay will slowly increase over time, and there is a cap on extra support capsules 'in queue'.
- If there are three separate rooms that can accommodate Life Support Capsules, the first room will no longer be dropped off, instead, the latter two rooms are provided in a cycle.
- If a
 Rhino has
  Iron Skin active, it will not protect the player from losing shields or health while oxygen is at 0%. It will continue to protect against enemy combat damage as normal. As soon as health reaches 5, Iron Skin will vanish and leave the player vulnerable. Reapplying it will make it vanish instantly.
 - The time it takes to activate life support is around 3 seconds, which is long enough for pursuing enemies to kill you if you are not careful.
- The maximum amount of capsules that can be on the map is capped at 8. The Lotus will not deliver another one until one has been opened, at which the drop timer starts.
- Life Support decreases at 1% every 1.5 seconds. That means 100% is enough for 2 minutes and 30 seconds of Life Support.
- Prior to Update 10.3 (2013-10-09), Lotus would warn you at 20% that you have 60 seconds of life support remaining when you actually had 30 seconds. She also warned that you had 30 seconds remaining at 10%, which was actually 15 seconds.
- At Update 10.6 (2013-10-30), Lotus will only warn players at 20% of life support, referring to 30 seconds. The warning at 40% was removed. If extraction is ready, Lotus will also suggest extraction.
- Despite claims that sprinting hastens the rate that Life Support decreases, DE has confirmed that there is no correlation.
- The Excavation mission type is slated to replace Survival missions taking place on planetside tiles, which include the Grineer Forest, Grineer Settlement, Grineer Shipyard, Corpus Outpost, and Corpus Ice Planet tiles.
- The "objective has been reached" flag is set at the 3:30 mark preventing new players from joining the session too close to the 5-minute reward mark.
- If the player sits idle and does not start the mission timer, it will eventually start itself after 5 minutes
- Many non-standard variants of Survival remove standard reward rotations and task the squad with surviving for a set time rather than for as long as they can. Non-endless extraction rules (timer starts with at least half the squad at extraction and all players extract simultaneously) apply to these variants.
- In the Kuva Fortress one Life Support Capsule spawn is located right next to a Shrapnel Mine. If the mine is activated and not destroyed in time while the capsule is converted into a Siphon, it will be destroyed through the damage over time effect left on the ground near the mine.
Tips[]
- In a squad, stick with the group at all times and avoid spreading out too much, preferably hanging around the Life Support Capsules, to ensure enemies are heavily clustered and minimize stragglers.
- Enemies spawn at points where players can't see, and in rooms next to where players are. Larger tiles will have more spawning points than smaller tiles. Splitting up will disable the nearest spawning points and cause the enemies to spawn in spread out locations.
- A player that trips the Inactivity Penalty will cause all enemies to swarm that player.
- It is helpful to bring a Companion with Vacuum/ Fetch to quickly gather Life Support Modules. However, the Companion may also pick up Life Support Modules too early, especially early on in the mission or if players get a lot of kills at close range.
- If a Life Support Capsule is activated when Life Support is at 0% but before oxygen drains, the squad will receive 2% life support to consume the capsule.
- Life Support Capsules that are about to spawn in have a light-blue waypoint and appearance.
- Once a Life Support Capsule has been activated, the second capsule in the same location will have shorter activation time. Further capsules do not continue to shorten the activation time.
- To maximize the use of Life Support Capsules, only activate them when Life Support is at least 40% or below. This will leave room for Life Support Pickups and also for player mistakes such as activating 2 Life Supports at the same time (40+30+30=100%).
Trivia[]
- This game mode was introduced early via the Survival Weekend Event.
- Survival replaced Raid missions in Update 10.0 (2013-09-13).
- Update 10.3 (2013-10-09) changed several mechanics regarding level generation and reward tables;
- The level was completely unlocked before activating the alarm, allowing players to sprint through the entire map to collect materials without running into enemies. This has since been fixed and the starting area's doors will all be locked until activated by the alarm.
- Survival rewards were dependent on faction type and the time spent. The update changed it so rewards are now dependent on the enemy level and the time spent. It also changed rewards so they stacked; players now take all rewards earned up to the point they leave, instead of the last reward.
- Before Update 10.3 (2013-10-09), you could fail the alarm cipher and it would still go off. Doing so will count towards failed ciphers in player stats.
- Before Update 10.3 (2013-10-09), repeated life capsules would tend to take longer to activate, and kept increasing if the players wished to stay in that location for longer periods of time.
- On Update 10.6 (2013-10-30) (Halloween), Life Support Capsules and Drops were changed into Jack-o'-Lanterns.
- Survival officially replaced Raid in Update 10.0 (2013-09-13). All Raid Void Keys were converted to Survival Void Keys, and T3 Survival keys were introduced.
- This mission type is essentially Raid viewed from a different perspective. Players must distract enemies while an unseen and unnamed Tenno secures Raid-like objectives elsewhere on the map. The mission rewards similar to the old Raid mission rewards, and will also appear at the beginning of the squad's reward display.
- Players that die can also drop Life Support.
- During TennoCon 2019, [DE]Scott suggested the "lone Tenno operative" was another Tenno player in other missions.
Bugs[]
- If a player has reactivated the alarm after running out of oxygen, the player will still have 5 Health and 0 Shields, but new oxygen pickups can appear and the Lotus will continue to spawn Life Support capsules, even though they cannot be picked up or used.
- If a host migration is made and a player died and self-revived, there is a chance that the player will lose everything from before the migration took place.
- When there is more than 1 capsule in queue, with another ready to be placed in the queue, activating the capsule in a room which can occupy 2 capsules, a capsule will be delivered nearby in the same room 'instantly' without Lotus notifying you.
Media[]


References[]
Patch History[]
Update 35.5 (2024-03-27)
- Fixed case where Survival mission would not start properly if the starting transmission was interrupted by opening the pause menu.
- Fixed the Lone Guardian being affected by Volt’s Speed in Conjunction Survival missions.
Hotfix 35.0.7 (2024-01-09)
- Fixed individual Focus School Eidolon Lens Blueprints being rewarded in Rotation C of the Survival, Persto mission instead of the intended Eidolon Lens Blueprint.
- Each individual Lens Blueprint had a drop rate of 10% for each type, so we have adjusted the drop tables to compensate for this change by increasing the drop rate for the Eidolon Lens Blueprint and the Mandonel Barrel and Receiver. More details in the public drop tables.
Update 35.0 (2023-12-13)
- DEIMOS EXPANSION: NEW NODES & MISSION TYPES
Completing the Whispers in the Walls Quest unveils five new nodes on Deimos to continue your excursions throughout Albrecht’s Laboratories. One of these new nodes feature a brand new mission type called Alchemy and four feature existing mission types (Assassination, Mirror Defense, Survival, and Exterminate) with an Entrati twist. All of these nodes are also available on The Steel Path!
- SURVIVAL (ENDLESS)
The Murmur is not backing down, so it’s time to whittle down their numbers.
How To Access:
Select the Persto node (default and Steel Path) on Deimos from the Star Chart or from the Laboratory Navigation in the Sanctum Anatomica.
How To Play:
Your classic Survival mission! Head into Albrecht’s Laboratories and see how long you can hold out against the Murmur and the Rogue Necramechs waiting within.
Rewards
Notable rewards for completing a round of Survival include:
Update 33.5 (2023-06-21)
- Fixed the Lone Guardian in Conjunction Survival missions not being activated by the player if they are in a Necramech.
Hotfix 32.3.6 (2023-03-15)
- Fixed players not extracting along with their other squadmates after Life Support reaches 0% in Survival missions.
- This fix maintains the change that was made to Survival mission extraction in Hotfix 32.2.9.
Update 32.3 (2023-02-15)
- Changed some mission types to display information related to your mission success in the end of mission screen. This change applies to the following mission types:
- Survival
- Previously a small icon would display the amount of time survived for these missions. This icon wasn’t always clear in terms of what it indicated, and it appeared in rewards despite not being one. Adding this information to the top of the end of mission screen should make this more clear.
- Survival
- Fixed a Life Support Tower floating in the Yuvarium Conjunction Survival mission.
- Fixed a map hole by a pillar in the Tycho, Lua Survival node.
- Fixed several map holes found in Conjunction Survival missions on Lua.
- Fixed Necramech getting stuck on terrain if spawned against a specific wall in Conjunction Survival missions.
- Fixed Lone Guardian in Conjunction Survival nodes getting stuck on terrain while walking to Life Support Tower.
- Fixed enemies getting stuck under a staircase in the Tycho, Lua Survival node.
- Fixed Clients not receiving Relic reward in a Void Storm Survival mission if they play through the entire wave (5 minutes) as Operator.
Hotfix 32.2.9 (2023-01-11)
- Changed extraction in Survival missions so that when Life Support is depleted and a player is at extraction a 1 minute countdown begins to extract all active players in the mission.
- This is to prevent players getting left behind in an undesirable mission state after the Host leaves the mission and migrates.
Hotfix 32.2.6 (2022-12-14)
- Fixed the “Thrax enemies draining life support” message getting stuck on the screen even after they’ve been defeated in Conjunction Survival missions.
Hotfix 32.2.5 (2022-12-14)
- Conjunction Survival Changes & Fixes:
- Fixed Lua Thrax and Sentient enemies not scaling in Conjunction Survival missions.
- Fixed transmission issues in Conjunction Survival missions.
Hotfix 32.2.4 (2022-12-07)
- Conjunction Survival Changes & Fixes:
- Fixed the Hollow Thrax Centurions not properly spawning in the Circulus (base + Steel Path) and Steel Path Yuvarium nodes.
- Fixed a case where Lua Thrax Plasm drops were not dropping at 100% with a Resource Booster active on the Steel Path Conjunction Survival nodes.
- Fixed Host hearing the sound FX when Clients enter the Lone Guardian’s buff area.
- Fixed being unable to chat link Lua Thrax Plasm.
- Fixed script error in Conjunction Survival missions.
Hotfix 32.2.3 (2022-12-01)
- Conjunction Survival Fix:
- Fixed the Necramech cooldown timer in Conjunction Survival being shorter than intended if destroyed by enemies instead of timing out.
Hotfix 32.2.2 (2022-12-01)
- Conjunction Survival Changes & Fixes:
- Fixed Steel Path Conjunction Survival Nodes (Yuvarium & Circulus) not rewarding the bonus Lua Thrax Plasm as intended (compared to their non-Steel Path numbers). Rotation Rewards for these Steel Path are back to what they were intended to be:
- 5 Lua Thrax Plasm on Steel Path Yuvarium
- 6 Lua Thrax Plasm on Steel Path Circulus
- Fixed Clients not seeing the glow in the wolf busts eyes when a certain Warframe is near them in the new Circulus tile.
- Fixed Lua Thrax enemies spawning in the Endurance Drift test and getting stuck in the room.
- They will now no longer spawn in these areas.
- Fixed Clients hearing the sound FX when the Host crosses into the Lone Guardian’s buff radius.
- Fixes towards Lua Thrax enemies not spawning if they can’t find a valid spot within 10m of a player.
Hotfix 32.2.1 (2022-11-30)
- Conjunction Survival Changes & Fixes:
- Removed a tile from the Orokin Moon tileset as it was not playing nice with color blind options and the black and white filter from the Lone Guardian (panels not lighting up for example).
- Fixed Nekros’ Lua Thrax Shadows of the Dead applying their Life Support drain in Conjunction Survival missions.
- Also fixed the enemy waypoint still appearing above their heads.
- Fixed Lua Thrax enemies losing their waypoint if they get ragdolled.
- Fixed the Lua Thrax enemies’ spawn sound FX stacking.
- Fixed the Lone Guardian in Conjunction Survivals getting stuck in certain areas of the Orokin Moon (Lua) tileset.
- Fixes cases where enemies could fall through and die when crossing a certain bridge in the Conjunction Survival missions.
Update 32.2 (2022-11-30)
- NEW LUA NODES: CONJUNCTION SURVIVAL
Lua rumbles. The Void exposes old scars and revives forgotten secrets. Smelling possible treasure, the Grineer have descended upon these newly exposed halls, only to be instantly Corrupted by its long-dormant Orokin Neural Sentry.
Conjunction Survival Requirement: The War Within Quest complete.
Optional But Recommended: Equip Necramech Summon to Gear Wheel.
What to Expect:
Lua has expanded with the newest inclusion of the Yuvarium (enemy level 25-30) and Circulus (enemy level 80-100) nodes featuring a new Survival mission variant called Conjunction Survival.
The fundamentals of a Conjunction Survival mission are the same as other Survival missions: maintain Life Support by triggering Life Support Towers and procuring Life Support Capsules dropped by slain enemies. However, additional gameplay mechanics add a new layer of difficulty and variety, fit only for the ancient halls of Lua stirred by the Void.
Upon triggering the alarms, a Lone Guardian begins to make their way to the Life Support Towers throughout Lua. They are at the center of an area null of all colors that follows their every move. Entering the area grants players 100% Ability Strength and a 50% Casting Speed buff for 5 seconds (as long as you remain in the bubble, the duration refreshes).
A new tile within both Yuvarium and Circulus can be found for Tenno that seek it out. Those who have heard the tale of Voruna from her Leverian may feel a familiar presence here.
Rotation Rewards
- New Resource: Lua Thrax Plasm (see below for more info)
- Voruna Blueprints
- Sarofang Blueprint, Blade, and Handle
- Perigale Blueprint, Barrel, Receiver, and Stock
- New Arcanes: *Stats shown at Rank 5.
- Arcane Rise (Warframe) - On Reload: 60% chance for +150% Damage to Primary Weapons for 24s.
- Arcane Blessing (Warframe) - On Health Pickup: +24 Health. Stacks up to 50x.
- Primary Frostbite (Primary) - On Cold Status Effect: Increase +3% Critical Damage and +2.25% Multishot for 12s. Stacks up to 40x.
- Conjunction Voltage (Secondary) - On Electricity Status Effect: Increase +1.5% Reload Speed and +3% Multishot for 12s. Stacks up to 40x.
Visit the official public drop tables for more information.
New Thrax Variants
These enemies spawn in these nodes and increase the depletion of Life Support by 50% of the regular rate while they are alive. Defeat all Thrax threats to remove this added pressure on Life Support! Two Thrax enemies spawn by default, but they are also affected by the number of players in the squad (+1 spawn for each squadmate).
Hollow Thrax Centurion: Armed with a Hespar, these lesser Thrax manifestations are unable to take incorporeal form, but remain deadly opponents.
Hollow Thrax Legatus: Armed with an Aeolak, these lesser Thrax manifestations are unable to take incorporeal form, but remain deadly opponents.
Lua Thrax Legatus: Armed with an Aeolak, the origin of these ghostly interlopers is a mystery, but the Void Conjunction is surely at its root. The Lua Thrax Legatus spawns on the base Circulus and Steel Path Yuvarium nodes for an added layer of difficulty.
This is where your Necramech comes in handy! Summon your Necramech to remove the Thrax threat, or continue to take them head-on. In Conjunction Survival, Necramechs have a 2 minute lifespan while active and a 10 minute cooldown on redeployment. Use at your own discretion!
'Corrupted Drahk Masters and their bloodthirsty Corrupted Drahks are also on the hunt in these nodes.
New Resource: Lua Thrax Plasm
A unique variant of Thrax Plasm harvested during Void Conjunctions on Lua (guaranteed Lua Thrax Plasm rotation reward on both Yuvarium and Circulus nodes) and 30% chance for 1x to drop from new Thrax variants.
Rotation Rewards are as follows: 3 Lua Thrax Plasm on Yuvarium 5 Lua Thrax Plasm on Circulus 5 Lua Thrax Plasm on Steel Path Yuvarium
6 Lua Thrax Plasm on Steel Path Circulus
