Unused Mod Capacity increases the Warframe's Energy at the start of missions.
> Start missions with |AMOUNT| Energy
> Energy recovers at |AMOUNT| per secondEnergy of a Warframe is a resource used mainly to cast abilities. Warframes have 4 abilities that at base, cost up to 100 energy to cast. Almost every Warframe has their own energy-pool with varying capacities depending on the types and costs of their various abilities, with the exceptions of ![]() Hildryn, who has no energy but uses shields, and
Hildryn, who has no energy but uses shields, and ![]() Lavos, having no energy but instead using a cooldown system.
Lavos, having no energy but instead using a cooldown system.
Like health and shields, a Warframe's energy capacity scales with their rank and through the use of mods or buffs. It is also worth noting that the words "power" and "energy" are often used interchangeably by members of the community.
Increasing Energy Capacity[]
Mods[]
These are the only mods currently in the game that increase energy capacity. It is worth noting that ![]() Flow,
Flow, ![]() Primed Flow, and
Primed Flow, and ![]() Archon Flow cannot be used together.
Archon Flow cannot be used together. ![]() Auxiliary Power only works on Archwings, and
Auxiliary Power only works on Archwings, and ![]() Adrenaline Boost in Conclave.
Adrenaline Boost in Conclave.
Formula For Modded Energy Capacity[]
These mods increase the energy capacity of a Warframe with the following the formula:

So taking ![]() Volt Prime as an example, with 200 base energy and 300 max energy he will have:
Volt Prime as an example, with 200 base energy and 300 max energy he will have:
- With
 Flow:
Flow: - With Primed Flow:
- With Primed Flow and Endurance Drift:


Buffs[]
The only buff currently available to increase energy capacity is Cephalon Suda's Entropy effect. Entropy will release a 25-meter AoE radial attack around the player, dealing 1000 ![]() Magnetic damage and applying the Magnetic Status Effect to enemies in range, increasing damage dealt to their shields. It will also restore 25% of the player's base Energy, and provide a (base) Energy boost of +25% for 30 seconds.
Magnetic damage and applying the Magnetic Status Effect to enemies in range, increasing damage dealt to their shields. It will also restore 25% of the player's base Energy, and provide a (base) Energy boost of +25% for 30 seconds.
Arcane Helmets[]
These Arcane Helmets are retired helmets that in the past used to grant increased energy capacity to their respective Warframes.
Azure Archon Shard[]


The Azure Archon Shard is a guaranteed reward from defeating Archon Boreal that can provide a flat increase to Energy Capacity after all bonuses are taken into account. Regular Shards provide 50 additional Energy Max, while Tauforged Shards provide 75.
Archon Shards can only be obtained through Archon Hunts, which are unlocked after completing Veilbreaker, or through activities in Albrecht's Laboratories like Netracells, which are unlocked after completing Whispers in the Walls, and Deep Archimedea, after obtaining Rank 5 for the Cavia Syndicate
Starting Energy[]
Starting Energy refers to how much energy a Warframe starts a mission with, when reviving from Death, or going through a Sanctuary Onslaught conduit.
Formula[]
Starting Energy can be increased with unspent mod capacity.
The formula followed is:

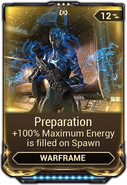
When ![]() Preparation is equipped, the formula becomes:
Preparation is equipped, the formula becomes:

Mods[]
Effective Energy Capacity[]
Casting Effective Capacity[]
Similarly to how one can define the concept of "Effective Health" by weighting the number of hit-points with the corresponding damage reduction, one can also define the concept of casting effective energy capacity by weighting the energy capacity using the Ability Efficiency factor:

Since casting cost can not be reduce under 25% of the base cost, the highest possible upper-bound for the effective energy capacity is:

Toggle Effective Capacity[]
Since the efficiency of toggle abilities depends also on the duration, in that case the formula becomes:

For the case where no energy is recovered and a constant rate of energy is drained, one can also consider the effective toggle duration as follows:


Due to the definition of the terms, there are many ways in-which the formula for effective toggle duration can be expressed.
Apart from toggle duration, this can be used to work out the effective duration granted per energy pick up.
Examples[]
Suppose a ![]() Prowling
Prowling ![]() Ivara has a modded drain of 0.25 energy/sec. An orb of 50 energy would provide:
Ivara has a modded drain of 0.25 energy/sec. An orb of 50 energy would provide:

Considering the same Ivara with full energy pool of 744 capacity, she can remain in prowl for:

Restoring Energy[]
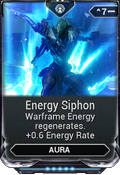
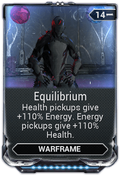
Energy does not naturally regenerate over time unless the ![]() Energy Siphon aura mod is equipped by at least one member of the squad. Otherwise, energy must be restored either by picking up Energy Orbs (and Health Orbs with
Energy Siphon aura mod is equipped by at least one member of the squad. Otherwise, energy must be restored either by picking up Energy Orbs (and Health Orbs with ![]() Equilibrium) or by a few other means.
Equilibrium) or by a few other means. ![]() Trinity and
Trinity and ![]() Harrow are the two Warframes with an inherent ability to explicitly restore energy to all Warframes within the squad, and
Harrow are the two Warframes with an inherent ability to explicitly restore energy to all Warframes within the squad, and ![]() Nekros can
Nekros can ![]() Desecrate nearby corpses for a chance to drop more Energy Orbs.
Desecrate nearby corpses for a chance to drop more Energy Orbs. ![]() Limbo has, and grants, access to the Rift Plane, a dimension in which Warframes regenerate energy over time consistently. The
Limbo has, and grants, access to the Rift Plane, a dimension in which Warframes regenerate energy over time consistently. The ![]() Zenurik Focus tree grants the
Zenurik Focus tree grants the ![]() Energy Pulse and
Energy Pulse and ![]() Wellspring abilities; the former being a passive that restores additional energy over-time when picking up Energy Orbs, and the latter being an active ability that creates a dome that restores energy over-time to all Warframes that walk through it.
Wellspring abilities; the former being a passive that restores additional energy over-time when picking up Energy Orbs, and the latter being an active ability that creates a dome that restores energy over-time to all Warframes that walk through it.
Two other mods can allow for what can be significant energy restoration by converting a portion of the damage received by enemy attacks on a Warframe's Health into energy: ![]() Hunter Adrenaline and
Hunter Adrenaline and ![]() Rage. However, these are obviously very risky for many frames and are only suitable for those that are rather "health-tough" with strong base Health, Armor and self-healing; frames that typically rely on constant Stealth or a Shield-Gating defense will not be able to benefit much from these mods.
Rage. However, these are obviously very risky for many frames and are only suitable for those that are rather "health-tough" with strong base Health, Armor and self-healing; frames that typically rely on constant Stealth or a Shield-Gating defense will not be able to benefit much from these mods.
Besides the Entropy effect from ![]() Cephalon Suda, the Blight effect from Red Veil also restores 25% of the player's base energy, and provides a base movement speed boost of +10% for 30 seconds. Squad Energy Restores are consumables that can grant energy to nearby teammates in varying amounts, up to 400 total. When using a Prime Warframe, moving close to a Death Orb will cause it to release a radial wave that restores 250 energy to all nearby Warframes within a small radius, this effect can only occur once per orb.
Cephalon Suda, the Blight effect from Red Veil also restores 25% of the player's base energy, and provides a base movement speed boost of +10% for 30 seconds. Squad Energy Restores are consumables that can grant energy to nearby teammates in varying amounts, up to 400 total. When using a Prime Warframe, moving close to a Death Orb will cause it to release a radial wave that restores 250 energy to all nearby Warframes within a small radius, this effect can only occur once per orb.
It is important to note that on most occasions, toggled abilities disable energy generation from team abilities, consumables, or passive regeneration methods. Some exceptions to this are ![]() Chroma (
Chroma (![]() Spectral Scream and
Spectral Scream and ![]() Effigy) and partially
Effigy) and partially ![]() Equinox (
Equinox (![]() Pacify & Provoke and
Pacify & Provoke and ![]() Mend & Maim).
Mend & Maim).
***Casting any abilities will temporary stop any passive energy regeneration methods from working, due to the the "drain" needs to be accounted for, it is suspected that this draining is coded to be treated like any toggled/channeled abilities. Frames that casts frequently will benefit from passive energy regeneration far lesser than those who casts lesser due to this mechanic.
Abilities[]
Equinox's Passive
When ![]() Equinox collects Health Orbs or Energy Orbs, 10% of the restored amount is converted into additional Energy and Health respectively.
Equinox collects Health Orbs or Energy Orbs, 10% of the restored amount is converted into additional Energy and Health respectively.
- This effect stacks with Equilibrium for up to 120% conversion.
Info
- Garuda slashes herself with her talons as she spins into the air, sacrificing up to 50% of her maximum Health to cleanse all status effects and restore up to
 18% / 22% / 30% / 40% of her maximum Energy capacity. Garuda cannot reduce her health below 2 health points using Bloodletting.
- Health cost is 50% of Garuda's maximum HP, including mods.
- Energy gain is the listed % of her maximum energy, including mods, Helminth invigorations and slotted
 Azure Archon Shards.
 - Energy gain follows the formula:
- Total Energy Gain = Base Energy Gain ÷ (2 - Ability Efficiency).
- Bloodletting can be cast if Garuda has less than 50% of her maximum HP remaining, but will only restore energy proportionate to the amount of HP sacrificed. For example, if she has 25% of her health left (or 50% of 50%) when Bloodletting, the energy gain will be halved.
- Cannot be cast if Garuda has 2 or less health points.
- This ability does not trigger health damage into energy conversion mods like Rage or Hunter Adrenaline.
Augment
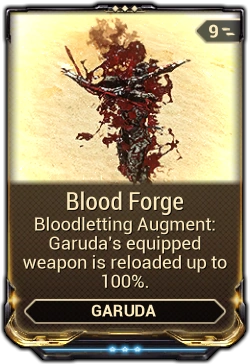
- Main article: Blood Forge
Blood Forge is a Warframe Augment Mod for ![]() Garuda's
Garuda's ![]() Bloodletting to reload her equipped weapon up to a percentage.
Bloodletting to reload her equipped weapon up to a percentage.
Tips & Tricks
- This ability gains no benefits from increasing health. Having lower max health allows flat HP regeneration such as health orbs or
 Oberon's
  Renewal to generate more energy more quickly.
 - Synergizes with
 Blood Altar's continuous healing to give Garuda a near infinite supply of energy.
 - Despite sacrificing HP, Bloodletting is an effective way of shedding off any harmful status effects (especially slowing effects and DoT procs from
 Slash and
  Toxin damage), possibly improving her survivability better than not removing the procs.
 - Bloodletting is a powerful ability to combine with Helminth-infused toggled abilities that constantly drain energy, the most notable being
 Sevagoth's
  Gloom as it provides Garuda with another self-healing ability besides Blood Altar to constantly regenerate her energy reserves.
- The Gloom and Bloodletting combo makes Garuda viable at completing Steel Path missions alone, including missions not normally frequented by players such as the Rathuum nodes and the Zealoid Prelate battle in Deimos.
 Seeking Talons also synergize extremely well with this build as the damage-over-time of her quills also triggers Gloom healing and, subsequently, powers Bloodletting. The quills' homing ability also offers little chance for enemies to escape and can even track and hit hiding enemies, ensuring Garuda can be healed by Gloom as long as they stay within the aura.
 Molt Reconstruct can work as a stand-in for Gloom's regeneration by allowing any energy spent to heal a large portion of Garuda's health. Often healing her to full in a single cast.
- Bloodletting itself will not restore health however, as it does not expend any Energy.
- Equipping Blood Forge and using Bloodletting allows Garuda to quickly reload otherwise slow-reloading weapons (such as the
 Strun,
  Nagantaka,
  Tenet Envoy and
  Kuva Zarr) and increase their overall DPS potential. It comes at the risk of getting struck while already losing her Health to reload, thus she should consider safeguards such as a nearby Blood Altar or equipping Quick Thinking and/or Gladiator Finesse, the mods accounting for her replenished Energy while using Bloodletting.
- Slotting Azure Archon Shards for extra Energy while also equipping Quick Thinking will make Garuda deceptively durable due to the resulting increased efficiency of regaining Energy via Bloodletting.
- Slotting Azure Archon Shards for extra Armor instead of extra Energy grants Garuda more effective hitpoints since Quick Thinking benefits from Armor.
- Slotting
- If a Garuda player wishes to take advantage of the reworked passive to further amplify damage output, Helminth can replace Bloodletting with another damage-related self buff ability, such as
 Xaku's
  Xata's Whisper or
  Mirage's
  Eclipse, as these abilities synergize well with the damage buff and Garuda's own Seeking Talons, while still maintaining self-survival options with
  Dread Mirror and Blood Altar.
- In exchange for losing this ability to generate Energy, Garuda can equip Rage or Hunter Adrenaline so she gains Energy while taking damage - which will be offset by a nearby Blood Altar.
- In exchange for losing this ability to generate Energy, Garuda can equip

|
 2 |
Kinetic Plating Generate armor plating that converts a portion of absorbed Kinetic Damage (Physical, Introduced in Update 25.7 (2019-08-29) |
|
|
Misc: 0.1% (battery drain per hit)1% (battery drain per second)0.25% (battery charge per melee attack)2 / 3 / 4 / 5 % (energy restore per hit)50% (damage reduction cap at empty battery)100% (damage reduction cap at full battery)
100% ( 100% (base melee damage bonus and stagger chance from Redline) |
Info
- Gauss expends 50 energy to shield himself in a barrier of kinetic energy with one swift motion, protecting himself against incoming
 Impact,
  Puncture, Slash,
  Cold,
Cold,  Heat, and
  Blast damage types, while also becoming immune to Heat, Cold, Blast,
  Stagger, and
  Knockdown statuses for
  15 / 20 / 25 / 30 seconds. While active, Kinetic Plating drains 1% battery power per second and
 battery power per hit received, to reduce affected damage by a minimum of
 14% / 16% / 18% / 20% at empty battery, up to a maximum of 70% / 80% / 90% / 100% at full battery. 2% / 3% / 4% / 5% of incoming damage is converted into extra Energy for Gauss. Melee attacks while Kinetic Plating is active will restore 0.25% battery. Kinetic Plating deactivates on duration end or by manually pressing the ability key again (default 2 ).
- Maximum damage reduction cannot exceed 100%. Minimum damage reduction cannot exceed 50%.
- Damage reduction is calculated as:
Min Damage Reduction + (Max Damage Reduction - Min Damage Reduction) × Current Battery Level - For example, with Kinetic Plating at rank 3, 100% Ability Strength, and battery level at 80%, the damage reduction will be: 20% + (100% - 20%) × 80% = 84%
- Damage reduction is calculated as:
- Battery drain per second, battery drain per hit, energy restore per hit, and battery charge per melee attack are not affected by Mods.
- Both damage reduction and energy restoration still function even when the battery is empty.
- Energy restoration is calculated before all damage mitigation.
- Maximum damage reduction cannot exceed 100%. Minimum damage reduction cannot exceed 50%.
- Ability Synergy:
- While Kinetic Plating is active, it adds 100% Slash damage to
 Mach Rush's shockwave, and makes it inflict a Slash proc on enemies caught in the explosion radius.
 - While the battery level is boosted during
 Redline, Kinetic Plating also grants Gauss a 100% base melee damage bonus and 100% chance to stagger enemies on hit.
- While Kinetic Plating is active, it adds 100%
Tips & Tricks
- Kinetic Plating stacks and synergizes well with Adaptation.
- Kinetic Plating provides initial protection while Adaptation builds up damage resistance from 0% to 90%.
- Though Kinetic Plating's damage resistance can reach 100% at full battery, it cannot cover all damage types, making it possible to get instantly killed by high level toxin damage.
- Adaptation's damage reduction can alleviate this downside.
- Kinetic Plating stacks with Hunter Adrenaline and, when combined, can quickly restore energy while under heavy fire.
- Kinetic Plating synergizes well with Quick Thinking as it reduces energy drain upon fatal hit, and also compensates with its energy restoration.
- Kinetic Plating does not require high Ability Strength to be viable as its damage reduction is primarily scaled with battery level.
- Damage reduction will be 84% with 100% Ability Strength at 80% battery level.
- This can be scaled up to 90%, which requires 250% Ability Strength.
- However, at full battery, damage reduction will reach 100% if Ability Strength is 100% or more.

|
 3 |
Cathode Grace Gain a brief burst of increased Critical Chance and Energy Regen, with each kill extending duration of Cathode Grace. Casting is on a cooldown. Introduced in Update 31.5 (2022-04-27) |
x 25 / 30 / 40 / 50 % (weapon crit chance)+ 25 / 30 / 40 / 50 % (ability crit chance)
1 / 1.15 / 1.3 / 1.5 EP/s (energy regen) |
3 s (extra time per kill) | |||
|
Misc: 60 s (casting cooldown and max duration cap) |
Info
- Gyre expends 75 energy as she surges a potent electric current through herself as Gyral Blocks envelop her forearms. Cathode Grace grants Gyre a 25% / 30% / 40% / 50% Critical Chance bonus to her weapons and abilities, as she constantly recharges 1 / 1.15 / 1.3 / 1.5 Energy points per second, lasting for an initial duration of 8 seconds. For each enemy killed directly by Gyre, or killed by any source while affected by a Status Effect inflicted by Gyre, Cathode Grace's remaining duration is extended by 3 seconds, up to a maximum duration capped at 60 seconds. In addition to the energy cost requirement, casting the ability triggers a 60 seconds cooldown before the next activation is allowed.
- Casting Cathode Grace is a full-body animation that interrupts Gyre's grounded movement and other actions.
- Cannot be recast while active or on cooldown.
- Critical Chance bonus for weapons is additive to the bonus from mods such as Point Strike, Pistol Gambit, and True Steel.
- Critical Chance bonus for Gyre's abilities is a percentage point increase.
- Bonus is additive to Gyre's passive.
- Casting an ability will stop the energy regeneration for 1 second.
- Cathode Grace's remaining duration is shown on the ability icon. Once duration elapses, the remaining cooldown timer replaces the duration timer on the ability icon.
- The ability's cooldown starts immediately when Cathode Grace's duration timer begins to count down.
- Audible cues play when Cathode Grace's duration ends, and when its cooldown is complete.
- Kills made while manning a Railjack turret, be it with direct fire or abilities such as Shatter Burst, also extend Cathode Grace duration.
- When the ability is cancelled (falling out of bounds) it takes the highest duration it gained from kills/assists and subtracts it from the Cooldown. Example: You reached 59 seconds on the ability icon and later on you fall out of bounds with 20 seconds on
 Cathode Grace's timer, Cathode Grace subtracts 59 seconds from the cooldown instead of the 20 seconds and your Cathode Grace will have no cooldown.
- Ability Synergy:
- Gyre's passive and Cathode Grace enable ability critical hits by granting 0% to 300% critical chance to damage and status effects dealt by
 Arcsphere,
  Coil Horizon, and
  Rotorswell.
 - Direct kills by Gyre's abilities, their
 Electricity status effects, and kill assists from allies extend Cathode Grace's duration.
- Gyre's passive and Cathode Grace enable ability critical hits by granting 0% to 300% critical chance to damage and status effects dealt by
- Gyre visually bows gracefully with hand gestures as hundreds of Gyral Blocks detach from her coil gown, electromagnetically levitating into the air. Gyre finishes her bow, culminating in a powerful posture that attracts and concentrates all Gyral Blocks to encircle her forearms in two spherical clusters. The Gyral Blocks rhythmically pulse in a wave-like pattern, while Gyre's body is enveloped in electricity.
Augment
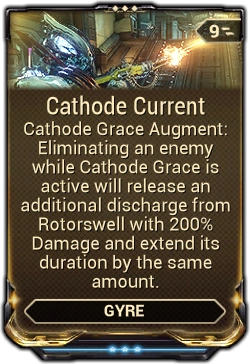
- Main article: Cathode Current
Cathode Current is a Warframe Augment Mod for ![]() Gyre's
Gyre's ![]() Cathode Grace that causes enemies killed to release an additional discharge from
Cathode Grace that causes enemies killed to release an additional discharge from ![]() Rotorswell and extend its duration.
Rotorswell and extend its duration.
Tips & Tricks
- As Gyre already generates her own Energy while Cathode Grace is active, she can forego of, or even sacrifice, Ability Efficiency stats in exchange for amplifying other stats, such as increased Duration with Constitution or firepower such as by equipping Blind Rage.
- As Cathode Grace has a rather long animation time, Gyre is vulnerable while activating the ability. Equipping Quick Thinking not only gives her a safeguard, it also can make her tankier by expending energy to prevent lethal damage - which she can quickly replenish by constantly attacking and keeping Cathode Grace up.
- This ability's energy regeneration is paused during channeled abilities, such as Gloom (while affecting enemies) added via the Helminth system,
- As Gyre already generates her own Energy while Cathode Grace is active, she can forego of, or even sacrifice, Ability Efficiency stats in exchange for amplifying other stats, such as increased Duration with

|
 3 |
Thurible Channel Harrow’s energy into the Thurible to generate a buff. Once finished, kill enemies to bestow nearby allies with bursts of energy. The more energy channeled the greater the reward for each kill. Headshots produce extra energy. Introduced in Update 21.0 (2017-06-29) |
|
|
Misc: 4.0x (headshot multiplier) |
Info
- Harrow chants in ritual to channel 25 Energy into the thurible at a rate of 10 / 10.83 / 12.5 / 15% of the base energy consumed per tick.
- Ability Efficiency will not reduce the stored energy gained per tick.
- Pressing the ability key again (default 3 ) or running out of energy stops the channeling, causing the thurible to generate an aura of incense around Harrow with a radius of
 13 / 15 / 17 / 20 meters that lasts for 20 / 25 / 30 / 35 seconds. While active, each enemy killed by Harrow restores the charged amount of energy to Harrow and all allies inside his aura; if an enemy is killed by headshot, the amount of energy restored per player is multiplied by 4.
- Energy per kill uses the following expression when accounting for Ability Strength and Ability Efficiency:
Energy Per Kill = 1 + [Energy Channeled × 15% ÷ (2 - Ability Efficiency)] × Ability Strength- With a maxed Intensify and maxed Streamline, draining 25 energy will yield 1 + [25 × 15% ÷ (2 - 130%)] × 130% = 7.9643 energy per kill and ~7.9 × 4 = 31.8 energy per headshot kill.
- With a maxed
- Duration is affected by Ability Duration.
- Aura radius is affected by Ability Range.
- Channeling speed is affected by Casting Speed.
- Enemies killed anywhere by Harrow using ranged and melee weapons will reward energy; weapons with deployables such as the
 Zenistar are also eligible to reward energy from indirect kills.
 - Players using toggled abilities that drain energy per second can not gain energy from Thurible.
- Energy per kill uses the following expression when accounting for Ability Strength and Ability Efficiency:
- While channeling energy into the thurible, the current amount of energy per kill is displayed to the right of the aiming reticle. The color of the text and stylized art are affected by Harrow's chosen Warframe energy color.
- Thurible's buff icon is displayed beside the shield and health indicators on the HUD, with the amount of energy per kill indicated below the buff icon.
- Upon killing an enemy via body-shot or headshot, a brief message displays above the ability icons indicating the total amount of energy restored per kill or per headshot kill.
- Channeling Thurible is a two-handed upper body animation that disables weapon use, casting other abilities and Pickups collection, but allows player movement and parkour Maneuvers.
- Can be recast while aura is active to channel energy. Channeling ends the previous instance of Thurible.
- While active, Harrow is surrounded in a glow of energy and his incense aura is constantly visible to all players. Both visual effects are affected by his chosen Warframe energy color.
Augment

- Main article: Warding Thurible
Warding Thurible is a Warframe Augment Mod for ![]() Harrow that reduces damage taken by allies within
Harrow that reduces damage taken by allies within ![]() Thurible's range when channeled, and grants extra energy charge if those Allies are hit.
Thurible's range when channeled, and grants extra energy charge if those Allies are hit.
Tips & Tricks
- While channeling Thurible, you can still move and use parkour maneuvers such as roll, slide, bullet jump, aim glide, wall hop and wall cling to evade incoming enemy attacks.
- Mod for Ability Strength and Ability Efficiency to increase the conversion rate per energy point spent. Natural Talent and Speed Drift greatly increase the speed at which each energy point is drained.
- Flow (and Primed Flow) synergize with this ability. Higher maximum energy allows you to channel even stronger buffs, at the cost of longer channeling time.
- Use
 Condemn to stop enemies in their tracks, allowing for easy headshot kills to maximize energy gain.
 - When under heavy fire, channel Thurible while under the protection of
 Covenant to guarantee your safety.
 - Dark energy colors can greatly improve visibility for long range shooting due to Thurible's incense aura being constantly visible to you and your team.
- However, lighter energy colors can allow teammates to spot the area of effect at a glance and rally to your position for energy restoration.
- This is most likely a bug, but channeling the Thurible allows Harrow to use his melee with a Gravimag deployed Arch-Gun.
Limbo's Passive
Rolling (default Shift ) lets ![]() Limbo enter and exit the Rift plane.
Limbo enter and exit the Rift plane.
- Entering leaves behind a small Rift portal lasting 5 seconds for allies to enter along.
- Warframes regenerate 2 Energy per second while in the Rift.
- Each enemy killed in the Rift by Limbo also grants him 10 Energy.
Octavia's Passive
Casting any ability will inspire ![]() Octavia and nearby allies with her music, granting the Inspiration buff that replenishes 1 energy per second for 30 seconds. Allies within 15 meters will also receive the Inspiration buff.
Octavia and nearby allies with her music, granting the Inspiration buff that replenishes 1 energy per second for 30 seconds. Allies within 15 meters will also receive the Inspiration buff.
- Octavia recasting any ability will also refresh the active Inspiration buff's duration.

|
 3 |
Rally Point Draw enemy attention to Styanax. His resolve uplifts nearby allies, regenerating the squad’s energy over time. Styanax and his allies also regenerate shields for every kill assist they contribute. Introduced in Update 32.0 (2022-09-07) |
3 EP/s (energy regen) |
|
Misc: Threat level priority |
Info
- Styanax expends 75 energy to stand his ground and sound a gallant call, increasing his Threat Level while raising his own and his allies' morale within 30 meters. Rally Point grants affected Warframes and Companions 3 Energy points regeneration per second, with each kill or assisted kill by rallied allies restoring their personal Shield pool by 20 / 30 / 40 / 50 shield points, which overflow into Overshields. Once cast, Rally Point persists on affected allies, lasting for 30 seconds.
- The amount of energy regenerated and shields restored are affected by Ability Strength.
- Energy regeneration does not occur during channeled abilities.
- If Styanax himself is the caster, shields per kill and energy regen values are displayed as an ability Buff icon beside Styanax's hitpoint indicators.
- Rally Point from another Styanax displays only the shields per kill and remaining duration timer on the ability buff icon.
- When Rally Point expires, a war-time drumbeat sound effect plays to alert all rallied players.
- Can be recast while active to refresh duration to full and buff new allies in range.
- If there are multiple Styanax players in a squad, the highest buff value will take effect and cannot be overriden by lower valued buffs, unless the timer has less than 10 seconds remaining.
- Casting Rally Point is a full-body animation that interrupts Styanax's grounded movement and other actions.
- When cast while airborne, it is a one-handed animation that still allows shooting and movement.
- Styanax and rallied allies visually pulse with energy lines, while enveloped by a shield-like form-fitting barrier. When a direct kill or kill assist occurs on an enemy by a rallied ally, a wisp of Void energy bursts from the enemy and rapidly flies to that ally to replenish shields.
- Void wisps are affected by the chosen energy colors on each individual rallied ally.
- Multiple Void wisps can appear from an enemy when kill-assisted by multiple rallied allies.
Tips & Tricks
- Rally Point builds up Styanax's shields into Overshields to fuel his passive Hoplite weapon Critical Chance bonus.
- Energy regen recovers the low costs of
 Axios Javelin and
  Tharros Strike quickly.
 - Axios Javelin's vortex assists in grouping enemies and Tharros Strike's defense reduction cripples them for rapid shield recovery to Styanax and rallied allies on kills/assists.
 Final Stand's javelin barrage rapidly inflicts damage to secure kills/assists to strengthen Styanax's shields.

|
 2 |
Energy Vampire Allies will gain energy over time when enemies are marked with Energy Vampire. Introduced in Update 4 (2012-11-02) |
15 / 17 / 20 / 25 (energy restored per pulse)6.25% (damage percentage)
≥25% (damage health threshold) |
15 / 17 / 20 / 25 m (pulse radius) | |||
|
Misc:
4 (number of pulses) |
Info
- Trinity expends 50 energy to extract pure energy from a single enemy target within 100 meters. The target is incapacitated in place, glows bright blue and emits 4 energy pulses over 5 / 6 / 7 / 9 seconds. Each energy pulse restores 10 / 15 / 20 / 25 energy points to Trinity and allied Warframes within a radius of 15 / 17 / 20 / 25 meters, while the target is constantly Staggered. During this time, 6.25% of the target's current health is dealt to it as
 True Damage each pulse, bypassing the target's Shields. If the target's health drops, or is already, below 25% of its maximum value the target will instead be dealt 6.25% × 25% = 1.5625% of the its maximum health as True Damage each pulse.
- If a marked target dies, all remaining pulses are released at once.
- Pulses are emitted at every quarter of the duration, the first occurring immediately on cast. The final pulse occurs when three-quarters of the duration has elapsed.
- Increasing Ability Duration will cause the pulses to take longer to come out, while decreasing Ability Duration quickens the pulses.
- Increasing
- The 6.25% damage percentage is applied to either the target's remaining health or to 25% of its maximum health - whichever is greater at the time of each pulse. Each energy pulse inflicts at least 5 True damage if the resulting damage is below 5 damage points.
- Cast time of 1.2 seconds is affected by Casting Speed.
- The pulses' stagger will not interrupt the attacks of heavy enemy units. It also does not affect enemies immune to stagger, such as Grineer Rollers, Corpus Ospreys, or certain bosses.
- Energy Vampire cannot be recast on the same target until its duration has expired.
- Energy Vampire cannot be cast on invulnerable targets.
- If Energy Vampire is cast on a Manic during its vulnerable phase, pulses can continue through its invulnerable phase.
- Players with channeled abilities active do not gain energy from Energy Vampire.
Augment
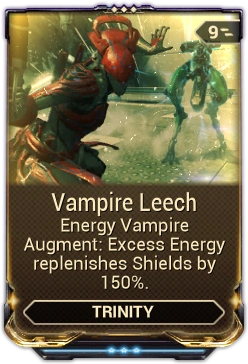
- Main article: Vampire Leech
Vampire Leech is a Warframe Augment Mod for ![]() Trinity that causes
Trinity that causes ![]() Energy Vampire to convert excess energy into Shields, and will even boost into Overshields.
Energy Vampire to convert excess energy into Shields, and will even boost into Overshields.
Tips & Tricks
- Casting Energy Vampire on a weak enemy and killing it will grant players a quick burst of energy.
- While increased duration slows energy gain by spreading the pulses over a longer period, killing the target quickly negates this penalty, allowing Trinity's other abilities to benefit from increased duration.
- Decreasing Energy Vampire's duration via Corrupted Mods will quicken the energy restoration at the cost of a shortened span of stagger control per cast.
- With a maxed Transient Fortitude and Fleeting Expertise, a rank-3 Energy Vampire will trigger all four pulses over 1.125 seconds, staggering the target only once at most.
- A low duration build will allow Trinity to cast Energy Vampire multiple times on a single target, providing a large source of energy and quickly dealing true damage.
- With a maxed
- If used on Grineer Latchers, the Latcher will not be destroyed by the pulses and Energy Vampire can be cast upon it repeatedly for more energy. The effect will stop if it latches onto a player.
- Energy Vampire can be used on Sortie Bosses to make quick work of them, as it deals percentage based damage.
Bugs
- If Energy Vampire is cast on a Shockwave MOA readying to stomp the ground, it will still produce a shockwave and won't be stunned.
- In Corpus levels, if the player targets something outside of the above-mentioned target tracking range, the nearest turret (and possibly cameras) will be targeted.
- If Energy Vampire is cast on an Eidolon Vomvalsyt, it will not emit the remaining energy pulses if their physical form is destroyed before the effect wears off.
Aside from the aforementioned abilities, there are a few others that have varying chances to drop/spawn Energy Orbs which can be picked up by anyone in a squad.

|
 4 +25/s +25/s/enemy +50/dodge |
Aegis Storm Take the skies and rain Balefire rockets down on the enemy. Nearby enemies are blasted into the air where they will create an Energy Orb every few seconds. When shields run out the enemies are smashed into the ground. Introduced in Update 24.4 (2019-03-08) |
100 / 300 / 400 / 500 ( |
|
Misc: 8-18 s (energy orb drop interval) |
Info
- Hildryn expends 100 shields or overshields to activate her jet thrusters as she lifts off from the ground. Hildryn gains vertical and horizontal flight capabilities using the movement (W A S D ), crouch (Ctrl ), and jump (Spacebar ) hotkeys, similar to Archwing Maneuvers but without the Afterburner. While active, her shield matrix drains 25 shield points per second to continuously generate a energy field with a range of 8 / 10 / 12 / 15 meters; the energy field shrinks as Hildryn gains vertical height and expands as she is closer to the ground. Enemies inside the energy field and within Hildryn's line of sight drain 25 shield points per second per enemy, causing a fiery energy geyser to erupt from beneath them; enemies burned by energy geysers are suspended in midair, receive 100 / 125 / 150 / 200
 Radiation damage per second, and drop an Energy Orb every 8-18 seconds. Deactivating Aegis Storm (default 4 ) causes Hildryn to slam into the ground, knocking down and dealing 100 / 300 / 400 / 500 Impact damage against all enemies inside the energy field.
- Geyser damage is increased as the energy field's radius becomes smaller.
- Hildryn in Aegis Storm cannot ascend higher than 10 meters above the horizontal surface underneath her. If Hildryn is above this threshold when activating the ability or due to descending changes in elevation, she will float downward. If Hildryn moves onto terrain that has a higher elevation than her original casting location, she will not maintain her current altitude limit and will rise to match the terrain.
- Hildryn's
 Balefire Charger is the only weapon usable while this ability is active. Primary, Secondary, and Melee weapons cannot be used with Aegis Storm.
- However, Hildryn cannot zoom in with her Balefire Charger during Aegis Storm.
- While Hildryn holds two Balefire Chargers instead of one while Aegis Storm is active, this is a purely cosmetic feature and has no effect on the weapon's effectiveness.
 Pillage and Helminth subsumed abilities cannot be cast while Aegis Storm is active.
- Hildryn can perform dodging while Aegis Storm is active, at the cost of using 50 shields per dodge.
- Aegis Storm's movement speed is affected by movement speed increases such as
 Volt's
  Speed and
  Wisp's Haste
  Reservoirs.
 - Hildryn is unable to accomplish any action that requires the Use key (default X ) while Aegis Storm is active, thus cannot interact with consoles, pick up datamasses, or revive allies from bleedout.
- The Operator can still be used while in Aegis Storm, and be able to do these actions without deactivating the ability.
- While Aegis Storm is active large shield pads appear above each of Hildryn's shoulders. These pads appear above the pads that are briefly visible when Hildryn casts Pillage.
- Unlike the pads that appear for Pillage and
 Haven; which appear to be generated by small spheres; the pads visible when Aegis Storm is active appear to be generated by two Balefire Chargers, Hildryn's Exalted Weapon.
- The Balefire Charger visible in Hildryn's hand when she casts Balefire appears to have five energy streams coming out of it. These are not visible in the Balefire Chargers generating her shield pads when Aegis Storm is active.
- Unlike the pads that appear for Pillage and
Tips & Tricks
- While channeling Aegis Storm, Hildryn can benefit from damage reduction from both Agility Drift and Aviator.
- Even though they can't be used, weapons with Weapon Augments can still trigger their Syndicate Radial Effects, as long as they were the equipped weapon when activating Aegis Storm. Using Balefire Charger will prevent these effects, as that then becomes the equipped weapon. This is useful with the Perrin Sequences' Sequence effect, which recovers 25% of the warframe's shield, which is especially effective for Hildryn.
- Operator Mode can be used without cancelling Aegis Storm, allowing Hildryn to crowd-control a large area of the battlefield while the operator uses their Amp or resurrects teammates. This also supplies affinity to an operator's Amp. However, take care not to die as operator, as Transference Static's shield depletion is particularly crippling for Hildryn.
- While channeling, Hildryn's shields can be restored by Volt's Capacitance,
 Trinity's
  Blessing, Night
  Equinox's
  Mend & Maim, and
  Mag's
Mag's  Polarize. Trinity's Vampire Leech will not restore shields.
 - Balefire Surge can replenish Hildryn's own shields during Aegis Storm.

|
 3 +10/corpse |
Desecrate Forces fallen enemies around you to drop additional loot. Introduced in Update 10.0 (2013-09-13) |
|
|
Misc:
30% / 40% / 50% / 60% (health orb drop chance) |
Info
- Nekros emits an aura of dark power that affects every corpse within a radius of 10 / 15 / 20 / 25 meters, consuming the corpses and granting a 30% / 40% / 50% / 60% chance to spawn a health orb and a 22.5% / 32% / 42.5% / 54% chance to roll the corpse's drop table again to produce additional loot. After a 2 second delay on the first corpse within range, corpses are consumed one at a time in random order, with subsequent corpses consumed at a rate of 3 corpses per second. Each corpse consumed drains 10 energy; the ability will remain active until toggled off or Nekros runs out of energy.
- Additional loot includes all items normally found on the original enemy's Drop Tables, such as Mods, plus Credits, Resources, Ammo Pickups, Health Orbs, Energy Orbs, Pigments, Life Support Modules and Power Cells.
- Technically, the corpse's loot table is rolled again at a 75% / 80% / 85% / 90% success rate, but only after a health orb has successfully been spawned. Combined with the 30% / 40% / 50% / 60% chance to spawn a health orb at all, this leads to the 22.5% / 32% / 42.5% / 54% drop table chance.
- Therefore, there will always be an additional health orb if there is additional loot.
- This also implies that a single enemy may drop up to three health orbs, one as regular loot, one from Desecrate proccing and another from rerolling its loot table.
- Even enemies with an empty drop table, like Corpus Security Cameras, may drop health orbs this way.
- Additional loot retrieval stacks with other loot abilities that loot while alive (
 Ivara's
  Prowl), loot while petrified (
 Atlas's Ore Gaze), and loot on death (
 Hydroid's Pilfering Swarm,
  Khora's Pilfering Strangledome, and
  Wukong's Monkey Luck passive)). However, it does not stack with other loot corpse abilities (
 Nekros's
  Desecrate and Chesa Kubrow's Retrieve).
- Despite being a channeled ability, this does not interrupt energy regeneration from any source including Energy Siphon and
 Wellspring, and it is unaffected by Ability Duration.
 - Desecrate does not activate channeling-based Incarnon Genesis perk bonuses.
- Bodies that are cut in half before or after death by taking Slash damage to the torso are each treated as distinct "corpses", each part with their own chance to yield additional loot. This does not apply to individual limbs that have been removed, but only the large sections of corpses.
- Previously, Cold procs being on a target when they died would result in an ice statue, which could then be shattered into two parts to desecrate. Currently this no longer functions in game, and results only in a frozen torso that cannot be broken down further, and therefore can only be desecrated once.
- Previously,
- Desecrate affects the corpses of most enemies as well as dead faction allies from Invasions, The Grustrag Three, Eximus enemy corpses, and Corrupted Vor's corpse if it is left behind. Desecrate also affects the following:
- Vaporized enemies as long as Desecrate is cast before they fully disappear.
- Enemies vaporized by Nova's
 Molecular Prime even after the corpses have disappeared. When Desecrate is cast, the corpses appear and disappear quickly.
 - Shadow corpses from
 Shadows of the Dead. Desecrating shadow corpses will only yield health orbs.
- Desecrate does not work on enemies that explode on death, such as Volatile Runners, or on certain bosses including Sprag and Ven'kra Tel.
- Sometimes, corpses may yield no drops even if Desecrate's attempt at the extra loot roll was successful, because the enemy's loot table can include a chance to drop nothing.
- Successfully desecrated corpses will glow with the chosen energy color and turn into smoke before fading away.
- At the start of a desecration, there is a small time frame where corpses can be dismembered. The corpse (or bisected corpse) will then reappear, ready to be desecrated again.
- Up to four Desecrate's attempts can be done on a single enemy with two well-timed dismemberments.
- Initial activation of the ability has a cast time of 1.8 seconds.
Augment

- Main article: Despoil
Despoil is a Warframe Augment Mod for ![]() Nekros's
Nekros's ![]() Desecrate to consume health instead of energy.
Desecrate to consume health instead of energy.
Tips & Tricks
- Know the timespan for a body to completely disintegrate:
- Grineer and Corpus corpses will disintegrate in 15 seconds.
- Infested corpses and
 Avalanched enemies will disintegrate in 5 seconds.
 - Corpses from enemies affected with Molecular Prime will disintegrate in 3 seconds.
- Corpses from enemies affected with
 Miasma will disintegrate within a second.
 - Enemies that do not leave bodies behind cannot be desecrated.
- Most useful in Survival missions, due to the large amount of enemies.
- Nekros can also desecrate personal life support from bodies.
- Weapons with high Slash damage are likely to dismember enemies into multiple body parts.
- Desecrate synergizes well with Equilibrium – every energy orb picked up will regenerate health and vice versa, allowing for Desecrate to be constantly active, regardless of whether the player has the Despoil augment or not.
- When using Equilibrium it is beneficial to take a controlled amount of damage, or use Despoil in order to fully benefit from being able to pick up Health orbs (also consider using Rage or Hunter Adrenaline to recover energy while taking damage) Alternatively, a companion with Synth Fiber allows for health orbs to be consumed continuously regardless of health for constant Equilibrium energy benefits. Using this, even a Flawed equilibrium mod can provide constant uptime with enough health orbs present.
- Desecrate is also very effective in Excavation missions because it can be used on Power Carriers, possibly making them drop additional power cells.
- Khora's
 Strangledome almost guarantees dismembering enemies upon kill from its chains due to its high Slash, granting more body parts for Nekros to generate loot from.
 - Corpses are consumed upon Desecrate's attempt to roll extra loot, regardless of success or not.
- Overlapping Desecrate using two or more Nekroses will not generate more loot. Only one Nekros can successfully Desecrate a given corpse.
- Having multiple Desecrating Nekroses is still useful if the Nekroses themselves are spread out or if some corpses would disappear before Desecrate gets a chance.
- This is especially useful when corpses are disintegrating faster than 3 per second (such as when an ability like Molecular Prime is being used, in infested missions, or if enemies are simply being killed at a rate of over 3 per second)
- This is especially useful when corpses are disintegrating faster than 3 per second (such as when an ability like

|
 2 |
Blazing Chakram Hurl a flaming ring that burns enemies and causes them to emit a healing blast on death. Reactivate to instantly travel to the ring's location. Introduced in Update 18.1 (2015-12-16) |
400 / 600 / 800 / 1000 (boosted 60% / 75% / 85% / 100% (vulnerability) |
|
Misc: 50% / 65% / 80% / 100% (health orb chance)20% / 25% / 30% / 35% (energy orb chance)30 m (uncharged throw distance)
70 m (charged throw distance) |
Info
- Nezha expends 25 energy to throw his Universe Ring 30 meters towards the target aim, which will ricochet off enemies or objects before returning, hitting up to 6 enemies. The chakram deals 100 / 150 / 200 / 250 Heat damage to enemies it touches and marks them for 10 / 11 / 13 / 15 seconds, with guaranteed Heat status effect. Marked enemies receive 60% / 75% / 85% / 100% Damage Vulnerability and have a 50% / 65% / 80% / 100% chance to drop a Health Orb, and a 20% / 25% / 30% / 35% chance to drop an Energy Orb, upon death.
- Casting animation of ~0.75 seconds, affected by Casting Speed.
- Can be cast while moving but will interrupt any other action.
- Casting animation of ~0.75 seconds, affected by Casting Speed.
- Holding down the ability key (default 2 ) will charge the chakram to increase its damage, up to 400 / 600 / 800 / 1000 Heat damage while
 Ragdolling enemies, and make it fly ~70 meters in a straight line forward and backward hitting all enemies in its path.
- Charging animation is not affected by Casting Speed.
- A charged Blazing Chakram loses its ability to ricochet off walls and enemies.
- If Blazing Chakram is activated again by pressing the ability key (default 2 ) while the chakram is in flight, Nezha will teleport to its current location at no energy cost.
- Nezha cannot teleport to the chakram if it is inside or too close to a wall.
- Bouncing from surfaces can extend the chakram's travel distance.
- The chakram's position is indicated as a waypoint onscreen and as a circular icon on the minimap.
- Both uncharged and charged throws are capable of hitting the same enemy multiple times.
- Blazing Chakram can be detonated mid-flight similarly to a throwing weapon
- This does not appear to deal damage—its primary function appears to be to force the early return of the Chakram.
- This requires a melee weapon to be equipped. Pressing the heavy attack key while a melee weapon is equipped and the Chakram is still on an outbound path will cause the Chakram to "explode", then return to Nezha.
- Ability Synergy:
- If
 Fire Walker is active when using Blazing Chakram's teleportation, Fire Walker will overheat at the destination and deal 500 / 750 / 1000 / 1250 Heat damage, with a 10% / 25% / 50% / ? Heat status chance, within a radius of 3 / 4 / 5 / 6 meters, as well as leaving a lingering ring of Fire Walker's flames.
- Damage does not bypass obstacles in the environment and diminishes with distance.
- Blazing Chakram striking an enemy impaled by
 Divine Spears produces a second chakram, which fires at a nearby enemy.
- Secondary chakrams can create additional ones off of speared enemies.
- A charged throw will also produce charged chakrams, which will not seek out enemies or bounce, and often fly off in random directions. Therefore, uncharged throws are much more well-suited to generate many chakrams and ramp up Reaping Chakram's bonus damage.
- If
Augment

- Main article: Reaping Chakram
Reaping Chakram is a Warframe Augment Mod for ![]() Nezha which increases
Nezha which increases ![]() Blazing Chakram's damage for each enemy hit by the attack. Additionally it increases the spawn percentage for health orbs for each enemy hit.
Blazing Chakram's damage for each enemy hit by the attack. Additionally it increases the spawn percentage for health orbs for each enemy hit.
Tips & Tricks
- Using Reaping Chakram with Equilibrium significantly enhances energy return chances. This allows high strength builds with low (45%) efficiency to still be able to cast this power almost infinitely.
- Archon Vitality garauntee's a double Fire Proc on each target hit, each target hit in chain taking significantly more damage-over-time as chained targets face increased damage multiplication. Charging this ability and using Archon Vitality creates even more powerful damage-over-time dual Fire Procs.
- The applied vulnerability mark is independent of the ring's damage and can be applied to enemies immune to Blazing Chakram's damage.
- The mark is removed in nullifier fields, however its duration is not decreased by effects such as Ancient Disruptor auras or the Executioner's natural debuff reduction.
- After activating Divine Spears and throwing a Chakram at impaled enemies, 2 additional rings are created and will bounce off enemies. If the Chakram is charged, the extra rings will have similarly increased damage and behavior.
- The two different Restorative Orb drop chances are calculated separately from each other and from the enemies standard drop table, as such it is possible for a single enemy to drop multiple orbs, even several of the same type.
- Enemies killed instantly by the Chakram's damage will still benefit from the additional restorative orb drop chances, even though the vulnerability mark is applied after the initial damage instance.
Bugs
- In games with moderately high latency, the chakram may veer wildly off-course or be seen shaking in midair while moving slowly, then disappear before striking an enemy. This is likely caused by the ring's position being calculated host-side, rather than client-side.

|
 3 |
Dispensary Deploys a device that generates 3 pickups after a short delay: empowered health orb, universal ammo pack and energy orb. Introduced in Update 28.0 (2020-06-11) |
|
|
Misc: 2 s (pickup spawn interval)100 HP (empowered health orb restore)1x (universal ammo pack restore)
1 (limit of active caches) | |||
| Subsumable to Helminth |
Info
- Protea expends 75 energy to unfurl the supply cache from her utility belt in front of her. The Dispensary hovers in place for 10 / 15 / 20 / 25 seconds. After being deployed, the supply cache warps in Pickups one by one every 2 seconds in the following sequence: an Empowered Health Orb that restores 100 Health points, a Universal Ammo Pack that restores 1x Ammo Pickup for the currently equipped Weapon, and an Energy Orb. This rotating sequence will repeat until the Dispensary's duration expires. If all previous pickups of a given type have not been collected when the Dispensary attempts to warp in a new copy, that attempt will be skipped. Each pickup type has a 10% / 15% / 20% / 25% chance to drop a second copy when first warped in and on each replenishment. Only 1 Dispensary may be active at once.
- Each individual pickup type will replenish once every 6 seconds as the Dispensary rotates through them. Empowered Health Orbs will attempt to spawn at 2, 8, 14, 20... seconds after deployment, Universal Ammo Packs will attempt to spawn at 4, 10, 16, 22... seconds after deployment, and Energy Orbs will attempt to spawn at 6, 12, 18, 24... seconds after deployment.
- Deploying animation speed is affected by Casting Speed.
- Pickups are arranged in a triangular formation around the cache, spawning from the top of the cache then dropping to the ground below.
- Empowered Health Orb health restore value is used as base value for mod interactions, such as Equilibrium and Mending Shot, though not Synth Fiber for Companions.
- Universal Ammo Pack restores Atmospheric Archgun ammo upon collection. However, it does not affect the Archgun Deployer cooldown in the Gear menu.
- While deployed, the Dispensary's location is indicated on the minimap using its ability icon.
- Deploying a new Dispensary will remove the current one.
- Pickups produced by the Dispensary are individual instances per player. If one player picks up an item, it will only disappear for that player while other players can collect their instances at their leisure.
- Pickups are still subject to squad-wide pickup count limit and will despawn from the oldest to the newest after the limit is reached.
- Pickups are replenished one by one according to the aforementioned drop sequence, if multiple pickups were collected by the same player.
- Can be recast while active to deploy a new Dispensary while removing the active cache, dropping multiple new pickups at a different location.
- Casting Dispensary is a full-body animation that allows movement.
- Dispensary is an invulnerable object that hovers in the air where Protea deploys it.
- Protea will deploy the Dispensary toward the direction her character model is facing at the end of the casting animation.
- Supply cache despawns by folding back into its compact form and teleports back to Protea's utility belt.
- Dispensary supply cache uses a custom model that resembles a floating and rotating vase, opening up its three petals to reveal a floral design. Each petal moves in an up and down motion, producing energy lights individually and in unison when spawning pickups. A pollen cloud visual effect bursts upward as a pickup is spawned.
- Subsuming Protea to the Helminth will offer Dispensary and its augments to be used by other Warframes.
- However, Subsumed Dispensary's duration is reduced to 5 / 7.5 / 10 / 12.5 seconds.
- However, Subsumed Dispensary's duration is reduced to
Augment

- Main article: Repair Dispensary
Repair Dispensary is a Warframe Augment Mod/Exilus Mod for ![]() Protea that causes
Protea that causes ![]() Dispensary to drop special pickups that heals Companions and reduces their respawn timer.
Dispensary to drop special pickups that heals Companions and reduces their respawn timer.
Tips & Tricks
- Place a supply cache before engaging enemies to give it time to produce a set of pickups.
- Place near static objectives to resupply quickly while defending.
- Jump and place the supply cache high in the air, out of reach from the ability canceling effects of special enemies (e.g. Nullifier Crewman). Pickups will rain down from above and stay put where they land.
- Recast the Dispensary after it has produced a set of pickups to create another set. Spread the placements apart to cover the area in useful supplies.
- Utilize Protea's passive for a chance to create more pickups per supply cache.
- Mod for Ability Duration to keep the cache active longer. Pickups collected by you and your team will have more time to be replenished by the active Dispensary.
- Activate
 Temporal Anchor and place a supply cache to completely recover its energy cost once Protea rewinds, while producing more Energy Orbs for later use.
 - Universal Ammo Packs are one of the only methods to resupply for Atmospheric Archguns, allowing you and your team extended usage of these heavy weapons.
- Empowered Health Orbs can be an excellent source of energy with Equilibrium, giving 110 energy for each one on max rank, due to the health orb providing 100 health.
- This can benefit any Warframe that could use more energy.
Bugs
- Using this ability inside The Index has the potential to stop all Energy Dispensers from spawning energy orbs for the rest of the match, for all players.
While not restoring energy directly nor indirectly, ![]() Grendel has the unique ability to increase energy gained from all sources and methods mentioned so far, this affects the Warframe itself and allies.
Grendel has the unique ability to increase energy gained from all sources and methods mentioned so far, this affects the Warframe itself and allies.

|
 2 |
Nourish Regenerate health as Grendel absorbs nourishment from enemies in his gut. While he digests, enemies that attack or are attacked by Grendel suffer Introduced in Update 26.0 (2019-10-31) |
|
12 m (splash radius) | |||
|
Misc:
10 ( | |||
| Subsumable to Helminth |
Info
- Grendel expends 50 energy to damage to the first digested victim equal to 20% of their total shield and health points, heal 600 / 700 / 800 / 1000 Health, and receive a buff that affects all allies within 10 / 15 / 20 / 25 meters for 10 / 15 / 20 / 25 seconds. This buff has three separate effects:
- All energy sources provide 1.5x / 1.65x / 1.8x / 2.0x more energy.
- Taking damage causes an explosion with a 12 meter radius that deals 100 / 150 / 200 / 250
 Viral damage with 10 Viral stacks and Stagger to enemies within line of sight. This explosion has a 2 seconds cooldown.
 - Adds +40% / +50% / +60% / +75% Viral damage to all weapons.
- All energy sources provide
- Retaliation waves damage and break destructible Objects such as crates and resource caches.
- Ability Synergy: Nourish requires at least 1 enemy swallowed by
 Feast to be alive in Grendel's gut to cast.
 - Can be recast while active, inflicting damage to the eaten enemy, healing Grendel, buffing new allies in range, and refreshing the buff's duration.
- Subsuming Grendel to the Helminth will offer Nourish and its augments to be used by other Warframes.
- Other Warframes are omitted from the swallowed enemy requirement, due to their inability to cast Feast.
- However, Subsumed Nourish does not provide healing, the explosion only applies 1 Viral stack, the energy multiplier is reduced to 1.3 / 1.39 / 1.48 / 1.6x, and Viral weapon bonus damage is reduced to +24% / +30% / +36% / +45%.
- Other Warframes are omitted from the swallowed enemy requirement, due to their inability to cast
Augment

- Main article: Hearty Nourishment
Hearty Nourishment is a Warframe Augment Mod for ![]() Grendel that allows
Grendel that allows ![]() Nourish to remove Status Effects and give him immunity based on the number of enemies in his stomach.
Nourish to remove Status Effects and give him immunity based on the number of enemies in his stomach.
Mods[]
Arcanes[]


Energy Reduction[]
Sorties with the Energy Reduction condition is the only way to reduce a Warframe's Total Energy capacity. This also reduces passive energy regeneration effects, like ![]() Energy Siphon and
Energy Siphon and ![]() Zenurik's abilities.
Zenurik's abilities.
There are also some instances where a Warframe's energy can be expended and/or stopped from regenerating. Nightmare Mode's Energy Drain condition slowly drains 15 energy per second throughout the mission. On top of its regular effects, a ![]() Magnetic proc will drain 90 energy over 3 seconds, or 30 energy per tick. In Conclave,
Magnetic proc will drain 90 energy over 3 seconds, or 30 energy per tick. In Conclave, ![]() No Current Leap nullifies passive energy regeneration in exchange for increased mobility.
No Current Leap nullifies passive energy regeneration in exchange for increased mobility.
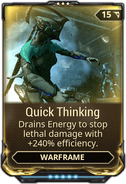
Using Energy as Health[]
Mods[]
These mods stop lethal damage by allowing hits to drain your energy after your Health is depleted in exchange for occasionally staggering the player. They synergize extremely well with ![]() Rage and
Rage and ![]() Hunter Adrenaline since all the health drained before taking lethal damage would ensure that there is enough energy for the mods to consume.
Hunter Adrenaline since all the health drained before taking lethal damage would ensure that there is enough energy for the mods to consume.
Patch History[]
Update 35.0 (2023-12-13)
- Increased the Starting Energy of the following Prime Warframes so that they have higher Energy Capacity compared to their base version:
- Grendel Prime from 100 to 115
- Inaros Prime from 50 to 75
- Ivara Prime from 75 to 100
- Khora Prime from 75 to 100
- Limbo Prime from 100 to 125
- Nidus Prime from 50 to 75
- Titania Prime from 100 to 125
Update 33.0 (2023-04-26)
- Fixed pausing the game in Solo mode not suspending the energy cost of abilities that use energy over time.
- Fixed the “Energy Drain” stat in the Warframe ability page showing as 0 when Zenurik’s Inner Might is equipped.
Update 32.3 (2023-02-15)
- Removed the “Starting Energy” stat that was added in Hotfix 32.2.9 and merged it with the existing “Energy” tooltip.
- Also fixed incorrect calculation of Mod upgrade to Energy drain, which resulted in incorrect calculation of Energy players receive on spawn.
Hotfix 32.2.9 (2023-01-11)
- Added a new “Starting Energy” stat (affected by Mods like Preparation) in the Arsenal to indicate the amount of Energy a Warframe will start a mission with.
- Hot Tip: Unspent Mod capacity increases how much Energy you have at the start of missions.
- Harrow will always show 100% Energy filled thanks to his passive.
Update 32.0 (2022-09-07)
- Operator Energy pickups will now be shared with Warframe.
- Note that this won’t affect Warframe mods that trigger certain conditions off energy pick-up while in Operator mode (ie. Health Conversion).