
Albrecht's Laboratories is a tileset hidden below the depths of Deimos. It is the abandoned labs of Albrecht Entrati, and contains numerous alcoves and facilities that are protected by his Necramech guards, now overrun by The Indifference and ![]() The Murmur.
The Murmur.
Access to this tileset is available upon completion of Whispers in the Walls.
Overview[]
Lore & History[]
Features[]
Unique Enemies[]
The primary enemy of this tileset features a new enemy faction called ![]() The Murmur, sentient geometric constructs with human-like limbs that have arrived from the Void.
The Murmur, sentient geometric constructs with human-like limbs that have arrived from the Void.
The Necramech guards that once served the ![]() Entrati have long since malfunctioned, no longer able to differentiate the real Albrecht and The Indifference, and joined forces with the very enemy they were meant to destroy, now targeting the Tenno and any other intruder that wanders the laboratories. These Necramechs are new mechanical enemies called Rogue Culverin and Rogue Arcocanid, though much weaker in design than the ones encountered on the Cambion Drift. Culverins have weakspots on their shoulders where corrosive fluid is stored, and destroying both will cause the mech to go into a short self destruct period, before exploding, destroying the rest of it's health in the process.
Entrati have long since malfunctioned, no longer able to differentiate the real Albrecht and The Indifference, and joined forces with the very enemy they were meant to destroy, now targeting the Tenno and any other intruder that wanders the laboratories. These Necramechs are new mechanical enemies called Rogue Culverin and Rogue Arcocanid, though much weaker in design than the ones encountered on the Cambion Drift. Culverins have weakspots on their shoulders where corrosive fluid is stored, and destroying both will cause the mech to go into a short self destruct period, before exploding, destroying the rest of it's health in the process.
Security Alerts[]
Unlike most other tilesets that may have mission wide alerts that either lock down doorways or have a chance to summon tougher enemies, Rogue Culverin units may rush to a Necramech dispensers and attempt to summon a Rogue Voidrig or a Rogue Bonewidow. A glowing red icon as well as an alarm will sound for a few seconds during this process, which can be interrupted by destroying the Culverin attempting to spawn them. If not prevented, a Rogue Necramech will be deployed from the station and go on the offensive, which can be a significantly tougher threat than the usual enemies in the area.
Summon Personal Necramech[]
Pom-2 computers are new hacking consoles that can summon the player's personally owned Necramech into the field via the above Necramech dispenser. Each computer can only be used once and shares a universal cooldown.
Voca[]
Voca are physical manifestations of the Voidtongue's cries, moans, and whispers, and act as Syndicate Medallions for ![]() Cavia. Every mission within Albrecht's Laboratories will have up to 8 total Voca. Much like Syndicate missions, the
Cavia. Every mission within Albrecht's Laboratories will have up to 8 total Voca. Much like Syndicate missions, the ![]() Shrill Voca,
Shrill Voca, ![]() Bellow Voca, and
Bellow Voca, and ![]() Echo Voca will be hidden throughout the map to be picked up, and are worth
Echo Voca will be hidden throughout the map to be picked up, and are worth ![]() 500,
500, ![]() 1,000, and
1,000, and ![]() 2,000 Standing, respectively.
2,000 Standing, respectively.
Lohk Surge[]
- Main article: Lohk Surge
Lohk Surges are Void interactables that provide a range of buffs to Tenno. Interacting with a surge will spawn an Eximus unit. The surges last 45 seconds and have a 10 minute cooldown. Up to three Lohk Surges can spawn in a mission.
Whisper[]
- Main article: Whisper
Floating Grimoires can be found throughout the tileset, spawning a hostile Operator doppelganger miniboss called a Whisper. This miniboss has two health bars, upon depleting the first health bar it becomes protected by a Whisper Grimoire that spawns at another part of the tileset while attempting to recover its lost health. Its defeat awards a Melee Arcane Enhancement and an Albrecht's Notes Fragment.
Secret Rooms[]
The laboratories feature a variety of hidden, locked or otherwise seemingly inaccessible rooms that often contain Voca and various containers. Most of the time the way in is found through a vent covered with a breakable grate. The locked yellow doors can be then opened from the other side once you find your way in and hack a Vintage Computer nearby.
Extraction Yellow Door[]
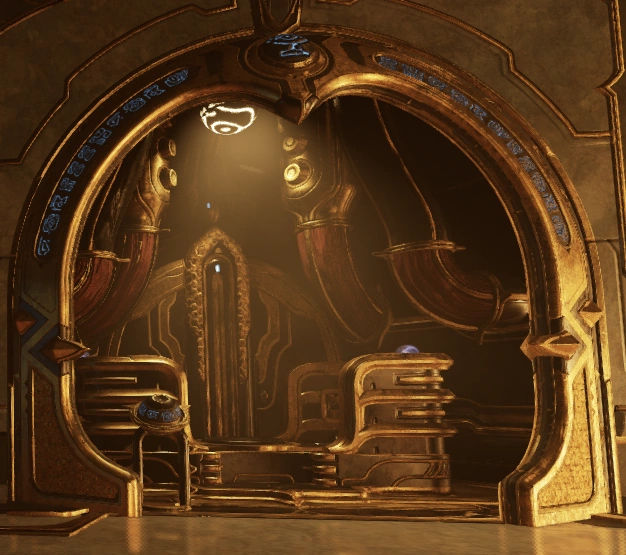
When facing the vessel that acts as the exit and the extraction point, the corridor to the left contains a yellow locked door. The way in is through a vent close to the ceiling. The walkway to the left of the vessel head can help you bullet jump or void dash towards the vent. Once inside, you can unlock the yellow door by hacking the computer next to it.
Circular Room with Two Yellow Doors[]
When facing the locked doors, behind you is a ramp going up to a circular platform. Said platform has arching support beams propping up the dome. Ascend the ramp, face the locked doors and look closely at where the support beam to your right meets the ceiling: it has a ceiling vent covered by a breakable grate. Once you follow the vent into the room, hack the computer in the middle to unlock the doors.
Brain Room Hidden Chamber[]
In a room where what looks like a massive brain held above a head of a vessel, the minimap shows a seemingly inaccessible room on the upper level behind and to the left of it. If you stand in the center of the room facing the suspended brain, you will see two lowered ceilings on the left and right of the brain. on the left ceiling closest to the brain (past the edge of the indoor balcony that divides the room into two stories) there will be a breakable grate that covers a vent. Follow the vent to access the hidden room.
Room with a Large Gate by the Stairs[]
When passing through this intersection room, if you go down the stairs, you may notice a large ornate grate blocking your path to stacked crates and other decorations. In order to get inside, shoot the unlit orb on the bridge leading to the grate door.
If there are no bridges in the room, look for a breakable grate on one of the walls nearby to access the loot instead.
Room with Electric Towers at the Start[]
This room has a locked yellow door on the right side of the electric towers. To access this, you can go up the stairs on the left side of electric towers facing loading room and before going to the next room, you should notice the left side of the hall, where rogue Necramechs usually spawn, has a different color. In the spawn point that has the different color, you can jump down. If you can't jump down any further, slam attack it.
Room with Vessel Reaching to Ceiling[]
This room has a vessel that reaches its hand to the ceiling, towards an enclosed opening. To open this, head to the far right side of the room to a Pom-2 and hack into it. Once hacked, a reactive crystal should appear on the balcony behind you. Attack it in Operator mode and the opening will open.
Library Room with Grimoire Altar at Back Center[]
This room is a library with two floors and a large open space in the back center, containing a Grimoire Altar. Activating the Altar will show a hologram, showing four requiem glyphs. These symbols correspond to locations that activate around the room, each location as a different glyph. Shooting the glyphs on the walls activates them, causing them to project a larger hologram. activating the four glyphs identical to the ones shown over the altar, in no particular order, will cause the floor to open up in the open area, revealing a secret room with three Lohk surges and other loot.
Room with Electric Pendulum[]
A large pendulum wreathed in electricity swings slowly in this room. At each extreme, the pendulum points at small alcoves containing reactive crystals. Activate both crystals, then return to the entryway and interact with the Pom-2 there. Once hacked, the yellow door at the far end will open to reveal a small U-shaped room with many containers and three Lohk Surges.
Room with a Tree in the Middle[]
This room has breakable gates on the sides of the platform where the tree sits. To find these, simply walk down the stairs to the zone where Enemy Necramechs can spawn. Once down there, look towards the tree and you should see a breakable gate to the left of the stairs.
Room with Four Sand Orbs[]
In this room there are three orbs filled with sand and an empty one. There is a reactive crystal in the ceiling, shoot it to fill the empty orb and make the platform descend.
Gallery[]
")
")
(Captura by Purple Flurp)
Patch History[]
Hotfix 36.1.2 (2024-08-22)
- Fixed a map hole in the Albrecht’s Laboratories tileset.
Hotfix 36.0.5 (2024-07-20)
- Fixed projectile-based Archguns being unable to damage Murmur Sarcophages.
Update 36.0 (2024-06-18)
- Improved the frequency of appearance for the new Albrecht’s Laboratories tiles that were released with Dante Unbound.
- Fixed Host migration breaking a puzzle in Albrecht’s Laboratories.
- Fixed VFX for the Altar puzzle in the Albrecht’s Laboratories tileset not being properly replicated for Clients.
- Fixed a flickering wall decal in the Albrecht’s Laboratories tileset.
- Fixes towards improper teleport volumes in the Albrecht’s Laboratories tileset.
- Fixes towards Necramech Demolishers getting stuck in the Albrecht’s Laboratories tileset.
- Fixed several map holes towards the top rock face in the Man in the Wall portions of the Albrecht’s Laboratories tileset.
- Fixed collision issues in Albrecht’s Laboratories tileset that players could escape through.
- Fixed Clients hearing generic Lotus transmissions (without seeing the transmission) after completing Albrecht’s Laboratories missions (including Deep Archimedea).
Update 35.6 (2024-05-15)
- Fixed player Necramechs spawning through the floor in Albrecht’s Laboratories instead of from the dispenser.
Hotfix 35.5.11 (2024-05-07)
- Fixed some Albrecht Laboratories mission nodes being unnecessarily in all CAPS in the World State Window UI.
Hotfix 35.5.9 (2024-05-01)
- Fixed a script error occurring in one of the Albrecht’s Laboratories rooms.
Hotfix 35.5.7 (2024-04-17)
- Fixed enemies (notably The Anatomizer and Necramite Drones) in Albrecht’s Laboratories being susceptible to getting stuck on terrain.
Hotfix 35.5.6 (2024-04-10)
- Fixed being unable to complete Deep Archimedea missions due to Stalker spawning in.
- This was due to Stalker spawning on the other side of locked doors, preventing players from completing the mission. We’ve disabled Stalker spawning into (including Stalker Beacon) Albrecht’s Laboratories missions to prevent this and similar issues from reoccurring in Deep Archimedea and the base missions.
- Fixed players being unable to matchmake for Omnia Fissure missions located on Albrecht’s Laboratories.
- Fixed the possibility of Distressed Pipes in Alchemy missions spawning under the floor in the new tiles that were released with Dante Unbound - making them untargetable unless with Slam Attacks.
- Fixed environment flickering issues in one of the Albrecht’s Laboratories tiles.
- Fixed a gap in one of the doorways in the Albrecht’s Laboratories tileset.
- Fixed being unable to destroy the grates in certain areas of the Albrecht’s Laboratories tileset.
Hotfix 35.5.3 (2024-04-04)
- NEW GAME MODE: DEEP ARCHIMEDEA
Embark on perilous research expeditions in Albrecht’s Laboratories! Deep Archimedea is a weekly challenge with three missions that must be completed in a single sequence. Rewards are given based on a number of factors, with the core principle being the higher the risk the higher the potential reward. Read on to learn more!
Before we get into the nitty gritty here, we're excited to get Deep Archimedea into your hands and will watch for feedback as players engage in this challenging gamemode.
Please use our dedicated Bug and Feedback Subforums now that this mode is live!
Requirements
- Completed the Whispers in the Walls Quest
- Rank 5 with the Cavia Syndicate
- Upon hitting Rank 5, a special transmission from Necraloid will play, directing you to him in the Sanctum Anatomica for Deep Archimedea. If you were already Rank 5 before the update, when you load into the Sanctum Anatomica it will play automatically and Necraloid will be accessible there to begin Deep Archimedea.
Difficulty Level
Deep Archimedea has an extremely high difficulty level and is designed to really put you and your Arsenal to the test.
Enemy Levels:
- Normal: 250 - 275
- Elite Archimedea: 375-400 (more information on Elite Archimedea in its dedicated section below)
NOTE ON LOADOUT RESTRICTION: In addition to a variety of difficulty modifiers, there are no opportunities to change your Loadout in between missions. Meaning the Loadout you start Deep Archimedea with is the Loadout you will use throughout all three missions. While it can be attempted solo, we highly recommend you go into Deep Archimedea with a Squad that has carefully prepared their Loadouts and is ready to take on the challenges ahead.
Where & How To Access
Deep Archimedea begins at Necraloid in the Sanctum Anatomica! Find him stationed on the second level of the Sanctum Anatomica.
How To Begin
The following simplifies how to jump into Deep Archimedea in three steps, but the sections that follow go into much greater detail on what you can expect in preparation for the missions ahead.
1. Interact with Necraloid to open the Deep Archimedea screen & use Search Pulses to unlock:
Players can exchange 2 of their 5 weekly Netracell Search Pulses to access the week’s Deep Archimedea. Doing so gives you unlimited chances to play Deep Archimedea missions, with each reward tier being earned once before each weekly reset on Monday @ 0:00 UTC.
You can view and interact with the Deep Archimedea screen prior to unlocking access each week, but you won’t be able to start the missions until you have sacrificed your Netracell Search Pulses.
Additional Search Pulses for week of Deep Archimedea’s launch:
We have given players an additional 5 Netracell Search Pulses for this week with Deep Archimedea’s release to ensure anyone meeting the requirements can participate in Deep Archimedea for its debut! These are in addition to the usual 5 weekly Pulses, so 10 in total if you haven’t used any yet on Netracells this week. These additional Pulses will expire at the next reset on Monday, April 8th @ 0:00 UTC.
2. Select Individual Parameters (if any)
You have the option to select Individual Parameters which will be applied to all three missions - these increase the overall difficulty in exchange for Research Points, which can unlock Reward Pools. Learn more about unlocking Deep Archimedea rewards in the "Research Points & Rewards" section further down. These Parameters are not required to begin Deep Archimedea, should you not be up to the extra challenge.
Individual Parameters consist of Loadout Modifiers, Personal Modifiers and Elite Archimedea - we cover each of these in detail in their own dedicated sections below.
3. Select the “Begin Research” button
Doing so will begin the mission countdown. Enter the Laboratories to start the missions with all of the parameters you had activated. Good luck, Tenno!
Mission Restrictions
Deep Archimedea missions, similar to Netracells, have the following restrictions on by default:
Empowered Enemies:
- Enemies have their Health and Shields increased by 100% and an additional 50% for each squad member, up to a maximum of 300%.
- Increased chance of Eximus.
Respawn Restrictions:
- No Self Revive: Self-reviving is disabled. Instead, 30s after a Tenno has been slain, a dormant Void Angel bearing the glyph of the fallen Tenno, will appear in the mission. Awaken and defeat the Angel to revive the dead Tenno. Each subsequent Void Angel will be much stronger.
- These Void Angels will only have one health bar and do not include the Ethereal Void Angel stage to defeat them.
- Known issue: Clients unable to interact with Void Angels twice in a single mission to revive fallen Host - we are looking to have this fixed hopefully by next Hotfix!
- Last Gasp Penalty: Activating Last Gasp Focus ability reduces the timer by 2 seconds.
- Bleedout Shortens: The bleedout timer shortens after each revive, to a minimum of 5 seconds.
- Mortis Strikes: After being dead for 3 minutes you will incur a Mortis Strike. After 3 Mortis Strikes you will not receive any more rewards for this run. A timer will be displayed while you are dead to track time until your next Mortis Strike.
- All mission rewards earned before receiving 3 Mortis Strikes will be retained, including mission completion rewards.
- Ex: if you received your 3rd strike in Mission 3, you would still retain earned rewards from Mission 1 and 2.
- The Mortis Strike timer only begins once a player’s bleed out timer expires and they have fully died.
- The Mortis Strike timer accumulates while a player is dead, awaiting revival. The counter is cumulative and does not reset upon revives, so try to stay alive, Tenno!
- All mission rewards earned before receiving 3 Mortis Strikes will be retained, including mission completion rewards.
Consumables Restrictions:
- Cooldown Increase: Each type of Restore has a 3 minute cooldown timer applied. This cooldown affects all sizes of Restore type.
Individual Parameters
There are two kinds of Individual Parameters that can be selected by the player: Loadout and Personal Modifiers.
Enabling any Individual Parameter increases potential Research Points by one for all three missions (totalling 3 Research Points per Parameter) in exchange for making these already difficult encounters even deadlier. Increasing your Research Points can unlock additional Reward Pools. We cover Research Points in more detail in the “Research Points & Rewards” section.
Loadout
These Parameters are applied based on your Loadout equipment. Match your Arsenal Loadout to any of the Warframes, Primary Weapons, Secondary Weapons, or Melee Weapons listed in the Deep Archimedea screen to increase your Research Points by one Point per equipment per mission.
In order to activate any of the Loadout parameters, players must change their equipment in the Arsenal. Matching Warframes, Primaries, Secondaries, and Melee weapons will activate their correlating parameters automatically. Deactivate them by changing your equipment to something other than what’s listed.
Loadout parameters reset weekly Monday at 0:00 UTC.
Personal Modifiers
These Modifiers affect players directly, providing a challenge in exchange for increased Research Points. These are applied individually, allowing a player to increase the challenge for themselves without affecting their teammates.
In order to activate/deactivate any of the Personal Modifiers, simply select them in the Deep Archimedea screen.
Here is the list of all of the possible Personal Modifiers:
- Gear Embargo: Gear cannot be used.
- Powerless: All Abilities are disabled until you kill 50 enemies.
- Secondary Wounds: Gain 1 Puncture Status Effect every time you take damage.
- Lethargic Shields: Shield recharge delay increased 500%
- Ammo Deficit: Ammo restored by drops and gear is reduced 75%
- Fractured Armor: Casting an ability reduces armor by 10% for 10s.
- Untreatable: Pickups do not heal, and Health Orbs cannot be picked up
- Abbreviated Abilities: Ability durations reduced by 75%.
- Concussive Drain: Taking health damage also consumes 5% of max energy per hit.
- Transference Distortion: Transference into Operator and Drifter is blocked.
- Terminal Velocity: You do 0 damage while not moving.
- Framecurse Syndrome: Activating an Ability inflicts 50 damage upon you.
- Knifestep Syndrome: Lose 2 Health when moving. Jumping pauses the effect.
- Energy Exhaustion: Lose 2 Energy per second for each enemy within 10 meters of you.
- Ammo Scarcity: Ammo depletes steadily. Battery weapons recharge slowly.
- Exposure Curse: Shields are removed.
- Sanguine Syndrome: Every time you take damage, you also suffer a Bleed Status Effect.
- Vampyric Syndrome: Lose Health every second. Killing enemies restores Health.
- Conductive: Take Electrical damage every few seconds.
Mission Deviations & Risk Variables
Each Deep Archimedea mission has its own Deviation and Risk Variable - modifiers which make these missions substantially more difficult. Each individual Elite Archimedea mission also has their own additional Risk Variable to contend with.
Deviations
Deviations live up to their name - they deviate from the bounds of a standard mission type, forcing new strategies to adapt to their conditions. They are variations of mission elements you may already be familiar with, designed to keep even the most experienced Tenno on their toes.
Here is the list of all of the possible Deviations:
- Necramech Influx: Necramechs appear with greater frequency.
- Fissure Cascade: Fissures rip into the mission, causing the Enemy Level to go up by 1 every 10s. Destroy them to stop the level from *increasing further.
- Damage Link: Enemies within 10m of each other form a Damage Linked group. Any damage done to an individual is distributed evenly to the entire linked group.
- Sealed Armor: Enemies take 90% less damage from non-weak point hits.
- Weak points will be highlighted with this Deviation active.
- Parasitic Towers (Survival): Life Support Towers only activate after 20 enemies have been killed within a 15m radius of them.
- Hostile Support (Survival): The Life Support Tower delivery system is disabled. Necramechs spawn every 90 seconds, and drop 6 Life Support Modules when killed.
- Hazardous Areas (Survival): Activate Life Support Towers to clear Hazardous Areas for your squad.
- Hazardous Goods (Alchemy): Amphors will inflict their associated elemental damage while being carried.
- Alchemical Invulnerability (Alchemy): 10% of enemies are equipped with an impervious Elemental Barrier that can only be destroyed by an Amphor of the corresponding element.
- Eximus Amphora (Alchemy): Eximus units always drop Amphor but they are the only units that drop them.
- Eroding Senses (Mirror Defense): The Auricle and Vitreum take damage over time, collecting the required Vosphene Glyphs will halt the degradation and partially heal them.
- Glyph Inflation (Mirror Defense): The security system requires twice as much Vosphene Glyphs to activate.
- Glyph Trap (Mirror Defense): Some Vosphene Glyphs are booby trapped with a portal that Teleports those that touch it 250m away. After the portal is revealed it lasts 45s.
- Radioactive Breakdown (Mirror Defense): All enemies are invulnerable and can only take damage when they are inflicted with Radiation Status. Chryrinka Pillars appear randomly and inflict Radiation Status.
- Barbed Glyphs (Mirror Defense): Each Glyph inflicts a small amount of damage when collected.
- Coordinated Front (Assassination): Eximus units support The Fragmented Tide and its final form.
- Relentless Tide (Assassination): The Fragmented Tide never stops attacking.
- Angelic Cohort (Assassination): Void Angels fight alongside the final Fragmented form.
- The Fragmented Two (Assassination): Face two Fragmented forms in the final battle.
- Engorged Gruzzlings (Disruption): All Gruzzlings are Eximus.
- Parasitic Conduits (Disruption): A Conduit's timer is paused unless a player is within 10m, more players in range will accelerate the timer. Conduits will slowly drain the shields of any players in range.
- Double Demolishers (Disruption): Two Necramech Demolishers will attack any Conduit, but their health is reduced.
Risk Variables
Risk Variables are more focused on enemies and weapons, designed to make the endless waves of enemies more merciless than ever before. Tenno will want to check Risk Variables before diving into a Deep Archimedea to ensure they’re prepared for whatever lies in front of them.
Here is a list of all of the possible Risk Variables:
- Hostile Regeneration: Enemy health slowly regenerates.
- Vampyric Liminus: Slow moving, immortal, Duviri Liminus drain Health and Energy from allies who get too close.
- While immortal, they are affected by CC effects. They also deal increased damage to players with Overguard.
- Adaptive Aberrations: Enemies gain resistance to Elemental Damage that has been inflicted upon them. Resistance is lost if no damage is *taken from that element for 5s.
- Bolstered Belligerents: All enemies have Overguard equal to 50% of their max health.
- Ranged Engagements: Only enemies with ranged attacks are present.
- Close Quarters: Only enemies with melee attacks are present.
- Fortified Foes: Guardian Eximus units may be encountered, including Guardian Eximus Necramechs.
- Myopic Munitions: Enemies will only take damage if a player is within 15m of them.
- Postmortal Surges: Slain enemies burst with Void energy.
- Elemental Potency: Enemies deal +100% Elemental Damage and have +85% resistance to Elemental Damage.
- Eximus Reinforcements: Additional Eximus units will be deployed.
Additional Endless Mission (Survival & Mirror Defense) Mechanic : Reduce Mission Timer Summoning and defeating a Rogue Necramech Eximus unit will reduce the mission timer by 45 seconds of Survival and Mirror Defense missions. To summon a Rogue Necramech, locate the dispensers that Rogue Culverins use to summon Rogue Necramechs in Albrecht’s Laboratories missions. Interact with the terminal there to summon a Rogue Necramech unit. There is a 50% chance that the unit spawned is an Eximus! Once you have used a terminal, all Necramech dispensers are put on a 60 second cooldown.
Elite Archimedea
For the truly courageous Tenno, Elite Archimedea is standard Deep Archimedea cranked up to 11, with increased enemy levels and an additional Risk Variable per mission.
How to unlock and Enable:
Completing all 3 Deep Archimedea missions with a Research Points of 25 or higher will unlock Elite Archimedea permanently. From the Deep Archimedea screen, it’s as easy as selecting the “Elite Archimedea” button to enable it.
Research Points & Rewards
Players can earn up to 5 Rewards (plus resources) each week from Deep Archimedea, depending on their total Research Points. 3 Rewards are available from Deep Archimedea, while all 5 are available from Elite Archimedea should players be up to the challenge.
Rewards from each Reward Pool can only be earned once per week, so the only way to earn more rewards is to increase your possible Research Points before heading into your missions.
Research Points:
Research Points determine the rewards that are granted at the end of each successful Deep Archimedea mission. They can be increased by enabling Individual Parameters and Elite Archimedea.
While Deep Archimedea can be attempted an unlimited number of times in a week, Research Points do not stack across attempts. In other words, each attempt is independent from the previous. Rewards are earned based on the singular attempt at hand, not the sum of your attempts over the week.
- Completing all 3 missions of a Deep Archimedea awards 3 Research Points.
- Completing all 3 missions of an Elite Archimedea awards 10 additional Research Points, for a total of 13.
- Elite Archimedea is unlocked after completing a Deep Archimedea with at least 25 Research Points, which requires players to complete Deep Archimedea with all Individual Parameters enabled.
- Each Research Modifier adds an additional 1 Research Point per mission, for a maximum of 24 bonus Research Points earned by completing all 3 missions with every Individual Parameter enabled.
- The maximum number of Research Points possible is 37 (13 from Elite Archimedea, 24 from Individual Parameters).
Reward Pools:
Enabling Elite Archimedea and all Individual Parameters gives a maximum of 37 Research Points for unlocking rewards! There are five Reward Pools that can be unlocked via Research Points, and three additional resource bundles. These Reward Pools have their drop tables spread across three different tiers: Silver, Gold, and Diamond.
Silver Rewards
These rewards share their reward pool with Netracells, so obtaining both Silver Rewards is just like you had used your 2 Search Pulses to take on 2 Netracells.
NOTE: The Netracell Drop Tables were changed with Dante Unbound, so the following list is the newly updated list of rewards. There’s a full breakdown of what exactly changed in the “Netracell Drop Table Changes” section of the Dante Unbound patch notes.
- Crimson Archon Shard
- Azure Archon Shard
- Amber Archon Shard
- Melee Arcane Adapter
- Melee Crescendo
- Melee Duplicate
- Tauforged Crimson Archon Shard
- Tauforged Azure Archon Shard
- Tauforged Amber Archon Shard
Silver Rewards are available at 5 and 10 Research Points, which means the minimum to receive them is:
- 5 Research Points: Complete all 3 Deep Archimedea missions with 1 Individual Parameter enabled.
- 10 Research Points: Complete Deep Archimedea with at least 3 Individual Parameters or Elite Archimedea enabled.
Entrati Lanthorn Bundle
Completing a Deep Archimedea run with at least 15 Research Points will earn you a bundle of 15 Entrati Lanthorns.
- 15 Research Points: Complete Deep Archimedea with at least 4 Individual Parameters or Elite Archimedea enabled.
Gold Rewards
These rewards contain the same items as the Silver Rewards, but with improved drop chances for the rarest rewards! The chance of receiving a Melee Arcane Adapter is reduced, resulting in an increase to the Melee Crescendo and Melee Duplicate Arcane drop rates. Additionally, Archon Shards are twice as likely to be Tauforged compared to the Silver Rewards!
NOTE: The Netracell Drop Tables were changed with Dante Unbound, so the following list is the newly updated list of rewards. There’s a full breakdown of what exactly changed in the “Netracell Drop Table Changes” section of the Dante Unbound patch notes.
- Crimson Archon Shard
- Azure Archon Shard
- Amber Archon Shard
- Melee Arcane Adapter
- Melee Crescendo
- Melee Duplicate
- Tauforged Crimson Archon Shard
- Tauforged Azure Archon Shard
- Tauforged Amber Archon Shard
Gold Rewards are available at 20 and 31 Research Points, which means the minimum to receive them is:
- 20 Research Points: Complete Deep Archimedea with at least 6 Individual Parameters or Elite Archimedea enabled.
- 31 Research Points: Complete Elite Archimedea with at least 6 Individual Parameters enabled.
Vosfor Bundle - Exclusive to Elite Archimedea
Completing a Deep Archimedea run with at least 28 and 37 Research Points will earn you 20 Vosfor (28 Points) and 50 Vosfor (37 Points).
- 28 Research Points: Complete Elite Archimedea with at least 5 Individual Parameters enabled.
- 37 Research Points: Complete Elite Archimedea with all Individual Parameters enabled.
Diamond Reward - Exclusive to Elite Archimedea
This final reward is the absolute best, guaranteeing either a Tauforged Archon Shard or a Legendary Melee Arcane (Melee Crescendo, Melee Duplicate)!
The Diamond Reward is available at 34 Research Points, which means the minimum to receive the reward is:
- Complete Elite Archimedea with at least 7 Individual Parameters enabled to reach 34 Research Points.
- Fixes:
- Fixed a stray out-of-bounds volume partially sticking out of a staircase in the Albrecht’s Laboratories tileset. This caused the screen to go black while traversing over this particular spot.
- Fixed issue with enemies spawning into the ground in a specific room in the Albrecht’s Laboratories tileset.
- Fixed the “Entrati Crystal” fixture in the Albrecht’s Laboratories tileset not being localized.
Hotfix 35.5.2 (2024-03-28)
- Fixed issue where Lohk Surges spawned in the same room could have the same buff. The buffs will now be more randomized!
- Fixed a teleport volume in the Albrecht’s Laboratories tileset spawning players out of the map.
Update 35.5 (2024-03-27)
- ALBRECHT’S LABORATORIES CHANGES
Albrecht’s Laboratories Tileset Expansion!
Several new tiles (roughly 15!) have been added to the Albrecht’s Laboratories tileset! Explore new passageways, rooms (maybe even some secret ones), and more with this environment expansion.
One of the tiles was featured in the Warframe: 1999 TennoCon 2023 demo, first one to find it gets bragging rights.
The new tiles also feature the GI lighting and volumetric fog systems, to create a more realistic feel as you navigate through the new areas of this Entrati labyrinth.
New Somachord Tones
New Somachord Tones have been added to Albrecht’s Laboratories! Scanning them will unlock the following Whispers in the Walls tracks for your Orbiter’s Somachord:
- Murum Vull
- No God Above Knowledge
- Platform 7
- Sanctum Anatomica
- See It In The Flesh
- The Fragmented
- Vashtav
- Yara Jeliira
- The Master Returns
- Netracell Drop Table Changes
In the same vein as the above change to make Archon Shards more accessible, we’ve made the following changes to the Netracell Drop Tables.
1. Removed all non-Legendary Arcanes (as listed below)
- Melee Exposure
- Melee Animosity
- Melee Retaliation
- Melee Influence
- Melee Vortex
- Melee Fortification
2. Adjusted drop rates in light of the removal of the above Arcanes
Overall the majority of the rewards have had their drop rate increased by roughly ~40-50%, with the exception of the Melee Arcane Adapter which has been slightly reduced to accommodate for the increased rates for Archon Shards and Legendary Arcanes.
Here are the new drop rates for each reward:
- Crimson Archon Shard - 17.50% (was 9.17%)
- Azure Archon Shard - 17.50% (was 9.17%)
- Amber Archon Shard - 17.50% (was 9.17%)
- Melee Arcane Adapter - 15% (was 20%)
- Melee Crescendo - 10% (was 5.62%)
- Melee Duplicate 10% (was 5.62%)
- Tauforged Crimson Archon Shard - 4.17% (was 2.50%)
- Tauforged Azure Archon Shard - 4.17% (was 2.50%)
- Tauforged Amber Archon Shard - 4.17% (was 2.50%)
The Official Warframe Drop Tables have also been updated with the above changes!
General Albrecht’s Laboratories Changes & Fixes:
- Fixed the Albrecht’s Laboratories Bounty drop information missing from the Official Warframe Drop Tables.
- Added new animations to Murmur faction enemies so that they react to Limbo’s Stasis, Rhino’s Stomp, and Mag’s Crush abilities.
- Yareli will now be automatically dismounted from Merulina when injecting Atropos Probe to the Vitreum scanners.
- Weapons will now be hidden during the animation to inject the Atropos Probe into the Vitreum scanner.
- Crucibles in Alchemy missions will now dissolve in/out instead of just spawning/despawning out of thin air.
- Rebalanced The Hollow Vein and The Anatomizer to be less of a bullet sponge, and made The Anatomizer pose more of a threat in missions.
- Reduced the total health values of these foes to make them easier to take out, especially for Eximus variants. Their large health pool was in place to help their survivability since they have no Shields or Armor, but the result was a little too tanky for our liking.
- Increased the attack frequency and grenade area of effect for The Anatomizer to make it a more active presence in battle. Also slightly increased the range at which it will engage with players.
- Also fixed Anatomizer being self-staggered by their own grenades.
- Fixed The Hollow Vein’s beam attack damage being tied to frame rate (damage per frame).
- The higher the frame rate, the more damage it dealt. So we’ve decoupled it from frame rate and given it a defined tick rate to prevent this from happening.
- The Hollow Vein is now vulnerable to Warframe abilities, staggers, and knockdowns.
- This enemy is already fairly strong and the resistances it had were mostly invisible to players, which made it even more difficult to deal with.
- Rogue Bonewidows can now be spawned into Albrecht’s Laboratories by Rogue Culverins. Meaning, there is now a 50/50 chance that either a Rogue Voidrig or Bonewidow spawns (and an additional chance for them to be Eximus units as well).
- Enemy Bonewidows have also been reworked!
- Fixed the Anchorhold door in Netracell missions not opening if Host migration occurred after it was hacked but not triggered to open, leaving the returning players unable to start the mission.
- Fixed Steel Path missions started via the Sanctum Anatomica Elevator not spawning Acolytes.
- Fixed Sentinels breaking open Murmur Sarcophages not counting towards the “Find X Murmur Sarcophages” Bounty challenge.
- Fixed the containers in Persto (Deimos) not dropping Life Support Capsules.
- Fixed Voca pickups not counting towards the “The Hunt is On” Nightwave Act and the “Find X Syndicate Medallions” Riven Challenge.
- Fixed Murmur faction enemies who could not be disarmed not taking damage from Disarming abilities (ex: Loki’s Radial Disarm).
- Fixed the Anatomizer being able to be disarmed (ex: Loki’s Radial Disarm).
- Since the Anatomizer only has a ranged attack, when it is disarmed it has no way to melee attack as a fallback, so it is no longer affected by disarming abilities/attacks.
- Fixed Netracells having the incorrect enemy level if a Cambion Drift bounty is started before speaking to Tagfer.
- Fixed Mocking/Scathing Whisper getting killed along with the rest of the enemies when the alert level hits 0% in Netracell missions.
- Fixed Lumbering and Shuffling Fragments never ending up in Grendel’s belly and instead completely despawning when Feast is cast on them.
- This was caused by a lack of recovery animations on these enemies, which we have now added! With that, they can also now be properly Regurgitated.
- Known issue: They do not have any velocity to them when Regurgitated and will spawn back on top of Grendel when cast.
- Fixed a crash when walking up to Loid in the final stages of the Whispers in the Walls Quest.
- Fixed script error caused by aborting during the stage of the Whispers in the Walls Quest where you first pick up the Grimoire.
- Fixed a random wall from the Albrecht’s Laboratories tileset appearing in unintended locations, causing holes in the map.
- Fixed Mocking/Scathing Whisper stretching weirdly in reaction to Warframe abilities.
- Fixed Rogue Culverins not firing at players while readjusting positioning.
- Fixed Tagfer missing his specific voice lines to react to you accepting or rejecting the Netracell mission.
- Fixed Host using the wrong throwing animation to toss Amphors at Crucibles in Alchemy missions after Host migration.
- Fixed interacting with and exiting the POM-2 terminal in the Sanctum Anatomica triggering Parazon Mods.
- Fixed Atropos Probe stands not updating their light from green to red if picked up by Yareli while riding on Merulina.
- Fixed Atropos Probes not appearing in Yareli’s hand for several seconds after if picked up while she’s riding on Merulina.
- Fixed being unable to throw Alchemy Amphors while riding Merulina.
- Fixed throwable items (ex: Voidrig’s Necraweb Canister) missing their arch projection/trajectory preview lines in certain areas of the Albrecht’s Laboratories tileset.
- Fixed an issue where you would need to relog or run a mission after completing The New War Quest to access the inbox message that unlocks the Whispers in the Walls Quest.
- Fixed more instances where the Heat Vents in Alchemy missions would spawn very far away from players.
- Improved how tiles in Albrecht’s Laboratories are randomized to prevent cases where certain tiles would never appear.
- OMNIA VOID FISSURES
A new type of Void Fissure is available! Found on Star Chart nodes previously untouched by Void Fissures, the new Omnia Fissure allows Tenno to crack Lith, Meso, Neo, or Axi Relics - whatever they choose!
There is one Omnia Fissure available at all times on both standard and Steel Path difficulties. Tenno must have access to the respective node on the Star Chart in order to access the correlating Omnia Fissure, including any Quests necessary for the node:
- Whispers in the Walls Quest for Albrecht’s Laboratories
Omnia Fissures can be found on:
- Albrecht’s Laboratories: Cambire (Alchemy)
- Albrecht’s Laboratories: Persto (Survival)
- STEEL PATH ADDITIONS
The Steel Path: Cavia Bounties
The Steel Path is now available for Cavia Bounties. Accessing the Steel Path variants is possible through a selection UI when speaking to a Bounty Giver.
How to change Bounty difficulty:
When interacting with a Bounty giver, select “Bounties” and change the difficulty at the top left of your screen, below your rank and Daily Standing Cap.
With Steel Path Bounties, you’ll earn 50% more Standing from The Cavia bounties!
As always, you’ll find many similarities between these Bounties and other Steel Path missions across the Origin System. Enemies are tougher and higher-level, you’ll earn one guaranteed Steel Essence upon Steel Path Bounty completion, and the Acolytes will “torment” you within Albrecht’s Laboratories Steel Path Bounties.
- Steel Path Incursion Expansion: Albrecht’s Laboratories
Steel Path Incursions are a familiar feature in the Origin System, with five Star Chart nodes being chosen each day that reward an additional 5 Steel Essence each on completion. With Dante Unbound, an additional sixth Incursion will make an appearance daily.
This new addition will work the same as existing Incursions, but will only appear within Albrecht’s Laboratories, meaning a daily incursion will always be on one of these Tilesets. The existing five Incursions will not see any changes and will not appear on Albrecht’s Laboratories nodes.
- GENERAL FIXES
- Fixed a script error caused by Vitriol Phials in Albrecht’s Laboratories.
- Fixed players getting a downed/revived UI message when a squadmate’s Necramech exploded in Albrecht’s Laboratories.
Update 35.1 (2024-02-20)
- Enemies hit with Amphor’s AOE will now count towards the “Hit Enemies with X Amphor” Alchemy Bounty Challenge.
- Previously, the challenge required a direct hit to count as progress towards the challenge, so we made it much more forgiving. In light of this change, we have slightly increased the required amount of enemies needed to hit to complete the challenge now that it is easier to gain progress:
- Low tier Bounty: From 5 to 6
- Mid tier Bounty: From 10 to 12
- Higher tier Bounty: From 15 to 18
- Previously, the challenge required a direct hit to count as progress towards the challenge, so we made it much more forgiving. In light of this change, we have slightly increased the required amount of enemies needed to hit to complete the challenge now that it is easier to gain progress:
- Vitreum scanning duration now scales according to squad size in the Effervo Assassination mission:
- Solo player: 30 seconds
- Two players: 27 seconds
- Three players: 24 seconds
- Full squad: 20 seconds (this was the original duration for all squad sizes prior to this change)
- Removed the “Find X Murmur Sarcophages” challenge from Alchemy Bounties.
- There was an issue with not enough Sarcophages spawning in Alchemy Bounties, making it impossible to complete the challenge, so it has been removed.
- Added an eyelid to the Vitreum that reacts based on its various scanning states.
- Fixed only 3 Acolytes spawning in total during Steel Path Alchemy missions.
- They will now continue to spawn in intervals as they usually do in endless mission types.
- Fixed the maximum number of Vitreums that can be activated simultaneously in the Effervo Assassination mission not scaling based on Squad size if started from Sanctum Anatomica’s navigation.
- Fixed Netracell Keyglyphs equipping onto the player closest to the terminal instead of the player that actually selected it.
- Fixed Clients seeing Keyglyph names in the Host’s language instead of their own in the pop-up that occurs when picked up.
- The Netracell search radius will now gradually shrink rather than suddenly jump after hacking the Pom-3 terminals.
- Repositioned and condensed the Netracell objective text so that it takes up less screen space.
- Fixed Exhaustion Keyglyph’s Energy drain causing the Sanguine Keyglyph to trigger and deal Bleed Status in Netracell missions.
- Fixed Host migration causing the next round of pressure vents in Alchemy missions to spawn far from the Crucible’s location.
- Fixed Clients switching to their Primary weapon after throwing an Amphor in Alchemy missions instead of their Secondary if they had it equipped upon picking up the Amphor.
- Fixed another section in the Netracell being accessible and bypassed by Titania in Razorwing.
- Fixed enemies continuing to spawn outside of The Fragmented’s arena (Effervo, Assassination node) after Host Migration.
- Fixed Murmur Eyes visually lingering after killing their Hurling Fragments with damage over time effects at the same time they expire.
- Slight timing tweak to when the audio transmission plays after hacking the terminal in the Persto, Deimos Survival mission.
- Made tweaks (pacing, repeat frequency, etc.) to the audio transmissions in the Deimos Assassination (Effervo), Alchemy (Cambire), and Netracell missions.
- Made an extremely minor tweak to Eximus units spawn timing in Alchemy missions so that they spawn a tad faster.
- Fixed lighting issue that would cause the depth fog to pop randomly in Albrecht’s Laboratories.
Hotfix 35.0.9 (2024-01-17)
- Fixed the map search radius for Necramite Drones not appearing in Netracell missions (including the Whispers in the Walls Quest stage).
- Fixed the “kill enemies to lower security level” radius marker in Netracell missions spawning very far from the Security Matrix.
- Fixed heat vents in Alchemy missions spawning very far from players.
- Fixed Mocking Whispers becoming indefinitely invulnerable after using its Exalted Bladestorm attack and hitting a Revenant player that has Mesmer Skin active.
- Fixed Murmur Sarcophages becoming unbreakable after Host Migration.
- Fixed Bounty objectives appearing in Netracell missions after starting a Netracell from the Sanctum Anatomica while the Bounty vote is active.
- Fixed Clients not hearing the alarm during the “kill enemies to lower security level” stage of the Netracell mission.
- Fixed the sound FX for the doors in the Sanctum Anatomica and a vent wall in the Labs being out of sync with their animations.
- Tweaked the Vitreum seeking alarm sound FX duration in the Assassination, Effervo mission to match the pulsing VFX.
- Improved the balance between sounds that occur when opening the Netracell.
- Fixed certain Vitriol Phials having mesh scaling issues with their puddles.
- Fixed the Operator’s head doing a 180 twist while placing an Atropos Prove into a Vitreum in the Assassination, Effervo mission.
Hotfix 35.0.8 (2024-01-11)
- Fixed a script error caused by Necramech summon terminals.
Hotfix 35.0.7 (2024-01-09)
- Improved spawn rates of The Anatomizer and The Severed Warden enemies in Alchemy Bounties. Particularly to address the issue of being unable to complete the “Kill X Flying Enemies” Bounty Challenge.
- Fixed individual Focus School Eidolon Lens Blueprints being rewarded in Rotation C of the Survival, Persto mission instead of the intended Eidolon Lens Blueprint.
- Each individual Lens Blueprint had a drop rate of 10% for each type, so we have adjusted the drop tables to compensate for this change by increasing the drop rate for the Eidolon Lens Blueprint and the Mandonel Barrel and Receiver. More details in the public drop tables.
- Fixed cases where Rogue Voidrigs would not spawn/be marked on the map.
- With this fix, the “Kill 2 Rogue Voidrigs” Bounty Challenge has been re-enabled! It was disabled in Hotfix #2, as the above issue was preventing Bounties from being completed.
- Fixed case where Rogue Voidrigs would suddenly teleport to a different location after being spawned by a Rogue Culverin.
- Fixed Rogue Culverins’ animations popping while spawning a Rogue Voidrig.
- Fixed the map search radius for Necramite Drones not appearing in Netracell missions (including the Whispers in the Walls Quest stage).
- Fixed reward containers in the Netracells having different Codex entries.
- Fixed breaking a Murmur Sarcophages counting as more than one towards the “Find X Murmur Sarcophages” Bounty challenge.
- Fixed hitches occurring after hacking a Necramech summon terminal.
- Fixed the maximum number of Vitreums that can be activated simultaneously in the Assassination, Effervo mission not scaling based on Squad size.
- Fixed damage type icons appearing next to the “Vitreum Seeking” UI in the Assassination, Effervo mission instead of “A, B, C…” to indicate which Vitreum is active and where.
- Fixed Murmur Eyes not despawning after its timer has run out in the Assassination, Effervo mission.
- Improved the accuracy of the direction in which broken furniture pieces will fly out when destroyed. We’re collectively keeping the Necramites employed with all this senseless furniture demolition.
Hotfix 35.0.4 (2023-12-20)
- Fixed Murmur Spawners leaving behind an incredibly bright light in Albrecht’s Laboratories missions.
- Fixed a wall clipping into the map on an Albrecht’s Laboratories tile.
Hotfix 35.0.3 (2023-12-18)
- Added Summon Necramech consoles to additional tiles in the Albrecht’s Laboratories tileset.
- Made improvements to performance in Albrecht’s Laboratories tileset by turning off destruction effects for items that are out of view.
- Fixes towards the doors to Albrecht’s Laboratories not opening after beginning Bounty/Mission from the Sanctum Anatomica.
- Fixed an unintended teleport volume in the Albrecht’s Laboratories tileset.
- Fixed Albrecht’s hands missing texture in the intro sequence of the Whispers in the Walls Quest cinematic.
- Fixed being able to skip the extraction cinematic in Albrecht’s Laboratories missions.
- Fixed Albrecht’s Laboratories nodes on the Star Chart being able to matchmake into Bounty variants of those missions.
- Fixed Rogue Necramechs in Albrecht’s Laboratories not having their intended Machinery health resistances.
Hotfix 35.0.2 (2023-12-14)
- Adjusted resource drop rates in Albrecht's Laboratories Entrati Coffers and Murmur Sarcophages to slightly decrease rates in more common crates, and increase rates in rarer ones.
- Fixed Stela having an unintentionally high drop rate on various Murmur enemies.
- Fixed players being unable to select Steel Path missions in the Sanctum Anatomica’s mission selection screen.
- Improved the way the Auto Breach Parazon Mod interacts with the new hacking terminals to make it clearer that had been used.
- Improved waypoint pathfinding in Albrecht’s Laboratories missions.
- Fixed Entrati Obols falling through the map.
- Fixed rewards earned during the Alchemy (Cambire, Deimos) not appearing in the mission progress screen.
- Fixed the reward pop-up after completing a round of Survival on Persto, Deimos not occurring. Also fixed the rewards not appearing in the End of Mission screen after extracting.
- Fixed Alchemy Crucible progress in the UI resetting and not tracking properly after Host Migration.
- Fixed multiple Crucibles appearing after Host Migrations in Alchemy missions.
- Fixed the ground rifts that Fragmented enemies crawl out from not appearing in non-quest Albrecht Laboratories’ missions while the quest is active.
- Fixed the explosion preview VFX for the Vitriol Phials not appearing in Albrecht’s Laboratories if the mission was started as a Bounty or from the Laboratory Navigation.
- This is a new feature that was released with Update 35 that allows you to see the explosion radius by hovering your reticle over the explosive item!
- Fixed rare care of tileset issues occurring (lighting and map holes) when transitioning between defense targets in the Mirror Defense (Munio, Deimos) mission.
- Fixed a script error in Assassination mission (Effervo, Deimos).
- Fixed several script errors from abilities cast by a certain bookbound enemy.
- Fixed the bookbound enemy’s avatar lingering after death.
- Fixed several script errors when extracting from Albrecht’s Laboratories missions.
- Fixed a map hole in the tileset.
- Fixed various minor map holes and a spot where players could get stuck in Albrecht’s Laboratories tileset.
- Fixed a crash in the missions.
Hotfix 35.0.1 (2023-12-13)
- Made adjustments to the pathing of the Necramite in the Albrecht’s Laboratories tileset.
Update 35.0 (2023-12-13)
- Introduced.