DAMAGE EFFICACY
x1.5 damage to Infested
x0.5 damage to Kuva Grineer
STATUS EFFECT
![]() Heat Damage is one of the four primary elemental damage types. Deals increased damage to Infested but reduced against Kuva Grineer. Its Status Effects ignites enemies with damage over time, causing them to panic and temporarily reduces Armor.
Heat Damage is one of the four primary elemental damage types. Deals increased damage to Infested but reduced against Kuva Grineer. Its Status Effects ignites enemies with damage over time, causing them to panic and temporarily reduces Armor.
Status Effects[]
General[]
The status effect of ![]() Heat damage is Ignite. It sets the enemy ablaze, which makes them panic, reduces their armor by up to 50% and, after a 1 second delay, deals a tick of damage every second for 6 seconds.
Heat damage is Ignite. It sets the enemy ablaze, which makes them panic, reduces their armor by up to 50% and, after a 1 second delay, deals a tick of damage every second for 6 seconds.
Enemies killed while under or by a ![]() Heat proc will be left in ashes, burning away shortly afterward.
Heat proc will be left in ashes, burning away shortly afterward.
Damage Over Time[]
Each tick deals ![]() Heat damage equal to:
Heat damage equal to:

- Notice that modded base damage calculation used for DoT is not the same as normal damage calculations, ignoring physical and elemental damage bonuses.

- Additional Multipliers include modded critical multiplier on Critical Hit and multipliers on Enemy Body Parts; these stack multiplicatively with each other.
For example, tick damage for a weapon with an innate 100 damage, ![]() Serration,
Serration, ![]() Hellfire, and
Hellfire, and ![]() Bane of Grineer will be:
Bane of Grineer will be:
- Modded Damage = 100 × (1 + 1.65) × (1 + 0.3) = 344.5
- Heat Mod Multiplier = (1 + 0.9) × (1 + 0.3) = 2.47x
- Tick Damage = 0.5 × 344.5 × 2.47 = 425.4575
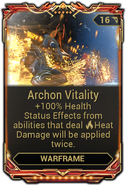
As can be seen in the above calculations for tick damage, Faction Damage is applied twice, making their effective bonus = (1 + Faction Damage bonus)2. This is a 1.30*1.30 = 1.69 or +69% increase for the 30% Faction Damage mods and 1.55*1.55 = 2.4025 or +140.25% for the 55% Primed Faction Damage mods.
| Time from initial proc | 0s | 1s | 2s | 3s | 4s | 5s | 6s | 7s |
|---|---|---|---|---|---|---|---|---|
| Tick damage occured? | ✗ | ✓ | ✓ | ✓ | ✓ | ✓ | ✓ | ✗ |
Heat Inherit and Repeated Application[]

Repeated application of ![]() Heat procs do not stack tick damage in the same way other damage over time (DoT) status effects like
Heat procs do not stack tick damage in the same way other damage over time (DoT) status effects like ![]() Toxin,
Toxin, ![]() Electricity, or
Electricity, or ![]() Slash do. Instead, a
Slash do. Instead, a ![]() Heat proc both adds a stack and refreshes the duration of all currently active heat stacks on the target. This allows for ramping up
Heat proc both adds a stack and refreshes the duration of all currently active heat stacks on the target. This allows for ramping up ![]() Heat tick damage indefinitely (scaling up linearly) as long as heat status is kept refreshed within the 6 second effect duration (modified by Status Duration). Additionally, all
Heat tick damage indefinitely (scaling up linearly) as long as heat status is kept refreshed within the 6 second effect duration (modified by Status Duration). Additionally, all ![]() Heat status stacks are automatically consolidated into one tick of damage per second, with new heat procs refreshing and further adding to this tick damage.
Heat status stacks are automatically consolidated into one tick of damage per second, with new heat procs refreshing and further adding to this tick damage.
Crowd Control[]
Enemies affected by a ![]() Heat proc are ignited in flames and will panic and flail around for a few seconds, preventing them from taking any other actions. The length of the panic animation depends on enemy type: approximately 4 seconds for humanoids, 3 for most Infested, and 2 for MOAs and Chargers, however Ospreys, Bosses and Tenno are immune, and their ability to act is not impeded. Repeated application of
Heat proc are ignited in flames and will panic and flail around for a few seconds, preventing them from taking any other actions. The length of the panic animation depends on enemy type: approximately 4 seconds for humanoids, 3 for most Infested, and 2 for MOAs and Chargers, however Ospreys, Bosses and Tenno are immune, and their ability to act is not impeded. Repeated application of ![]() Heat status will reapply the panic effect.
Heat status will reapply the panic effect.
Armor Stripping[]
The ![]() Heat status effect's armor strip has a ramp-up time when it first procs and a ramp downtime when the proc ends. Every 0.5 seconds after the initial proc, the enemy will have 15%, 30%, 40%, 50% of its armor stripped. It will therefore take 2 seconds to reach the maximum armor strip.[1] Proccing more heat status effects within this time frame will not speed up the armor stripping process.
Heat status effect's armor strip has a ramp-up time when it first procs and a ramp downtime when the proc ends. Every 0.5 seconds after the initial proc, the enemy will have 15%, 30%, 40%, 50% of its armor stripped. It will therefore take 2 seconds to reach the maximum armor strip.[1] Proccing more heat status effects within this time frame will not speed up the armor stripping process.
After the proc ends, the target will regain armor every 1.5 seconds for 6 seconds. The enemy's armor strip will decrease as follows: 50%, 40%, 30%, 15%, 0%. [2]
Status Duration mods will increase the time intervals for the armor strip as expected. For example, with +100% Status Duration, the armor strip will occur every second instead of every half second. As a result, the full 50% armor strip will only be achieved after 4 seconds.
![]() Heat status armor reduction is multiplicative with other armor reduction sources. This can be expressed as the following:
Heat status armor reduction is multiplicative with other armor reduction sources. This can be expressed as the following:
Armor after reduction = (1 - 50%) × [1 - (20% + 6% × Number of Corrosive stacks)] × (1 - 18% × Number Corrosive Projections)
Railjack[]
The status effect of ![]() Heat damage against Railjack space enemies is Sear, dealing 6 ticks of damage over 5 seconds. Against the Tenno's Railjack, it causes a Fire Hazard which causes ship armaments to overheat faster and cool down slower.
Heat damage against Railjack space enemies is Sear, dealing 6 ticks of damage over 5 seconds. Against the Tenno's Railjack, it causes a Fire Hazard which causes ship armaments to overheat faster and cool down slower.
Sear ticks deal 100% × Modded Damage × (1 + Heat Damage bonuses) as ![]() Heat damage. Unlike standard heat, each proc has an independent duration and is not refreshed by additional heat procs.
Heat damage. Unlike standard heat, each proc has an independent duration and is not refreshed by additional heat procs.
| Time from initial proc | 0s | 1s | 2s | 3s | 4s | 5s | 6s | 7s |
|---|---|---|---|---|---|---|---|---|
| Tick damage occured? | ✓ | ✓ | ✓ | ✓ | ✓ | ✓ | ✗ | ✗ |
Elemental Combinations[]
![]() Heat damage mods can be combined with other elemental mods to create a new elemental damage type.
Heat damage mods can be combined with other elemental mods to create a new elemental damage type.
Heat Sources[]
- Main article: Category:Heat Damage
Enemies[]
Mods[]
Abilities[]

|
 1 |
Fireball Charge and release a fiery projectile that ignites enemies on contact. Introduced in Vanilla (2012-10-25) |
50 / 100 / 125 / 150 ( |
|
Misc: 100% (
500% (Damage increase) |
Info
- Ember expends
 25 Energy to launch a fiery projectile that inflicts
  150 / 275 / 300 / 400
  Heat damage with a 100% status chance. On impact, the projectile explodes within a
  3 meter radius to inflict 50 / 100 / 125 / 150 Heat damage with a 100% status chance. Final damage is multiplied by 500%.
- Area damage affects the initial target, does not decrease with distance, and can also perform headshots.
- Fireball can be recast within a
 1.5 second window to perform a repeating combo chain. Each successive hit in the chain deals increasing damage by 2x to a cap of 8x.
- Damage increase from charging is additive to the increase from combo.
- Projectile has flight time and will continue to travel until it hits a solid object or enemy.
- Ability Synergy:
- Each cast of Fireball increases
 Immolation's heat generation by 1% per second.
 - Immolation increases Fireball's damage up to 300 / 550 / 600 / 800 impact and 100 / 200 / 250 / 300 at maximum heat.
- Each cast of Fireball increases
- Will not disrupt Shade's cloak.
- Casting Fireball is a One-Handed Action that allows the player to perform attacks, movement and parkour Maneuvers.
- Has a delay of 0.5 seconds between uses.
Augment
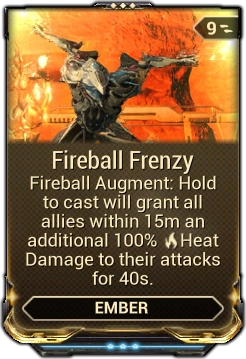
- Main article: Fireball Frenzy
Fireball Frenzy is a Warframe Augment Mod for ![]() Ember that allows
Ember that allows ![]() Fireball to, instead of charging, be held on cast, creating a wave of energy traveling outward from the user that temporarily grants the caster and nearby allies additional
Fireball to, instead of charging, be held on cast, creating a wave of energy traveling outward from the user that temporarily grants the caster and nearby allies additional ![]() Heat damage to all attacks.
Heat damage to all attacks.
Tips & Tricks
- Can be used as a cheap form of crowd control.
- Modding for high efficiency through the use of
 Fleeting Expertise can allow for this ability to be spammed, quickly building up the combo multiplier and damage over time.

|
 3 |
Fire Blast Slam the ground to create a wave of incinerating plasma that knocks back enemies and strips their armor. Introduced in Vanilla (2012-10-25) |
50-100% (armor reduction) |
|
Misc: 100% (
-50% (total heat removal for Immolation) | |||
| Subsumable to Helminth |
Info
- Ember expends 75 Energy to slam the ground, creating a wave of fire that expands outwards to a radius of 25 meters. Enemies that are on-screen or are in Line of Sight from Ember and within range are dealt 66 / 100 / 141 / 200 Heat damage with a 100% status chance, have their Armor permanently reduced by 50% - 100%, and suffer
 Knockdown and are violently pushed back.
- Armor reduction per cast is capped at 50% - 100%, achievable with 100% Ability Strength. As such only values below 100% will have effect.
- Hit detection consists of the following:
- An enemy that is visible on-screen will be hit.
- An enemy that has direct line of sight from Ember will be hit, even if off-screen.
- Armor reduction per cast is capped at 50% - 100%, achievable with 100%
- Ability Synergy:
- Each cast of Fire Blast decreases Immolation's rate of heat generation by 2% per second, while also removing 50% heat.
- Fire Blast's enemy armor reduction scales linearly with Immolation's heat level, with 0 percent heat resulting in the minimum value being removed and 100 percent heat resulting in the maximum.
- Fire Blast's energy cost decreases with Immolation's heat down to 25 energy cost at maximum heat.
- Each cast of Fire Blast decreases
- Has a cast delay of about 0.7 seconds.
- Subsuming Ember to the Helminth will offer Fire Blast and its augments to be used by other Warframes.
Augment
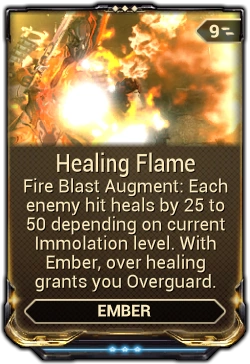
- Main article: Healing Flame
Healing Flame is a Warframe Augment Mod for ![]() Ember that heals the player for each enemy hit by
Ember that heals the player for each enemy hit by ![]() Fire Blast. Any healing received at maximum health will accumulate Overguard.
Healing Flame
Fire Blast. Any healing received at maximum health will accumulate Overguard.
Healing Flame
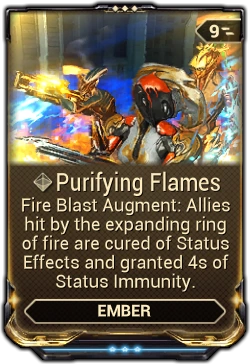
- Main article: Purifying Flames
Purifying Flames is a PvE and Conclave Warframe Augment Mod for ![]() Ember's
Ember's ![]() Fire Blast that causes Ember and her allies who enter the fire to have debuffs removed and grant them temporary status immunity.
Fire Blast that causes Ember and her allies who enter the fire to have debuffs removed and grant them temporary status immunity.
Tips & Tricks
|
 4 +10/enemy (max 10x) |
Inferno Command a flaming comet to crash down in front of ember, engulfing enemies with a fire that can spread through their ranks. Introduced in Update 26.0 (2019-10-31) |
200 - 400 / 350 - 500 / 300 - 600 / 350 - 700 ( |
5 m (ring radius) | |||
|
Misc: 10 (energy cost target cap)
100% ( 67.5° (targeting angle) |
Info
- Ember summons fiery meteorites to descend from above, crashing into all on-screen enemies at a 67.5° within 10 / 15 / 20 / 25 meters. On impact, enemies receive 1000 / 1500 / 2000 / 2500
 Impact and Heat damage distributed evenly, with a 100% Heat status chance. The enemies are then surrounded by a ring of fire for 7 / 10 / 12 / 15 seconds, which grows to a radius of 5m, dealing 200 - 400 / 350 - 500 / 300 - 600 / 350 - 700 Heat damage and status per second. The rings will spread to unaffected enemies caught in their radius, causing the newly affected enemies to suffer the Heat damage and status over time. Rings on newly affected enemies have their own fresh duration, independent of any other rings. Enemies can only be affected by a single ring per cast of Inferno, however will still take damage from the rings of other affected enemies.
- Ring radius growth rate is affected inversely by Ability Duration.
- Does not require Line of Sight from Ember; enemies only need to be within view of the camera to be affected.
- An enemy that has line of sight but is off-screen will not be hit.
- Ring radius growth rate is affected inversely by
- Inferno costs 0 energy to cast. If enemies are within range, it consumes 10 energy per enemy. Energy is consumed for at most 10 targets, for a total of 100 energy.
- While only consuming energy for up to 10 targets, Inferno will still target and drop a meteor on any number of targets. For example, if 20 enemies are hit by Inferno, at base Ability Efficiency only 100 energy is consumed.
- While only consuming energy for up to 10 targets, Inferno will still target and drop a meteor on any number of targets. For example, if 20 enemies are hit by Inferno, at base
- Damage from multiple casts does stack.
- Ability Synergy:
- Inferno raises Immolation's heat generation by 3% per second per cast.
- Inferno gains bonus damage in percent (%) equal to the current heat level, dealing double damage at max heat.
- Inferno raises
- Can be cast without any targets on screen.
Augment
- Main article: Exothermic
Exothermic is a Warframe Augment Mod for ![]() Ember that gives enemies affected by
Ember that gives enemies affected by ![]() Inferno a chance to drop Energy Orbs when killed.
Inferno a chance to drop Energy Orbs when killed.
Tips & Tricks
- If there are no enemies nearby casting Inferno will cost no energy, but will still increase the rate of heat generation, allowing you to reach max heat quickly.
- If you wish to build up heat quickly equipping Fleeting Expertise can be a good idea, as it will allow you to cast Inferno more often. Conversely, if you wish to build heat more slowly equipping Blind Rage would be ideal, as it allows for fewer, but more powerful, casts of Inferno.

|
 3 |
Prismatic Gem Deploy a gem that shoots prismatic beams. The gem targets enemies that are taking weapon damage from Citrine and her allies. Its beams inflict Heat, Cold, Toxin, and Electricity Status Effects. Status Chance and Status Duration increase for nearby allies. Introduced in Update 32.3 (2023-02-15) |
60 / 70 / 85 / 100% status chance |
60 / 70 / 85 / 100% status duration | |||
|
Misc: 5 m placement distance1 beam per ally0.4 s retarget delay∞ beam range4 primary elemental status on hit1 stack per status
1 gem limit |
Info
- Citrine expends 75 Energy to summon her Prismatic Gem, launching it forward horizontally for 5 meters from her location before it ceases movement. The Prismatic Gem is an untargetable Invulnerable floating object that lasts for 23 / 25 / 27 / 30 seconds, during which it emits a rainbow aurora spanning a radius of 10 / 12 / 13 / 15 meters.
- The gem object is not affected by gravity and remains intangible to other entities, allowing players, enemies, and their attacks to phase through it.
- When deploying, the gem slides above higher terrain elevation in its travel path and stops movement on collision with walls.
- Citrine can move the aiming reticle during the casting animation before she fully summons the gem, to push it forward to the desired direction.
- Prismatic Gem's rainbow aurora enhances Status Effect application from Citrine and her allies' weapons in various ways:
- Citrine and allied Warframes inside the aurora gain a 60% / 70% / 85% / 100% Status Chance bonus for their weapons, and 60% / 70% / 85% / 100% Status Duration bonus for both weapons and abilities.
- Status chance percentage bonus is displayed as a Prismatic Gem buff icon beside Citrine and her squadmates' hitpoints indicators. Status duration bonus remains hidden.
- While affected by status bonuses, Citrine and her allies are visually followed by burrowing mineral deposits that puncture through the horizontal surface directly below them. Movement causes the minerals to retract and re-emerge in response while creating digging sounds.
- When Citrine or her allies inside the aurora lands a weapon attack on an enemy, or when an enemy inside the aurora is hit by a weapon attack from Citrine or her allies from anywhere, the Prismatic Gem projects 1 light beam for each individual ally onto the targeted enemies. Each beam attacks 1 target then induces a 0.4 seconds delay before Prismatic Gem can generate another beam triggered by the same ally.
- Eligible allies include other Warframes, Companions, summoned allied units such as Specters, Air Support Charges or On Call Crew, allied Invasion units, Hostages, converted Liches and Sisters, Kavor Defectors, and Sortie and Arbitrations Defense Operatives.
- Prismatic Gem does not require line-of-sight with its target to strike them with its beams.
- Multiple consecutive hits from continuous fire, beam, and other rapid-fire weapons will allow the gem to focus its beams onto the same target.
- Multiple beams for different allies from the same Prismatic Gem may attack separate numbers of targets per second.
- Weapons with deployable extensions such as
 Azima and
  Zenistar trigger Prismatic Gem when the owner is standing in the aurora or when they hit enemies inside it.
- Each beam deals 4 hits in rapid succession per attack, dealing 500 / 650 / 800 / 1,000 Heat,
 Cold,
Cold,  Electricity, and then
  Toxin damage, with each hit proccing its respective damage type.
- The gem's beam possesses unrestricted range and bypasses all obstacles in the environment to strike its target.
- Ability Synergy:
- Enemies hit by
 Fractured Blast while Citrine is inside the Prismatic Gem's aurora will extend its Impact and
  Slash status duration, while the gem sweeps its beam to each impacted enemy individually in rapid succession to inflict one instance of damage and a set of status effects.
 - Prismatic Gem contributes kills and assists to increase
 Preserving Shell's damage reduction.
- Enemies hit by
- Can be recast while active. Only 1 gem may be active at once; recasting will remove the previous crystal and place a new one.
- Casting Prismatic Gem is a full-body animation that interrupts all movement, Maneuvers, and other actions.
- Ability is not dispelled when Citrine herself enters an ability nullification zone. The gem is destroyed when it enters an ability nullification zone or when Citrine falls out of bounds.
Tips & Tricks
- Greatly synergizes with Galvanized Aptitude, Galvanized Savvy, Galvanized Shot, and Condition Overload. Even weapons with low status chance will make highly effective use of these mods when used in the gem's range.
- Because of its ability to inflict status effects, Prismatic Gem synergizes well with some of the Archon mods such as Archon Continuity, Archon Flow, Archon Stretch and Archon Vitality.
- Synergizes well with status-activated weapon arcanes such as
 Primary Frostbite,
  Conjunction Voltage, and
  Cascadia Flare. These buffs will stack and refresh their duration each time Citrine or any of her allies cause Prismatic Gem to fire a beam at any target.
 - Prismatic Gem reacts to weapon attacks made by Companions, allowing for semi-automated gem beams within the companion's attack range.
- Equip a Sentinel with the continuous beam weapons (
 Artax,
  Cryotra,
  Tazicor, and
  Verglas), or high fire rate weapons (
 Burst Laser,
  Multron,
  Stinger, and
  Deth Machine Rifle) to maximize auto-target acquisition frequency by the gem.
 - Control the Sentinel's attack range by equipping targeting mods, such as
 Carrier's Striker (10 meters), Assault Mode (30 meters),
  Djinn's Thumper (60 meters), and
  Diriga's Calculated Shot (70 meters). Zoom mods such as Eagle Eye equipped on their weapon further extend this targeting range.
- Equip a Sentinel with the continuous beam weapons (
- In cooperative squads, deploy the gem near her allies to assist them with status bonuses and help Citrine secure assists and kills to sustain Preserving Shell's damage reduction. This is particularly useful whenever Citrine does not have line of sight to enemies from her position to fire her ranged weapon or use Fractured Blast to focus-fire the gem.
- Due to the sheer quantity of various damage per second from Heat, Electricity and Toxin status effects, Prismatic Gem excels at securing the lethal hit on enemies for Citrine.
- Due to the sheer quantity of various damage per second from
- Be cautious around destructible objects such as explosive and nitrogen canisters, as the
 Blast and Cold status effects are affected by Prismatic Gem's status duration buff.
- Greatly synergizes with
|
 1 +3/s |
Spectral Scream Exhale a deep breath of elemental destruction. Chroma's energy color determines the element. Introduced in Update 16.0 (2015-03-19) |
|
|
Misc: 100% (status chance)10 m (spread range)?% (stagger chance)90° (horizontal aim angle)
45° (vertical aim angle) |
Info
- Wielding mastery over the deadly elements, Chroma can selectively change his elemental alignment, by tapping the ability key to freely cycle the selection wheel between Heat, Electricity, Toxin, or Cold.
- Chroma's initial element once he enters a mission is determined by the primary emissive color in his Appearance customization; otherwise it will default to Heat.
- Chroma's initial element once he enters a mission is determined by the primary emissive color in his Appearance customization; otherwise it will default to
- Hold down the ability key (default 1 ) to expend 10 Energy to activate Spectral Scream. While active, Chroma holsters his weapons away and continuously exhales elemental energy in a cone 4 / 5 / 6.5 / 10 meters long that inflicts 200 / 250 / 300 / 400 Heat, Electricity, Toxin, or Cold damage per second with a 100% status chance and a ?%
 Stagger chance; each enemy hit directly by Spectral Scream's cone will also spread its ability effects via an elemental energy stream to one other enemy within 10 meters.
- Damage bypasses obstacles in the environment and does not decrease with distance.
- Damage type is based on Chroma's current elemental alignment which is determined by Chroma's emissive color.
- Spectral Scream's cone emits from Chroma's mouth, which changes direction based on where Chroma's model is facing (not the player camera) and can only be aimed within 90 degrees to each side and 45 degrees above or below Chroma.
- While Chroma cannot use his primary and secondary weapons with Spectral Scream active, he is still able to melee, cast abilities or maneuver just as freely.
- Spectral Scream drains 3 energy per second and will remain active as long as Chroma has energy. Spectral Scream will end if Chroma runs out of energy or if deactivated by holding down the ability key again (default 1 ).
- Chroma cannot replenish energy using
 Energy Vampire,
  Rally Point, Rift Plane's innate energy regeneration, Squad Energy Restores, Energy Siphon, Energy Nexus, Dreamer's Bond, and/or
  Wellspring while Spectral Scream is active.
 - Energy Orbs, Orokin Void Death Orb's energy restores, Rage, Hunter Adrenaline, Spellbound Harvest,
 Arcane Energize, and
  Emergence Dissipate's Energy Motes can still replenish Chroma's energy during Spectral Scream.
- Chroma cannot replenish energy using
- Ability Synergy:
- Elemental alignment determines the ability effects of
 Elemental Ward and the elemental damage type of
  Effigy.
 - Spectral Scream's damage can be boosted by the Fury aspect of
 Vex Armor.
- Elemental alignment determines the ability effects of
- The AoE cone is directed from the point of the animation as opposed to toward the crosshair. This means that diving rolls will divert the aim.
- A visual effect lingers after the cone of damage, dependent on element.
Augment
- Main article: Afterburn
Afterburn is a Warframe Augment Mod usable in both PvE and Conclave for ![]() Chroma's
Chroma's ![]() Spectral Scream that launches a single damaging elemental attack upon deactivating the ability.
Spectral Scream that launches a single damaging elemental attack upon deactivating the ability.
Tips & Tricks
- This ability can come in handy when used as a form of Crowd Control and can both be used as a damage ability, or with Heat or Electricity elemental damage creating a continuous crowd control stun.
- This ability can be used to resist knockdowns, making it usable for walking through Corpus laser doors or shockwaves caused by MOAs or death orbs.
- Rolling can be used to counteract the movement speed reduction and cover a large area in a short period of time.
- Spectral Scream's conical area of effect can also break containers, as well as hazards such as explosive barrels. Regardless, increasing range, and having Elemental Ward active along with Spectral Scream will make it easier to clear rooms of containers.
|
 2 |
Elemental Ward Depending on Chroma's elemental alignment, an offensive area-of-effect is created. Chroma and his nearby allies are imbued with defensive energy. Introduced in Update 16.0 (2015-03-19) |
| ||||||||||||||
| Subsumable to Helminth |
Info
- Chroma expends 50 Energy to emit an aura of elemental energy, empowering himself and nearby allies within 6 / 8 / 10 / 12 meters for 10 / 15 / 20 / 25 seconds, providing both offensive and defensive buffs.
- Elemental Ward exhibits different effects depending on Chroma's current elemental alignment, determined by Chroma's primary emission color or the selected element of
 Spectral Scream.
- Generates a flame aura around Chroma and affected allies that increases base Health by 15% / 20% / 30% / 55% and inflicts 25 / 50 / 75 / 100 Heat damage per second within a radius of 5 meters with a 2% / 5% / 7% / 10% status chance. The radius of this damage effect is not increased with ability range.
- Infuses Chroma and affected allies with an electric current that increases base Shields by 10% / 15% / 20% / 30% and converts incoming damage into arc discharges. An arc discharge inflicts 250% / 300% / 500% / 1,000% incoming damage as Electricity damage to a single target within 5 / 6 / 8 / 10 meters with a 10% / 15% / 20% / 25% status chance. Arc discharges will inflict a minimum of 50 / 60 / 100 / 200 Electricity damage.
- The shield bonus stacks additively with base shield modifiers.
- A rank-3 Elemental Ward with Intensify and a maxed Redirection will increase Chroma's shield capacity to ⌊370 × (1 + 1 + 0.3 × 1.3)⌋ = 884.
- A rank-3 Elemental Ward with
- Arc damage bypasses obstacles in the environment.
- The final damage of an arc discharge is determined by the amount of shields and/or health lost by incoming damage. For example with a maxed Intensify, losing 100 shields from a single instance of damage will produce an arc that inflicts 100 × 10 × 1.3 = 1,300 Electricity damage at rank 3 to a single target as long as it's within range.
- Damage from environmental hazards can also be converted into arc discharges.
- Arcs can strike the same target multiple times, and arcs can be produced in quick succession should Chroma and allies receive multiple instances of damage that exceed the minimum threshold.
- The shield bonus stacks additively with base shield modifiers.
- Emits an aura of noxious fumes around Chroma and affected allies that increases base Reload Speed by 15% / 25% / 30% / 35%, as well as weapon damage when Holstering by 15% / 25% / 30% / 35% for ? / ? / 3 / 3 seconds. Within a radius of 5 meters, the noxious fumes also have a 25% / 35% / 40% / 50% chance per second to deal 5% of an enemy's maximum health as Toxin damage with a 100% status chance.
- The Toxin damage will only be applied to an enemy if it is not already affected by a Toxin proc, but can occur as soon as an existing Toxin proc expires. As such, its effect cannot stack with itself but can refresh itself every 7 seconds.
- Damage bypasses obstacles in the environment and does not decrease with distance.
- Encases Chroma and affected allies in a layer of frost that increases base Armor by 25% / 70% / 90% / 145% and creates an ice shield that reflects incoming gunfire back to its source. Reflected damage is increased by 150% / 200% / 250% / 300% and has a 10% / 15% / 20% / 25% status chance.
- The armor bonus stacks additively with base armor modifiers.
- A rank-3 Elemental Ward with Intensify and a maxed Steel Fiber will increase Chroma's armor to ⌊370 × (1 + 1 + 1.45 × (1 + 0.3))⌋ = 1,437.
- As with all other additive armor bonuses, Elemental Ward's bonus is applied before multiplicative armor bonuses.
- A rank-3 Elemental Ward with
- Incoming hitscan and non-hitscan projectiles are physically redirected after hitting Chroma. As such, obstacles in the environment can prevent reflected damage from hitting enemies.
- Hitscan projectiles are reflected directly to the source enemy regardless of distance from Chroma. Melee attacks are not reflected.
- Non-hitscan projectiles are reflected in the direction of the source enemy.
- Does not prevent damage to Chroma aside from the additional armor bonus and other damage reduction rules; Chroma will be hit normally before reflecting weapons fire.
- The armor bonus stacks additively with base armor modifiers.
- Elemental Auras of any type from two or more Chromas do not stack and only the first aura will apply its benefits as long as the player is within buff range. For example, two Heat auras do not increase damage nor health values, and possessing a Heat aura will negate receiving a Cold aura.
- Has a casting delay of 1 second. The animation interrupts movement and other actions.
- Elemental Ward cannot be recast while active.
- Elemental Ward does not work on Nekros' Shadows.
- Subsuming Chroma to the Helminth will offer Elemental Ward and its augments to be used by other Warframes. The Ward's effects are determined by the Warframe's primary emission color.
Augment
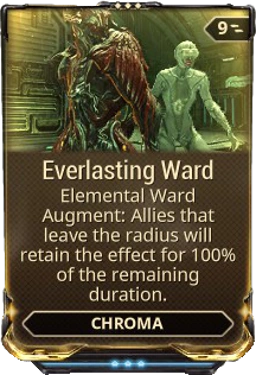
- Main article: Everlasting Ward
Everlasting Ward is a Warframe Augment Mod for ![]() Chroma that allows allies to retain
Chroma that allows allies to retain ![]() Elemental Ward's effects upon moving out of its range, lasting for a percentage of Elemental Ward's remaining duration.
Elemental Ward's effects upon moving out of its range, lasting for a percentage of Elemental Ward's remaining duration.
Tips & Tricks
- In a pinch, the bonus Health provided by the Ward can be used as a quick heal, as the Health granted is automatically added to your remaining health and is not reduced from your remaining health when Elemental Ward wears off.
- The Ward is capable of damaging containers and hazards, albeit fairly slowly. Combining Elemental Ward with Spectral Scream and range mods will make for a useful farming tool so long as you have the energy to maintain it.
- Can be used to great effect on Survival and Exterminate missions where enemies approach you from all directions and are often difficult to locate or target. At maximum Ability Strength, the damage reflected can easily finish off weaker enemies and potentially stun any survivors.
- Works very well with weapons that require you to reload frequently or have long reload times.
- Its damage increase is considered as a Universal base damage increase, same as Vex Armor and
 Arcane Arachne
 - Can reduce recharge delay for
 Cycron or a Kitgun equipped with
  Pax Charge, however, it does not affect recharge rate.
Bugs
- Allies who enter, leave, then re-enter the radius of Heat-oriented Ward will not regain the buff on the same cast of Elemental Ward. This results in an empty space where the bonus health should have been, even if they took no damage at all.
- This causes Medi-Ray and other healing abilities to attempt to heal the player, but if the player gets out of Elemental Ward's range, their health will return to normal again, wasting the health restored in the process.
- This causes
- The in-game UI shows the armor bonus from the Cold aura as a flat bonus rather than a percentage.
|
 4 +10/s |
Effigy Chroma turns his pelt into a massive sentry that strengthens nearby allies and engulfs enemies in elemental attacks. Introduced in Update 16.0 (2015-03-19) |
| ||||
Info
- Chroma expends 50 Energy to shed his outer pelt, imbued with elemental energy while sprouting wings and converting it into a stationary floating sentry with 1000 / 2000 / 4000 / 8000 Flesh health and 140 Ferrite Armor. The sentry will attack all enemies within 20 meters with a continuous stream of elemental energy, dealing 100 / 200 / 300 / 400 Heat, Electricity, Toxin, or Cold damage per tick with a ?% status chance at 5 ticks per second. If enemies come within 5 meters of the sentry, it will periodically unleash a radial knockback that inflicts 200 Heat, Electricity, Toxin, or Cold damage and
 Ragdoll. The sentry can also unleash a radial roar to temporarily stun all enemies within 30 meters.
- Damage type is based on Chroma's current elemental alignment, determined by Chroma's primary emission color or the selected element of Spectral Scream.
- Damage type is based on Chroma's current elemental alignment, determined by Chroma's primary emission color or the selected element of
- Enemies killed by the sentry have a 15% / 30% / 45% / 60% chance to drop additional credits. In addition, all credits that drop within 10 meters of the sentry yield 25% / 50% / 75% / 100% additional credits.
- For enemies killed by the sentry within the percentage credit bonus range, credit income is increased by an average of 43.75% / 95% / 153.75% / 220%. This assumes the credit chance on kill results in double credits from that enemy.
- While Effigy is active, Chroma can fight in his lightened form, gaining 20% movement speed but with a 50% armor reduction.
- The armor reduction is a multiplicative penalty that's applied to Chroma's total armor (e.g., with a maxed Steel Fiber and Intensify, Chroma with Vex Armor at full capacity will have his armor lowered to 350 × (1 + 1.1 + 3.5 × 1.3) × 0.5 = 1,163.75 when Effigy is activated).
- The armor reduction is a multiplicative penalty that's applied to Chroma's total armor (e.g., with a maxed
- Effigy drains 10 energy per second while active, and will deactivate if Chroma runs out of energy, sentry health is depleted, or if manually deactivated by pressing the ability key again (default 4 ).
- Channeling energy cost is affected by Ability Efficiency and Ability Duration.
- Chroma cannot gain energy from Energy Vampire, Rally Point, Rift Plane's innate energy regeneration, Squad Energy Restores, Energy Siphon, Energy Nexus, Dreamer's Bond, and/or Wellspring while Effigy is active.
- Energy Orbs, Orokin Void Death Orb's energy restores, Rage, Hunter Adrenaline, Spellbound Harvest, Arcane Energize, and Emergence Dissipate's Energy Motes can still replenish Chroma's energy while Effigy is active.
- Ability Synergy: Effigy's damage per tick and knockback damage can be boosted by the Fury aspect of Vex Armor.
- Effigy will only maintain the damage increase from Fury so long as Chroma's Effigy is within range of Vex Armor.
- Effigy will only maintain the damage increase from Fury so long as Chroma's Effigy is within range of
- When deactivated, Chroma can teleport his pelt from anywhere onto himself. This will stop movement and interrupt any action Chroma is doing, such as reloading, leaving a player vulnerable.
- When deactivated while sliding, Chroma's pelt will be reapplied to him without triggering the animation, even if the player immediately cancels his slide.
- Both the initial cast and the return of Chroma's pelt will cease any actions as they are a two-handed ability.
Augment
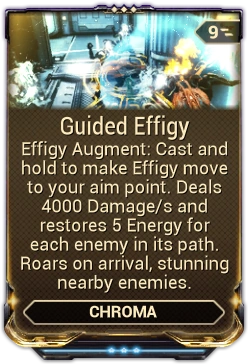
- Main article: Guided Effigy
Guided Effigy is a Warframe Augment Mod for ![]() Chroma's
Chroma's ![]() Effigy that allows him to control the Effigy, dealing rapid damage to enemies in its path while recovering energy and stunning enemies at the destination.
Effigy that allows him to control the Effigy, dealing rapid damage to enemies in its path while recovering energy and stunning enemies at the destination.
Tips & Tricks
- The pelt usually unleashes its roar a few seconds after deploying. This allows you to quickly deploy the sentry for a temporary stun to all nearby enemies.
- The pelt can be
 Banished, preventing damage from non-banished enemies while still being able to damage all enemies normally.
 - The pelt gains shields from the Shield Osprey Eximus Specter.
- As the pelt will not move from the spot it is cast on (unless the Guided Effigy mod is equipped), it would serve quite well as an impromptu turret. As such, it is recommended to place the pelt on top of an objective that needs to be defended such as in a Defense mission. If that is the case, then it is recommended to equip energy-regenerating mods such as Rage or Hunter Adrenaline to keep the pelt active for as long as possible.
|
 3 |
Thermal Sunder Siphon kinetic energy from the area, charging the battery and inflicting Introduced in Update 25.7 (2019-08-29) |
| ||||||||
| Subsumable to Helminth |
Info
- Gauss expends 50 energy to manipulate the kinetic energy around him to create an area of extreme temperatures with an initial radius of 6 / 8 / 10 / 12 meters, which gradually shrinks to a final radius of 3 / 4 / 5 / 6 meters and lasts for 6 / 9 / 12 / 15 seconds.
- Tap the ability key (default 3 ) to absorb kinetic energy, charging battery power by 10% to inflict a Cold proc on all enemies within range, lasting for 2.5 - 5 / 3 - 6 / 3.5 - 7 / 4 - 8 seconds based on battery. Enemies caught in the area creation receive 75 - 375 / 100 - 500 / 125 - 625 / 150 - 750 Cold damage based on battery with guaranteed Status Effect; enemies lingering inside the area also receive damage per second, which diminishes in amount with the size of the area. When cast on enemies already affected by Cold proc, they receive 9 additional Cold status procs to be instantly frozen solid for the full status duration.
- Hold down the ability key to expend kinetic energy, draining battery power by 10% to inflict a Heat proc on all enemies in range, lasting for a minimum duration of 2.5 - 5 / 3 - 6 / 3.5 - 7 / 4 - 8 seconds based on battery. Enemies caught in the area creation receive 150 - 750 / 200 - 1000 / 250 - 1250 / 300 - 1500 Heat damage based on battery with guaranteed Status Effect; enemies lingering inside the area also receive damage per second, which diminishes in amount with the size of the area. When cast on enemies already affected by Heat proc, Thermal Sunder deals its normal damage plus the damage of the current Heat proc[3].
- Damage per second has a moderate chance to stagger light enemy units within the area.
- Enemies already afflicted with a status effect of the same type will have it reapplied; its status duration uses the battery power level at the time of the new Thermal Sunder cast.
- Tap the ability key (default 3 ) to absorb kinetic energy, charging battery power by 10% to inflict a
- Casting Thermal Sunder of the opposite damage type on enemies already afflicted with Cold or Heat procs, combines the damage type into Blast. Affected enemies first have the initial status effect removed, receive the new status effect, they also receive a Blast proc and deals damage based on the mode being used plus the damage of the canceled status.
- Blast damage is given by :
- For example: Casting a Heat Thermal Sunder at 80% battery followed by a Cold Thermal Sunder at 70% battery with 6 seconds left on the Heat proc will deal: [300 + 0.8 * (1500 - 300)] * 6 + [150 + 0.7 * (750 - 150)] = 8,130 damage.
- The order in which the elemental procs are combined changes the direction in which enemies within the ability area are knocked back by the Blast proc. Casting Cold first then Heat will knock enemies outwards, while casting Heat first then Cold will pull enemies in towards the player.
- When casting both elements, the elemental proc cast second will override and replace the first element already present, e.g. if enemies were affected by the Cold area first, casting Heat proc on them will remove the Cold proc and replace it with Heat.
- Ability Synergy:
 Mach Rush through a Thermal Sunder area to add its Cold or Heat damage to Mach Rush's knockdown and shockwave explosion.
- Thermal Sunder gains bonuses to its status effects when
 Redline is active and above the redline battery charge (>80%):
- Cold mode applies 10 Cold status procs to instantly freeze enemies solid.
- Heat mode's damage is doubled. This doubling is applied after the bonus damage from active heat procs on a target, allowing consecutive casts to do double the previous cast's damage.
- The Blast proc permanently reduces enemy's current amount of armor based off of battery power level, up to a maximum of 100% with a full battery charge, before inflicting its damage.
- Armor reduction scales linearly from 0% armor reduction at 80% battery to 100% armor reduction at 100% battery.
- Can be recast while active to create new Cold or Heat sunder areas. Gauss may create up to 4 distinct areas of either element, resulting in only 8 total distinct areas active at once. Casting Thermal Sunder in a new area after reaching the maximum of Heat or Cold areas will remove the oldest area of corresponding element.
- Subsuming Gauss to the Helminth will offer Thermal Sunder and its augments to be used by other Warframes.
- The damage dealt by Subsumed Thermal Sunder is equivalent to 50% of Gauss's battery: 225 / 300 / 375 / 450 Cold damage and 450 / 600 / 750 / 900 Heat damage.
- However, the damage scaling from Heat status is capped to 10x of the ability's damage.
- The damage dealt by Subsumed Thermal Sunder is equivalent to 50% of Gauss's battery:

Augment
- Main article: Thermal Transfer
Thermal Transfer is a Warframe Augment Mod for ![]() Gauss's
Gauss's ![]() Thermal Sunder, increasing elemental damage for himself and allies within range.
Thermal Sunder, increasing elemental damage for himself and allies within range.

|
 4 |
Catalyze Catalyst Probes erupt from Lavos and douse combatants in a fiery gel. Damage is doubled for each element afflicting an enemy. Hold to imbue the next ability cast with Introduced in Update 29.6 (2020-12-18) |
1,000 / 1,500 / 1,750 / 2,000 (imbued elemental damage) |
15 / 18 / 20 / 25 m (maximum distance) | |||
|
Misc: 9 (number of probes)3 s (travel time)5 m (gel mist reach)
100 % (damage increase per status effect) |
Info
- Lavos materializes a satellite ring of 9 Catalyst Probes that fan out in all directions, traveling in a zigzag pattern at a speed of 8.33 meters per second for 3 seconds to reach a maximum distance of 15 / 18 / 20 / 25 meters before dissipating. Catalyst Probes are invulnerable and intangible flying devices that continuously spray a mist of highly flammable gel that extends 5 meters above and below the probes, to coat all enemies coming into contact. Enemies coated by the gel receive 1,000 / 1,500 / 1,750 / 2,000 Heat plus 1,000 / 1,500 / 1,750 / 2,000 Imbued Elemental damage and guaranteed status effects of both. Damage is further increased by 100% for each unique elemental Status Effect active on an enemy before being coated by the gel. Casting Catalyze triggers a cooldown of 30 seconds after the probes reach their maximum distance and expire.
- Damage is calculated by Damage = (Base Damage + Imbued Damage) × 2Unique Status Effects × (1 + Strength Mods)
- Proc damage is based on the portion of base/imbued damage. For example, imbuing Heat does not double the damage for each heat proc, it merely applies two procs.
- Proc damage is based on the portion of base/imbued damage. For example, imbuing
- Status effects of Physical damage types ( Impact,
 Puncture, and Slash), as well as
  Void,
Void,  Lifted, and
  Nukor's unique Microwave effect do not increase Catalyze's damage.
 - Catalyze's Heat and Imbued Elemental status procs are applied after the damage increase per status effect calculation.
- The remaining travel time for all probes is shown on the ability icon and must expire before the ability cooldown begins.
- Although the gel mist visual effect appears several meters in front of the Catalyst Probes, enemies must be passed over by the probes to be affected by the ability.
- Catalyst Probes only travel along the horizontal axis centered on Lavos' torso when the casting animation completes. Probes phase through all entities and obstacles in the environment as they travel.
- Damage is calculated by Damage = (Base Damage + Imbued Damage) × 2Unique Status Effects × (1 + Strength Mods)
- Ability Synergy:
- Hold down the ability key (default 4 ) to add Heat damage to Lavos' mixing vial at no cost, as the Imbued Elemental damage type for his next ability cast.
 Transmutation Probe reduces Catalyze's active cooldown for each enemy it electrocuted. If enemies were electrocuted during Catalyst Probes' flight time, the cooldown reduction carries over to Catalyze's cooldown.
- Each type of elemental status effects inflicted on enemies by weapons and abilities enhances Catalyze's damage.
- Hold down the ability key (default 4 ) to add
- Can be cast while in midair.
- Casting Catalyze is a full-body animation that restricts movement and other actions. Catalyst Probes will spawn from Lavos at the end of the casting animation.
- Nullifier Crewman and Isolator Bursa bubbles do not dispel Catalyst Probes on contact, but will protect enemies from the gel sprays within the spheres.
- Lavos visually summons the Catalyst Probes from his right hand, raising his arm from front to back while forming a crescent ring above him, then reaching out collecting the probes into an Ayatan-like formation before launching the probes out in all directions. Catalyst Probes appear as horseshoe in shape with a gel vial attached to the inside of the ring. Probes emit gel blobs and two jets of gel spray from their sides, while pushing a wall of energy-like mist in front of them as they slither forward through the air.
- Enemies hit by Catalyze emit a special fiery combustion visual effect as they catch on fire.
- Enemies killed by Catalyze leave residual energy particles that represent heat and the imbued elemental damage type.
- Catalyst Probes, gel blobs, sprays, mist, combustion, and elemental particles are affected by Lavos' Appearance colors.

|
 1 |
Fire Walker Blaze a trail of flames, scorching enemies and cleansing allies. Introduced in Update 18.1 (2015-12-16) |
500 / 750 / 1000 / 1250 ( |
5 / 6 / 7.5 / 10 s (flame duration) | |||
|
Misc: 15 / 15 / 20 / 25 % (movement speed bonus)0.5 s (damage interval)
10 / 25 / 50 / ? % ( ? s (flame ring duration) | |||
| Subsumable to Helminth |
Info
- Nezha expends 25 energy to ignite his Wind Fire Wheels to gain 15% / 15% / 20% / 25% bonus Movement Speed for 15 / 20 / 25 / 30 seconds, while leaving behind a trail of fire beneath his feet that lasts for 5 / 6 / 7.5 / 10 seconds. Enemies that walk over the flames are dealt 50 / 100 / 150 / 200 Heat damage per 0.5 seconds, with each instance of damage having a 10% / 25% / 50% / ? Heat status chance. While Nezha and his allies stand on the flames, they are immune and continually cleansed of all Status Effects.
- Cast animation of ~0.5 seconds, affected by Casting Speed.
- Flames can be formed in mid-air but only while Bullet Jumping. Falling will not leave behind any flames.
- Ability Synergy: If Fire Walker is active when using
 Blazing Chakram's teleportation, Fire Walker will overheat at the destination and deal 500 / 750 / 1000 / 1250 Heat damage with a 10% / 25% / 50% / ? Heat status chance within a radius of 3 / 4 / 5 / 6 meters, as well as leaving a lingering ring of Fire Walker's flames for ? seconds.
- Damage does not bypass obstacles in the environment and diminishes with distance.
- Fire Walker can be cast while moving but will interrupt all other actions.
- Can be recast while active to refresh its duration.
- Subsuming Nezha to the Helminth will offer Fire Walker and its augments to be used by other Warframes.
- This does not allow other Warframes to use Fire Walker's explosion on teleport. This is exclusively a synergy with Blazing Chakram.
Augment
- Main article: Pyroclastic Flow
Pyroclastic Flow is a Warframe Augment Mod for ![]() Nezha and
Nezha and ![]() Nezha Prime that accumulates the damage
Nezha Prime that accumulates the damage ![]() Fire Walker deals and unleashes it in a trail of fire upon reactivating the ability.
Fire Walker deals and unleashes it in a trail of fire upon reactivating the ability.
Tips & Tricks
- The 100% chance of the Heat status effect makes this an effective form of control for narrow hallways or choke points.
- Quickly sliding into groups of enemies can reliably disable them.
- The amount of ground that can be covered in flames can be improved using Sprint Speed mods.
- Also works as an escape tool to prevent enemies from following you.
- Can be used to cut off melee units from defense objectives.
- Briefly tapping slide key allows for additional control over Nezha's momentum while maintaining the additional speed.
- Choosing a dark energy color makes the visual effect less intrusive.
|
 2 |
Blaze Artillery Deploys an artillery unit to blast plasma charges at enemies it faces. Each enemy hit increases the power of subsequent plasma attacks. Introduced in Update 28.0 (2020-06-11) |
|
|
Misc: 3/s (shots per second)130° (firing arc)3 (limit of active turrets)
100% ( +100% (damage bonus per hit) |
Info
- Protea expends 50 energy to launch the plasma turret attached to her utility belt, facing toward the aiming reticle. Once deployed, Blaze Artillery hovers in place for 3 seconds, constantly acquiring enemy targets within Line of Sight, 30 meters and a 130 degree frontal cone to fire plasma charges upon with a fire rate of 3 shots per second;. Protea may deploy up to 3 plasma turrets on the battlefield at once.
- Deploying animation speed is affected by Casting Speed, from mods such as Natural Talent and Speed Drift.
- Recasting the ability at the maximum turret limit will remove the oldest turret.
- Turret duration is shown on the ability icon, as well as displayed on the rear of the turret as a holographic circle.
- Deploying animation speed is affected by Casting Speed, from mods such as
- When a target is acquired, the turret fires a stream of scorching plasma with infinite body Punch Through to inflict 100 / 150 / 200 / 500 Heat damage with a 100% status chance within a 2 meter radius around its target. Blaze Artillery's overall damage increases by 100% for each successful hit against all enemies caught in a plasma stream, stacking for subsequent attacks.
- The current amount of the damage multiplier from enemies hit is shown on the rear of the turret.
- Plasma turret will attempt to fire at different targets in range throughout the artillery's lifetime.
- Enemies within coverage of a Nullifier Crewman's bubble will not be targeted by the turret.
- Ability Synergy:
- Blaze Artilleries contribute damage to
 Temporal Anchor's recorded damage pool for the implosion on rewind.
- Blaze Artilleries contribute damage to
- Can be recast while active to deploy multiple turrets.
- Casting Blaze Artillery is an upper-body animation that allows movement.
- Blaze Artillery is an invulnerable object that hovers in front and above Protea as she deploys it.
- Once deployed, the compact state of the plasma turret disappears from Protea's utility belt.
- Blaze Artillery turret uses a custom model that resembles a floating flak turret with dual cannons. Cannons visually recoil when firing plasma charges, as particle effects pour out from the firing cannon followed by the plasma stream surging through the air at high speed.
- On expiration, the turret collapses in on itself in a warping effect; if the expiring turret is the last active instance, it will instantly reappear on Protea's utility belt in the compact state.
Augment
- Main article: Temporal Artillery
Temporal Artillery is a Warframe Augment Mod for ![]() Protea's
Protea's ![]() Blaze Artillery that causes a single artillery to follow Protea with its duration paused while
Blaze Artillery that causes a single artillery to follow Protea with its duration paused while ![]() Temporal Anchor is active, but receives a cap to its maximum combo count.
Temporal Anchor is active, but receives a cap to its maximum combo count.
Tips & Tricks
- Face toward a crowd of enemies then place a turret. To maximize the plasma charges fired, engage the turret against a number of enemies or heavy units that require several attacks to kill.
- Preemptively place turrets toward directions where enemy forces are likely to come into view.
- When heading to extraction, deploy turrets facing ahead to guard you and your teammates from enemies in front and coming up from behind.
- Damage multiplier is based on the number of enemies hit by a single plasma stream. Blaze Artillery quickly raises its damage multiplier when used in crowded hallways and tight corridors, where plasma streams can pierce through multiple enemies aligned with the shot.
- Plasma turrets prefer to target the closest enemies and switch between targets in range. Use this behavior to your advantage to spread the damage around and apply Heat status effects to stun enemies with a lingering damage over time.
- Due to the punch-through of plasma streams, it is ideal to deploy Blaze Artilleries near the ground to align the shots with crowds of enemies.
- However, deploying turrets higher up gives a greater field of vision when there are obstacles.
- Arrange lines of Shrapnel Vortexes with
 Grenade Fan parallel to each other, creating a funnel to push enemies into the center lane. Deploy turrets to strike the enemies in single file, helping raise each plasma turret's damage multiplier.
 - Activate Temporal Anchor and place multiple turrets. Direct damage from plasma turrets, including the damage over time from Heat status effect are recorded to fuel the temporal implosion.
- Energy spent on the turrets are returned once Protea rewinds.
- Alternatively, use the temporal implosion to pull enemies to the center, then deploy turrets to increase their damage multipliers quickly.

|
 3 |
Lantern Create a swarm of razorflies that transform an enemy into an irresistible floating beacon, attracting witless comrades and finally exploding. Introduced in Update: The Silver Grove (2016-08-19) |
1,000 / 1,500 / 2,000 / 2,500 ( |
15 / 20 / 25 / 25 m (cast range)8 / 12 / 15 / 20 m (attract radius)5 / 6 / 7 / 8 m (explosion radius)
2.5 m (damage radius) | |||
|
Misc: 4 (max number of Lanterns) |
Info
- Titania expends 75 energy to infuse an enemy with mesmerising light from up to 15 / 20 / 25 / 25 meters away, causing it to hover in place with a swarm of razorflies. The Lantern source becomes Invulnerable and unable to move or attack for 10 / 15 / 20 / 25 seconds. Enemies that come within 8 / 12 / 15 / 20 meters from the Lantern will be pacified and blindly follow the target. Enemies within 2.5 meters of the Lantern will be dealt 200 / 250 / 300 / 350 Heat damage every second. Titania can have up to 4 Lanterns active at once.
- Cast animation of 1.3 seconds is affected by Casting Speed.
- All damage prevented by the invulnerable enemy target are stored and dealt in full when the ability ends.
- Upon deactivation by holding the ability key (default 3 ), expiration or being dispelled, all active Lanterns will explode, dealing 1,000 / 1,500 / 2,000 / 2,500 Heat damage to the source enemies and all enemies within 5 / 6 / 7 / 8 meters.
- Damage diminishes with distance.
- If the target dies before Titania finishes her casting animation, energy used for Lantern will be refunded.
- Enemies trapped by Lantern become allied to the player.
- Trapped enemies do count toward mission progression (e.g. Defense). They must be slain (by deactivating the ability or its ability duration ended) to progress.
Augment
- Main article: Beguiling Lantern
Beguiling Lantern is a Warframe Augment Mod for ![]() Titania that grants 100% weapon damage against enemies attracted to
Titania that grants 100% weapon damage against enemies attracted to ![]() Lantern.
Lantern.
Tips & Tricks
- While the crowd control aspect is somewhat tricky, Lantern can be utilized as an offensive ability by rapidly skipping to the detonation in crowded areas.
- If the target was an Ancient, the explosion will always hit its protective crown.
- While their Hyekka Master is affected by Lantern, Hyekkas summoned earlier become allies of the player and will attack other enemies. However, they can still be attacked and damaged by players.
- The pacification range is affected by mods, but enemies will rush to the lantern from extremely far beyond this range, even through line of sight, as long as they aren't currently fighting something else. So if the Lantern is placed where no players or friendly NPCs are located, then even with minimized Ability Range enemies will willing run into pacification range of the lantern.
- If the target passes into a Nullifier Crewman's bubble, Lantern will not be dispelled.
Bugs
- Certain enemies, most notably Regulators and Sensor Regulators, will not be affected by the ability, but the cast animation will still play. (energy is not refunded)
- If the target is an Ancient Healer its aura will be applied to the player.

|
 4 +12-24/s |
Sol Gate Open a portal to the sun to irradiate enemies with a devastating beam of pure solar plasma. Introduced in Update 25.0 (2019-05-22) |
2,000 / 2,200 / 2,500 / 3,000 (boosted beam damage per half second) |
|
Misc: 500 % (base beam max damage ramp-up)1,000 % (boosted beam max damage ramp-up)-50 % (boosted beam move speed penalty)25 % (Vitality Mote damage bonus)
100 % (Haste Mote 100 % (Breach Surge spark chance on hit) |
Info
- Wisp tears open and sustains a portal to the sun to harness its destructive power. While sustaining the portal, Wisp focuses the solar plasma into a single beam with curving flares over a length of 40 meters; the beam possesses infinite Punch Through against enemy bodies, and inflicts 1,000 / 1,100 / 1,250 / 1,500 Heat and
 Radiation damage per half seconds with a ?% status chance to all enemies it contacts. Each enemy that receives damage from the beam becomes more vulnerable to it, with beam damage increasing by 50% per half second up to a maximum of 500% damage bonus per damage instance. Press the ability key (default 4 ) while active to deactivate this ability.
- Wisp recoils backward when the ability deactivates.
- Holding the fire button (default LMB ) increases the beam's damage to 2,000 / 2,200 / 2,500 / 3,000, status chance to ?%, and damage ramp-up per half second to 100% up to a maximum of 1,000% damage bonus. Wisp's movement speed is slowed by 50% while boosting Sol Gate.
- Sol Gate expends 25 energy to activate, then consumes 12 energy per second (24 energy per second during the boosted version) while active and will remain active until Wisp's energy is depleted, or the ability is deactivated by pressing the ability key again.
- Activation energy cost is affected by Ability Efficiency, and the energy drain is affected by Ability Efficiency and Ability Duration.
- Wisp cannot replenish energy using Energy Vampire, Rift Plane's innate energy regeneration, Squad Energy Restores, Energy Siphon, Energy Nexus, Dreamer's Bond, and/or Wellspring while Sol Gate is active.
- Sol Gate's energy drain is not converted into shields by Augur Mods.
- Energy can be replenished by Energy Orbs, Arcane Energize, Orokin Void Death Orb energy restores, Rage, and/or Hunter Adrenaline while the ability is active.
- Ability Synergy:
- Currently obtained Motes from
 Reservoirs provide additional properties to Sol Gate.
- Vitality: Provides a 25% damage increase.
- Haste: Allows Sol Gate to deal
 Corrosive procs on every damage instance.
- Does not gain Corrosive damage.
- Does not gain
- Shock: Provides a 25% damage increase.
- Reservoir Motes orbiting Wisp will instead orbit around the portal. When Sol Gate is deactivated, Motes will return to Wisp again.
 Wil-O-Wisp can be cast during Sol Gate to cloak, spawn a clone and teleport to it when desired.
- Has a 100% chance to trigger
 Breach Surge's surge spark.
- Currently obtained Motes from
- Wisp cannot cast Reservoirs or Breach Surge, perform parkour Maneuvers or sprinting except dodge rolls, or other general interactions while channeling this ability.
- Wisp is immune to knockdown while channeling this ability.
- Energy beams, energy particles, and energy surge color tinting are affected by Wisp's chosen Warframe energy color.
Info
- Odonata expends 25 energy to generate a large frontal shield that blocks enemy fire for 10 / 14 / 18 / 22 seconds. Shots fired through the shield will gain 50% Heat damage and critical damage will be multiplied by 2x.
- The Heat damage bonus is an additive bonus that's applied to the weapon's base damage, similar to an elemental mod (e.g., firing an unmodded
 Imperator with 50 base damage through Energy Shell will add 50*0.5 = 25 Heat damage to the weapon).
- Unlike an elemental mod, the Heat damage bonus does not combine with other elemental types to create secondary elements; the weapon will separately proc the elements present on it and Heat from Energy Shell.
- Unlike an elemental mod, the
- The
- While most hostile gunfire is blocked by Energy Shell, area-of-effect damage can still bypass it.
- Ability Synergy: Missiles from
 Seeking Fire that pass through Energy Shell will also gain Heat damage.
 - Cannot be recast while active.
Augment
- Main article: Energy Field
Energy Field is an Odonata Augment Mod for Energy Shell that extends its effects to nearby allies within a set distance.
Energy FieldMaximization
Maximization is a form of specialization: mods may be blended to result in values that vary between the top-end limits listed here. Click any maximized link to learn how to build it.
Info
- Bonewidow deploys its powerful sword Archmelee, the
 Ironbride, as its Exalted Weapon. Ironbride inflicts a base 800 / 1000 / 1250 / 1500 Blast and Heat damage before accounting for its other weapon stats.
- Damage is affected by Necramech Pressure Point.
- Damage is affected by
- Exalted Ironbride costs 25 energy to deploy, then drains 2.5 energy per second and will remain active so long as Bonewidow has energy.
- Exalted Ironbride will end if Bonewidow runs out of energy or if deactivated by pressing the ability key again.
- Bonewidow can still replenish energy from Energy Orbs while Exalted Ironbride is active.
- Ability Synergy:
- Exalted Ironbride widens
 Shield Maiden's block angle to 220 degrees.
 - Bonewidow's Slide gains Ironbride's damage.
- Exalted Ironbride widens
- Cannot be cast while in the air. However, it can be sheathed while in midair.
Weapon

- Main article: Ironbride
- This weapon deals primarily Slash damage.
- Innate
 polarity.
 - Heavy Attacks hurl a projectile that travels a short distance, exploding on impact.
- Able to damage an Orphix from any angle.
Advantages over other Archmelee weapons (excluding modular weapons):
- Normal Attack (wiki attack index 1)
- Above average crit chance (45.00%)
- High total damage (1,500)
Disadvantages over other Archmelee weapons (excluding modular weapons):
- Normal Attack (wiki attack index 1)
- Below average attack speed (0.83x animation speed)
- Below average attack range (3.00 m)
See WARFRAME Wiki:Stat Comparison/Percentiles for more details.

|
 3 |
Gravemines Launch a pattern of charged mines all around you. Each mine detonates in a violent blast when touched, damaging enemies in a three-meter radius. Introduced in Update 29.0 (2020-08-25) |
|
|
Misc:
3m (explosion radius) |
Info
- Voidrig expends 75 energy to deploy 8 / 12 / 16 / 24 charged mines and scatter them 5 / 6 / 7 / 8 meters around it, detonating on contact with an enemy for 200 Heat damage with a guaranteed proc over a 3 meter radius.
- If no enemy is hit or touches the mine after deployment it will self-detonate after 2.5 seconds.
- Unlike the description may suggest, the Gravemines are fired ahead in fast sequence of two straight roughly parallel lines from fixed twin launchers on the Voidrig's chest (each one half of the total mine amount). The mines are launched in the direction that the Voidrig's chest is facing, rather than the player's current aim, thus to defensively cover the area around it, requires to spin the mech while casting the ability.
Info
- Voidrig deploys its powerful turret Archgun, the
 Arquebex, on both arms as its Exalted Weapon, while simultaneously bracing itself on the ground. Shots fired by the Arquebex inflict 150 / 250 / 350 / 500 Blast and Heat damage.
- The Arquebex is immediately able to be used upon casting the ability even while the deployment animation takes a few seconds to play through.
- Guard Mode costs 50 energy to deploy, then drains 5 energy per second and will remain active so long as Voidrig has energy.
- Guard Mode will end if Voidrig runs out of energy or if deactivated by pressing the ability key again.
- Voidrig can still replenish energy from Energy Orbs and Necramech Rage while Guard Mode is active.
- The Voidrig is immobile while Guard Mode is active, and use of its other special abilities is prevented.
- Cannot be cast while in the air.
Tips & Tricks
- Guard Mode is a viable crunch move in case a player is forced to deal with an Eidolon alone, either because allies are all downed and ran out of revives or said player got disconnected from others due to a connectivity issue, and still wants to salvage the mission's progress. The Arquebex deals massive damage to the giant enemy especially when struck at its weakpoints, as well as temporarily disabling Vomvalysts that shield it by smashing them with cannon fire.
Arcanes[]

Sources of Heat Resistances[]
Arcanes[]

Mods[]
Additional Effects[]
Some mods and arcanes add additional effects when a ![]() Heat occurs or dealing
Heat occurs or dealing ![]() Heat damage.
Heat damage.


Tips[]
 Magus Accelerant is a rare case of resistance reduction that will multiply the effects of heat. It is especially effective against Proto Shield, able to increase the -50% damage modifier against heat to +15% with a single application, a 2.3x damage bonus. However, it does not reduce armor resistance, where it would have an exponential effect with health resistances.
- Heat damage and its combination elements are not very effective against Corpus. In addition to Heat damage being reduced against Proto Shields,
 Gas damage is reduced against Flesh and Radiation damage is reduced against Shields (though it is increased against Robotic).
Media[]


Patch History[]
Update 36.0 (2024-06-18)
- Simplified Faction Resistances
- Infested: Vulnerable to Heat
- Kuva Grineer:
Update 26.0 (2019-10-31)
- Heat Status Proc Changes
Heat Status procs now reduce targets' armor to 50% of the original value, with subsequent Heat procs refreshing the duration. Not hot enough for you? Applying the Status proc multiple times also turns up the Heat, dealing more damage per tick as the flames increase.
Update 11.0 (2013-11-20)