“You're not supposed to be in here! You're going to ruin the surprise!”
The following article/section contains spoilers.
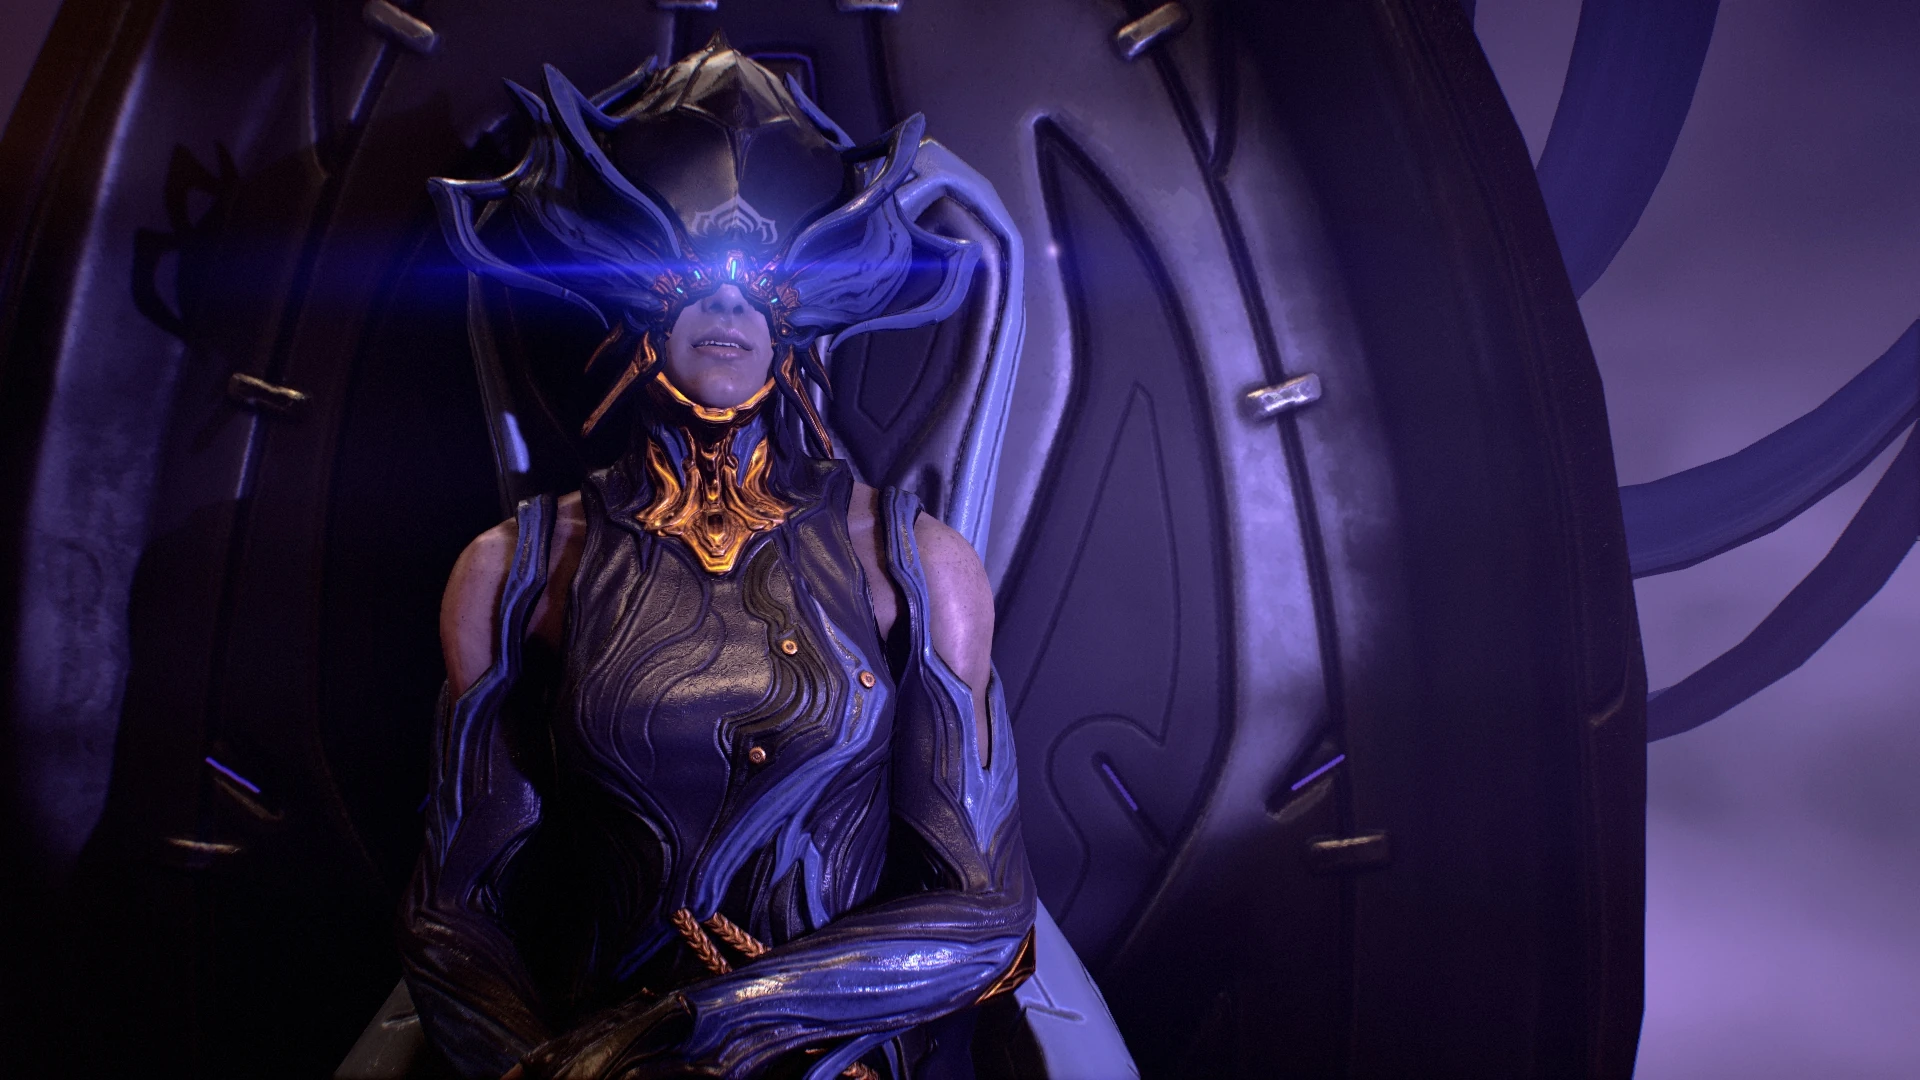
The Sentient armada has emerged from the Veil Proxima in shocking numbers.
At their head, Natah, once the trusted guide 'Lotus', now seemingly in thrall to Ballas and her brother Erra.
Across worlds and space, the Tenno and their unlikely alliance launch a final assault to take the Sentient mothership... where Natah awaits.
The New War is a solo-only main Quest, released in Update 31.0 (2021-12-15). The Sentients, led by Natah, Erra and Ballas, return to wage an all-out war against the Tenno for complete domination of the Origin System. This Quest was made replayable in Update 31.1 (2022-02-09).
Synopsis[]
The Sentients, led by Ballas and Erra, launch a full-scale invasion on the Origin System. The Tenno are forced to form an alliance with the Grineer and Corpus to unite against a common enemy. However, despite the efforts of Grineer Kahl-175, Corpus Veso, and Teshin, the Origin System falls as Ballas banishes the Lotus and the Operator into a Void portal, attempting to trap them within their own history under a recursive timeline.
Without the Tenno, the Origin System crumbles under the Sentients as Ballas becomes its new ruler, brainwashing the masses into subservience under Narmer and using his position to defame the Tenno and manipulate everyone's memories of their actions. The mysterious Drifter fights back against Narmer, having somehow brought back the Lotus, now a dying Eidolon. They team up with Hunhow to claim Sentient shards from Erra's Archons to heal the Lotus. However, she fails to recognize the Drifter and becomes hostile. After a segment about the Operator during the accident on the Zariman Ten Zero where they accept The Man in the Wall's deal, the powers are granted to the Drifter. This act also allows the Operator to return to the Origin System in the Drifter's place, causing the Lotus to cease hostilities and leave with the intent to fight Ballas.
A confused Operator travels to the Zariman Ten Zero which has come halfway out of the Void, confronting the Drifter, revealing the Drifter to be an alternate reality version of the Operator. Ballas, enraged at Lotus and the return of the Tenno, sets in motion his plan to use the Sentient mothership Praghasa to devour the Origin System's sun to escape to the Tau System alone, thereby ending all life, organic or otherwise, in the entire system. This forces Erra to defect and lend his aid to the Tenno for the survival of his race. After a long battle, the Lotus and the Tenno finally kill Ballas. Their victory is cut short by the arrival of The Man in the Wall, appearing as a giant humanoid embedded into a wall, who bellows in a heavily distorted voice before mysteriously vanishing.
With Narmer now destabilized, the Origin System begins to slowly recover. The Tenno returns the Lotus to Lua, who reveals conflicting personalities between herself, Natah, and Margulis. The Tenno asks her to choose one voice to lead the others in the near future.
Walkthrough[]
“You're not supposed to be in here! You're going to ruin the surprise!”
The following article/section contains spoilers. Please finish the quest before proceeding.
The Railjack should at least be decently equipped to improve its survivability; Sigma MK I Components and a Crew Engineer will suffice. However, the Necramech does not require sufficient modding.
When initiating the quest in the Codex, a disclaimer warns that The New War will take much time to complete (expect a 2-6 hour playthrough with checkpoints to allow completion throughout multiple play sessions), access of the Arsenal is limited, and regular WARFRAME activities cannot be performed until the quest is completed, The player should make sure their Arsenal is well-equipped and are fully prepared before typing NEWWAR to begin the quest.
Commit to THE NEW WAR?
THE NEW WAR requires several hours to complete. You will be able to pause the game, and your progress will be saved between missions.
Prepare wisely. Loadout access will be limited and regular Warframe activities will not be available until this quest is completed!
THE NEW WAR contains sequences of violence, frightening situations involving teens, and depictions of emotional abuse. It is intended for mature audiences.
Type NEWWAR to confirm.
For My Brothers[]
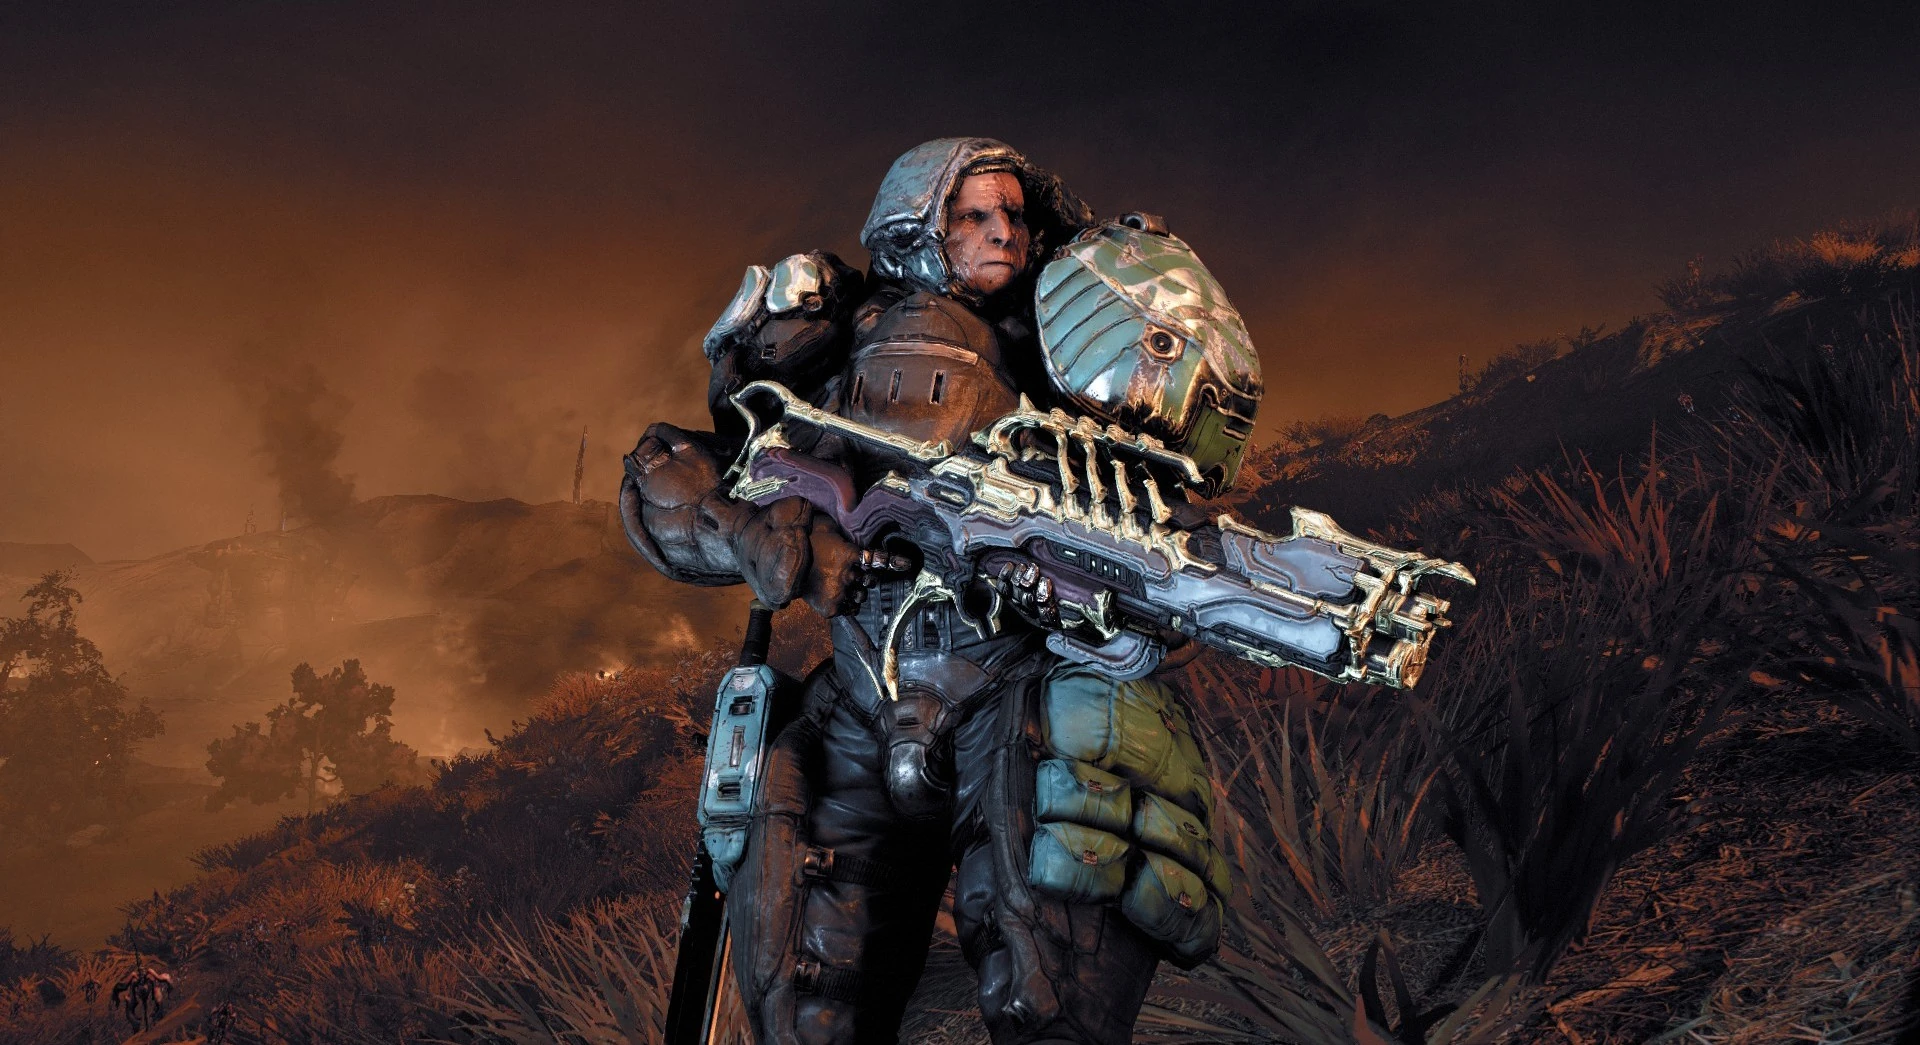
Kahl-175[]
Kahl with Corinth Prime
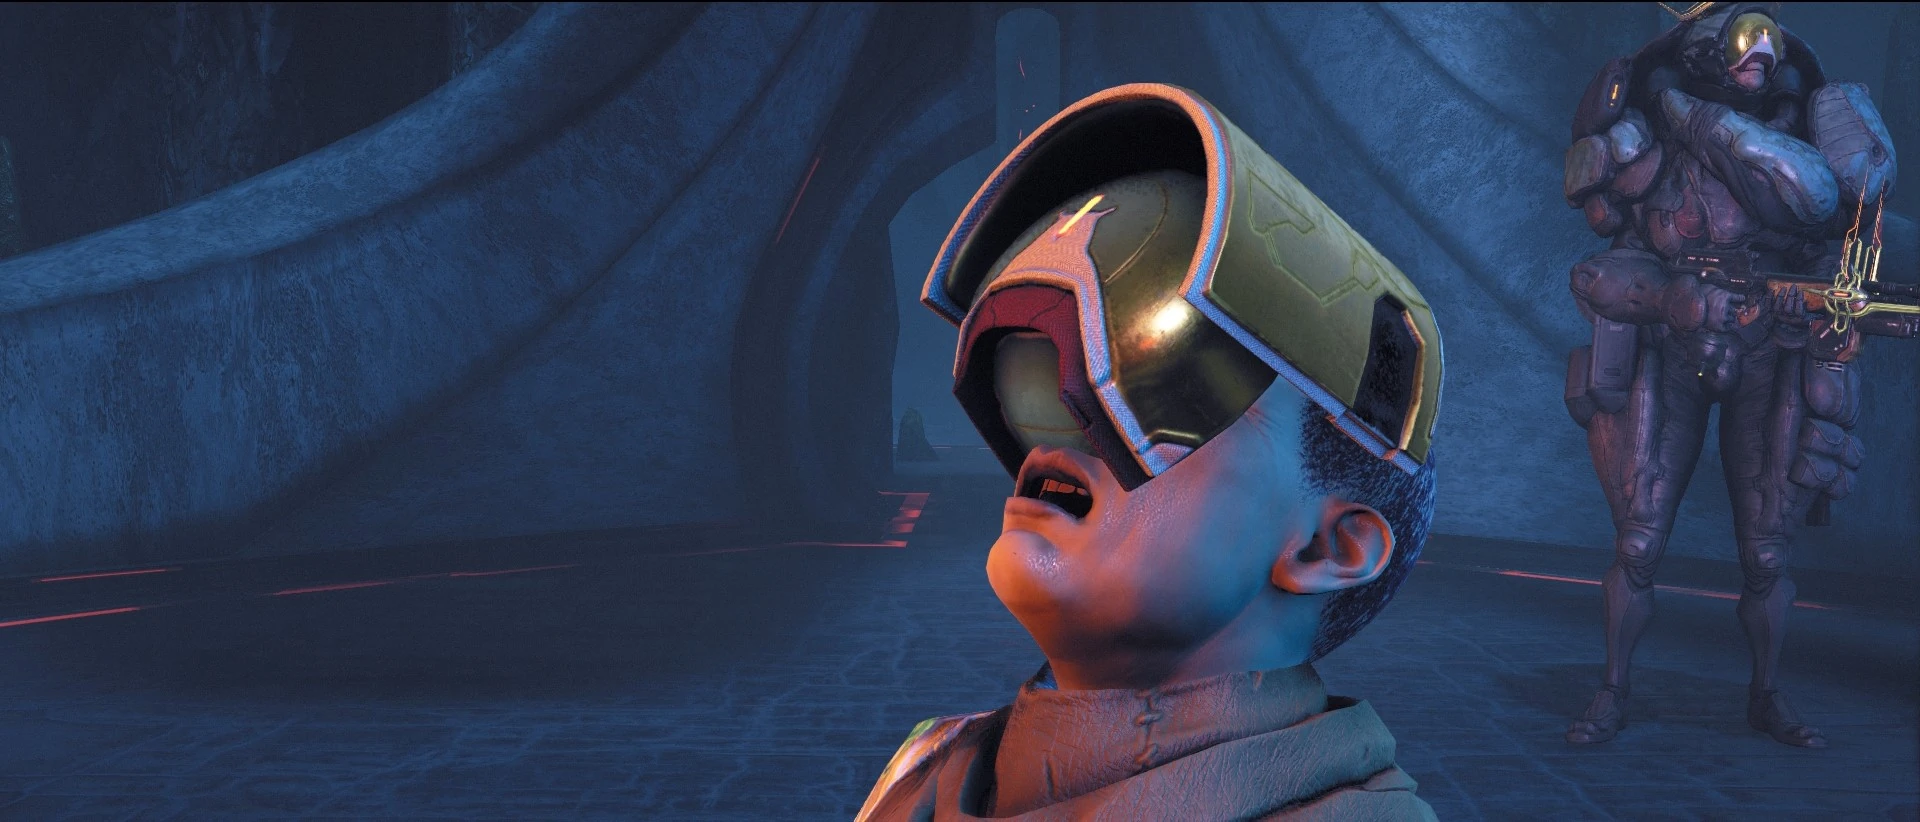
In Cetus, on Earth, a Murex arrives and crashes into the Unum's Tower. As an Ostron child watches in horror, Erra approaches them and removes up their Excalibur Mask, telling them to not be afraid.
The player now controls the Grineer soldier, who has vastly different gameplay compared to Tenno:
Kahl has 1,000 health and no shields. Health Orbs dropped by enemies heal 100 instead of the usual 25.
Kahl's Grakata has 90 Magazine Capacity instead of the usual 60. He is also armed with a Machete, and is capable of "Mercy" finishers.
Kahl has two "abilities":
His first ability throws an incendiary grenades. He can carry up to a maximum of four.
His second ability deploy blunts. It has a 3 second cooldown and deploying a new blunt will destroy the oldest ones.
Kahl can crouch and roll, but cannot slide, double jump, or bullet jump.
Kahl can use ammo dispensers to replenish ammunition for his Grakata and grenades.
Dying at any point throughout the quest will revert progress to the beginning of the mission's current objective.
As Kahl approaches the beacon, a Tusk Bolkor crashes in front of him. A small squad of Dargyns are chased by Sentients, with one of them being shot down. Kahl chooses to help the downed Dargyn, engaging small resistance, only to find the Dargyn Pilot dead. As he stares at the Condrix in the distance, asking, "what is mission now?" only for Vay Hek to tell him that there is no mission as going near the Condrix would get him eaten alive. However, Kahl has an idea: to feed the Condrix a bomb.
Kahl's advancement is further met by some resistance, but is aided by a Rampart. As he nears the Condrix, Sentients deploy search parties, forcing Kahl to stealth around them. He reaches an encampment and acquires a bomb. As he readies himself, a small Grineer squad and a Tusk Thumper approach the Condrix, only for the thumper to be shot out of the air mid-jump and crash next to Kahl, knocking him off his feet. As a Sentient approaches and stabs the other Grineer dead, Kahl finds a dead/disabled Rhino and wrestles his gun, using it to kill the approaching enemy. Kahl stands on his feet and pumps his newly acquired Corinth Prime.
Kahl makes his final stand as he reaches the base of the Condrix, impeded by a Symbilyst. He mercy kills the Sentient by slamming it with the butt of his Corinth Prime before unloading three consecutive shots. Kahl weakly approaches the Condrix, dropping his weapon, and slumps down to arm the bomb. As he is about to declare his speech for his queens, he suddenly pauses and instead declares for his brothers.
However, the bomb halts midway through the activation process. Kahl opens his eyes and looks in horror as Erra approaches him.
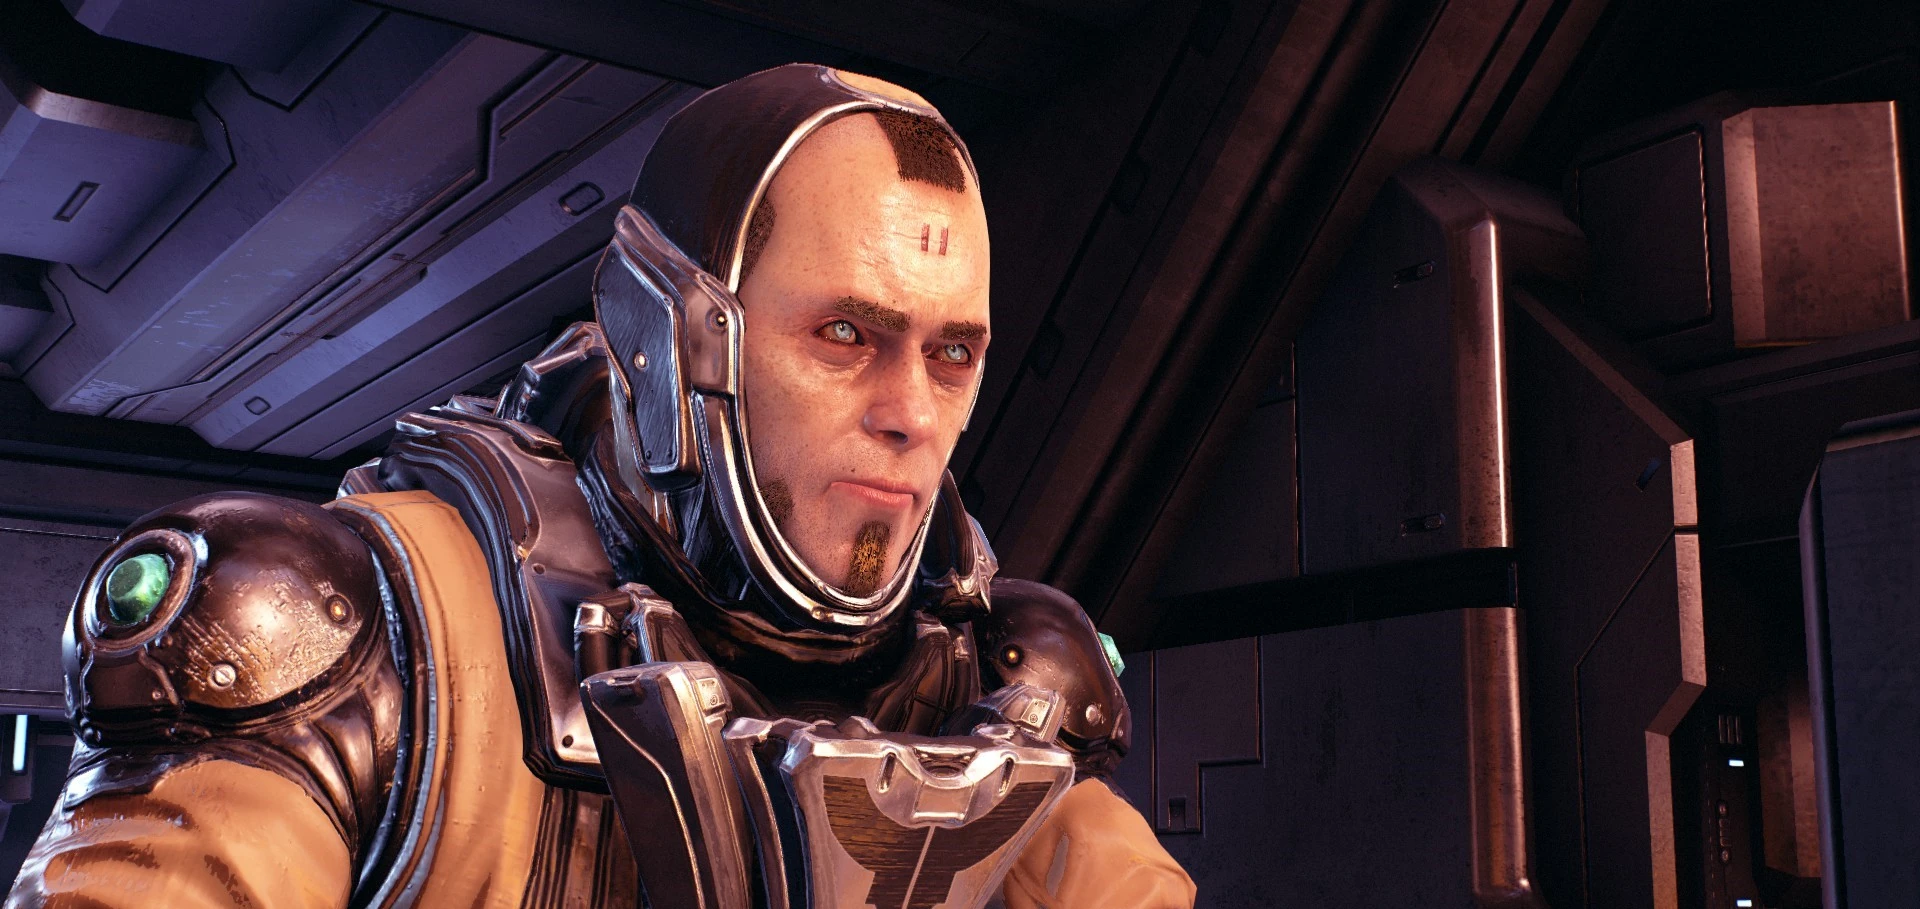
Veso-R[]
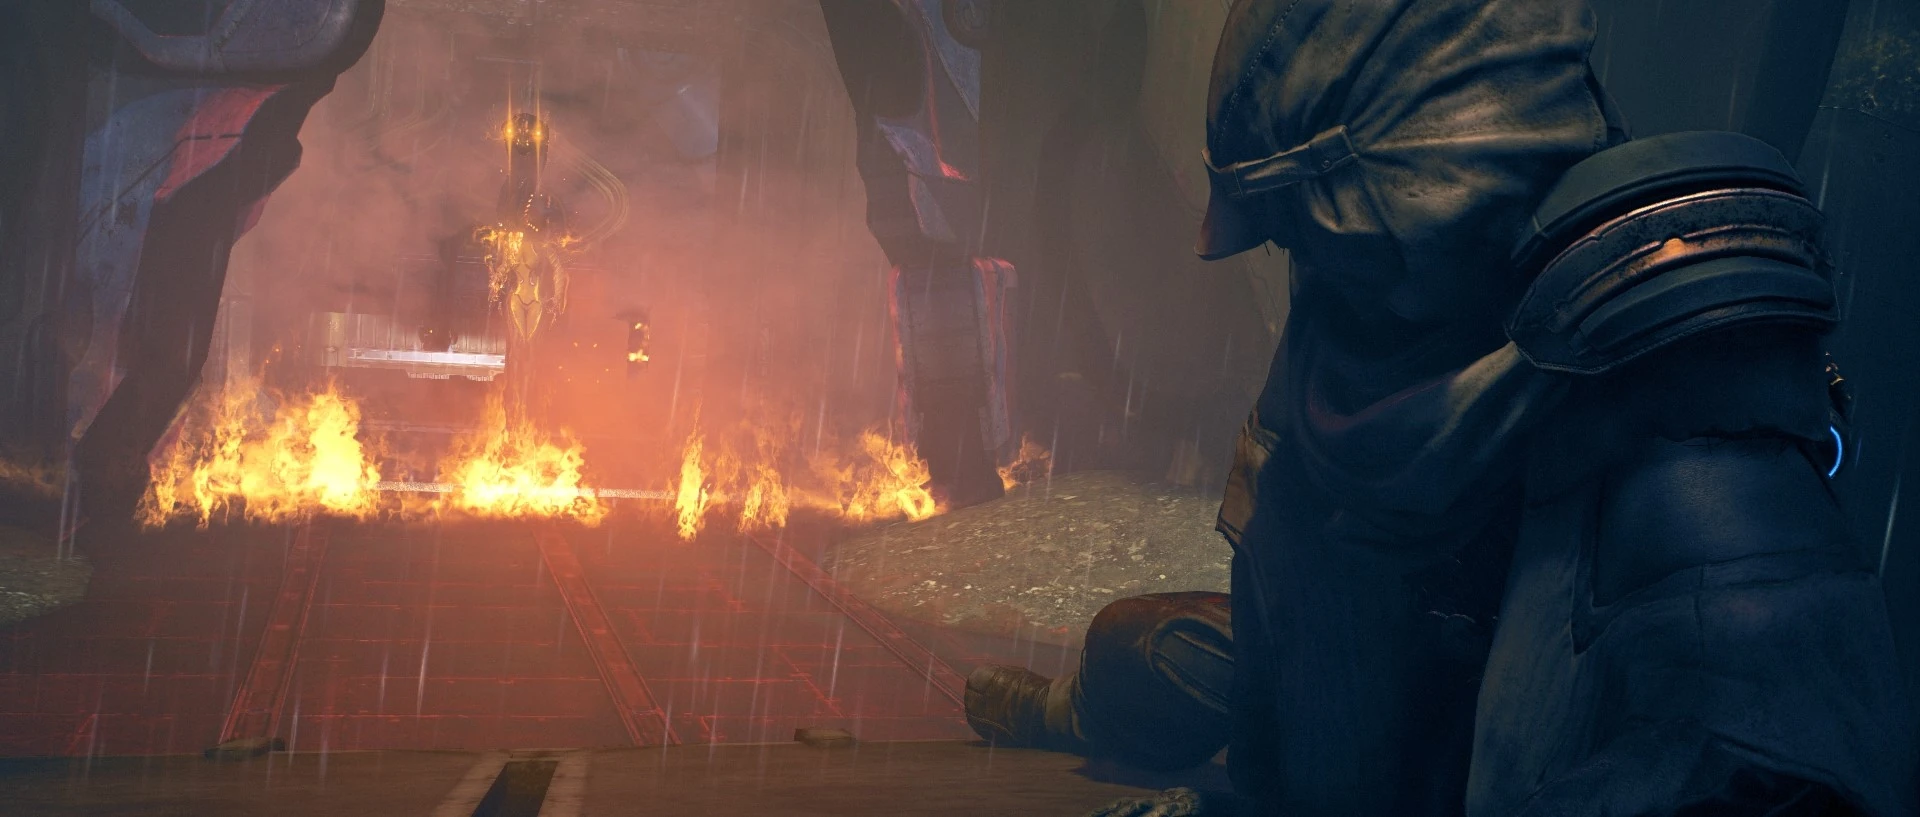
Veso's final moments
On a Corpus Ship, CorpusVeso takes panicked breaths as alarms blare. Outside the window, the Corpus and Grineer fleets have united to push back their common enemy in the Veil Proxima. As Alad V gives a speech, he calls upon all tech to engage the ship's command overrides.
Like Kahl, Veso can crouch and roll, but cannot slide, double jump, or bullet jump.
Using nearby robotic dispensers, he can summon Breacher MOAs with his first "ability". Using the ability button and aiming at a surface, the MOA can be commanded to move and perform objectives. Shooting the Breacher MOA will cause it to explode and clear debris.
Veso discovers that Sentients have latched into their grid network, causing some of their robotics to go rogue and turn on the Corpus. He encounters the first override behind a half-opened door that only his Breacher MOA can fit through. His progress is further impeded by a grid laser that can only be bypassed by his Breacher MOA to disable it from the other side.
He then encounters a Shield Drone dispenser, which can interfaced with his second "ability" to summon a drone that recharges his and his allies shields. Shortly after are indestructible turrets, forcing Veso to rely on the Shield Drone to run past. He then encounters a Striker MOA dispenser to produce a combat MOA ally for his third "ability".
As Veso nears the second command override, Alad V questions what is taking Veso so long while mentioning needing to stand down fire control. As Veso is confused by the notion, Alad V orders him to look outside and urges him to hurry before they are under new management. The next command override is through a broken glass window with a Breacher MOA dispensary, but the path is blocked by electricity which will kill the MOA; the Shield Drone must be commanded to fly through the window and provide the Breacher MOA with shields to allow it to move past.
In the next room, debris blocks the way save for a cargo mover. Veso must command his Breacher MOA to interface with a terminal while standing inside the cargo mover to get to the other side.
Nearing the final command override, the Sentients take control of a Jackal. Veso must attack the Jackal's front legs until it engages its laser, and then continue shooting it to deplete its shields. Once it enters the self-repair routine, Veso must take the opportunity to command a Breacher MOA to self-destruct under it. This must be done twice, with the second phase emitting electricity and requiring the Shield Drone's defense.
After disabling the final override, Alad V orders the crew to stand down, claiming to have negotiated with his enemies for profit. As the Murex latches on, Veso, realizing Alad V intends to betray the Corpus Board of Directors, angrily reactivates the fire controls and orders to blast into the heart of the enemy ship, destroying it. The resulting shockwave causes the Corpus ship to break apart. Meanwhile, the Tenno's Railjack arrives onto the battle.
Railjack[]
The Tenno have formed an unlikely alliance with the Grineer and Corpus and are engaging the Sentient fleet in the Veil Proxima. Teshin denies the Tenno entrance to the mothership until he has destroyed their Orphix fields. The alliance is able to push onward, only for a boarding party to sabotage the Railjack's slingshot. Once the slingshot has self-repaired, the Railjack must face the mothership to allow Teshin to board.
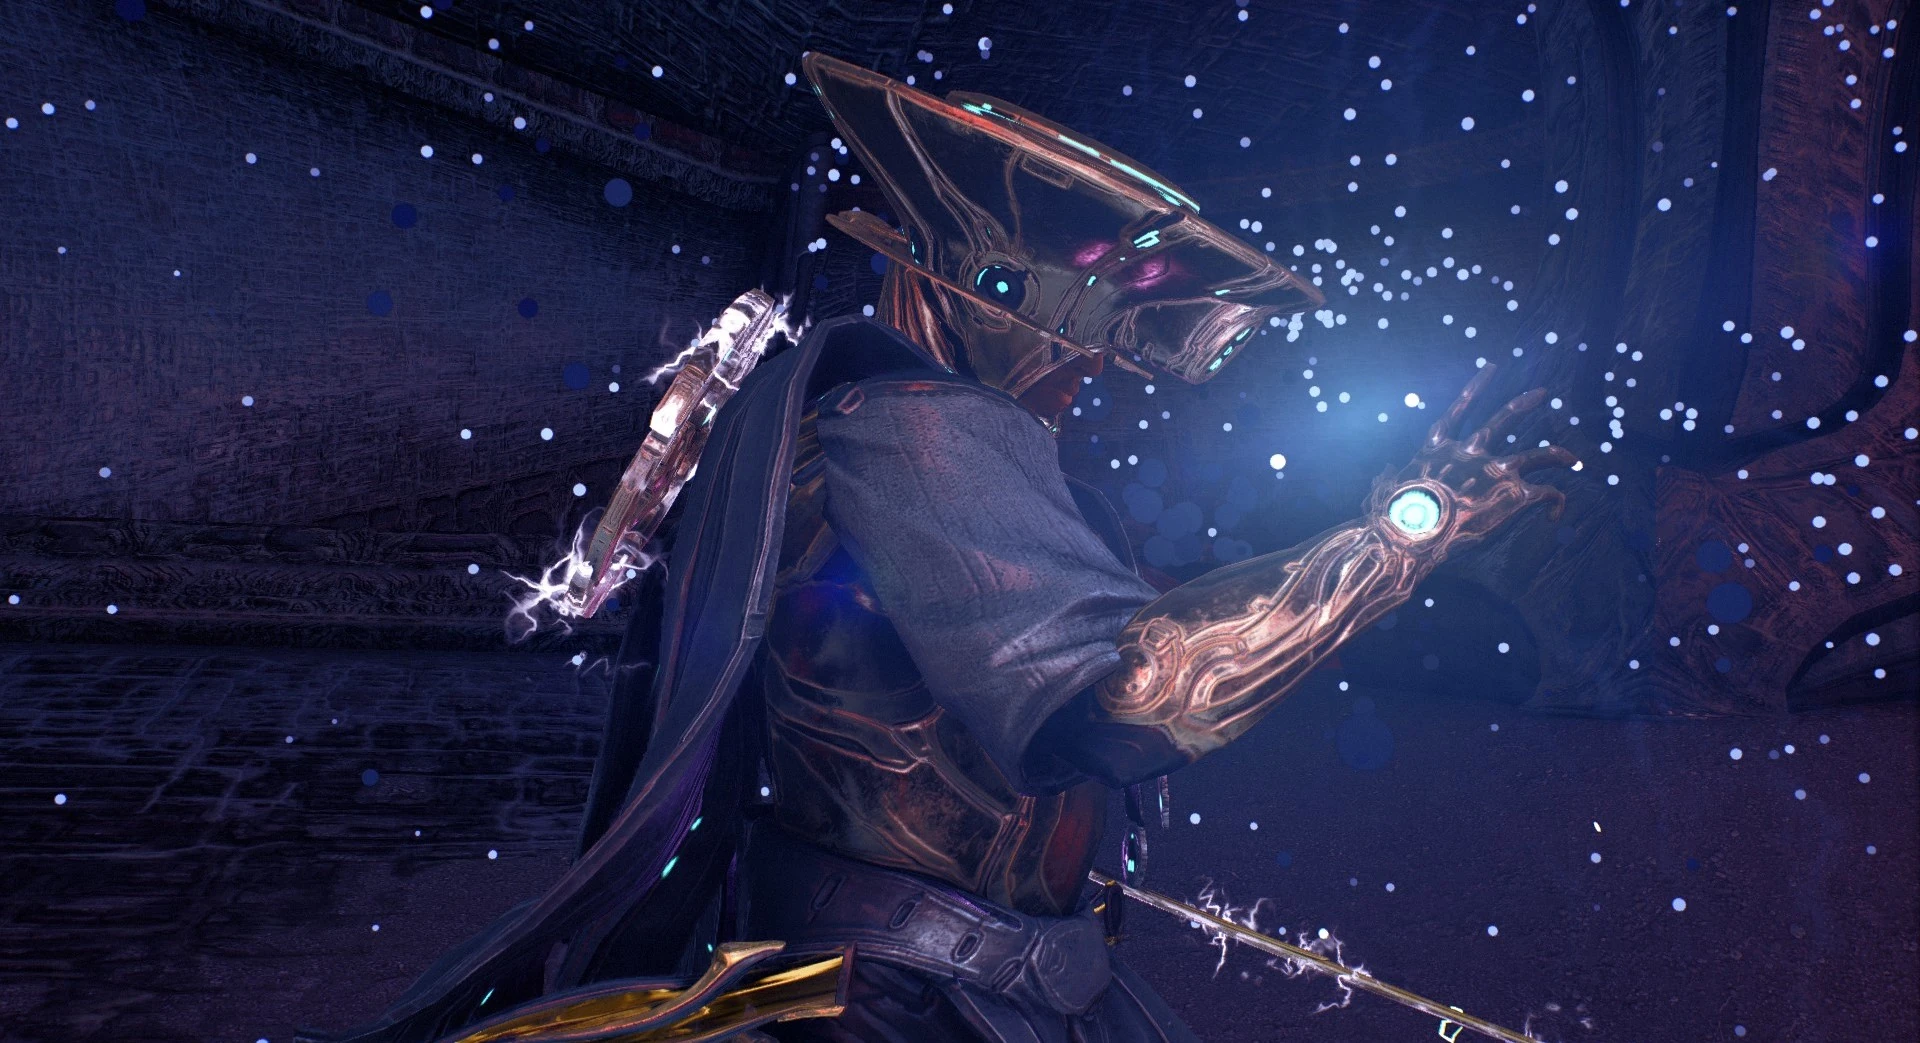
Teshin[]
Teshin after performing a finisher
Teshin drops in from the ceiling, killing an Aerolyst.
Sentient enemies are protected by elemental shields that can only be destroyed with the corresponding element.
Unlike Kahl and Veso, Teshin can slide, double jump and bullet jump.
Teshin can throw Orvius with the primary fire button to stun enemies. He can then lasso onto it and make long jumps with Alternate Fire.
While moving forward, Teshin discovers captured Grineer and Corpus. The first Orphix field is guarded by three energy locks that can be destroyed with the Orvius, with only 25 seconds between each lock. He must then fight off Sentient defenders before Ordis can disable the generator surrounding the Orphix field.
Approaching the second Orphix field has four energy locks. He encounters a strange red projection that makes him slowly recall reprimanding the Tenno before shrugging off its effects. After destroying the field, Teshin must fight a Typholyst.
The third and final Orphix is protected by five energy locks and another Typholyst. However, he chooses to instruct the Tenno not to join him and decides to scout ahead. As he makes the jump, the view suddenly cuts into first-person of a tired, out of breath character as Ballas forces them to watch Teshin and Erra engage in a Frame Fighter-like duel. Teshin struggles as a mask veil impairs his mind, with Ballas revealing his plans to brainwash the masses to end the war in one fell swoop. Teshin eventually collapses, but is able to remove the veil; Erra deems him a lost cause and crushes his helmet.
The Operator arrives too late to blast Erra aside and looks on in horror as Ballas steps aside to reveal the Lotus, now heavily burnt and weakened (possibly a consequence of the events of The Maker). Ballas kisses her and takes what seems to be her life essence. A Void portal suddenly opens behind her and pulls her in; the Operator and their Warframe try to hold her back, but Ballas steals the Tenno's Paracesis (regardless of whether the player had crafted or equipped one at the beginning of the quest) and cuts off the Lotus's arm, sending her flying into the portal. Ballas then stabs the shocked Tenno through the back, casting them into the portal.
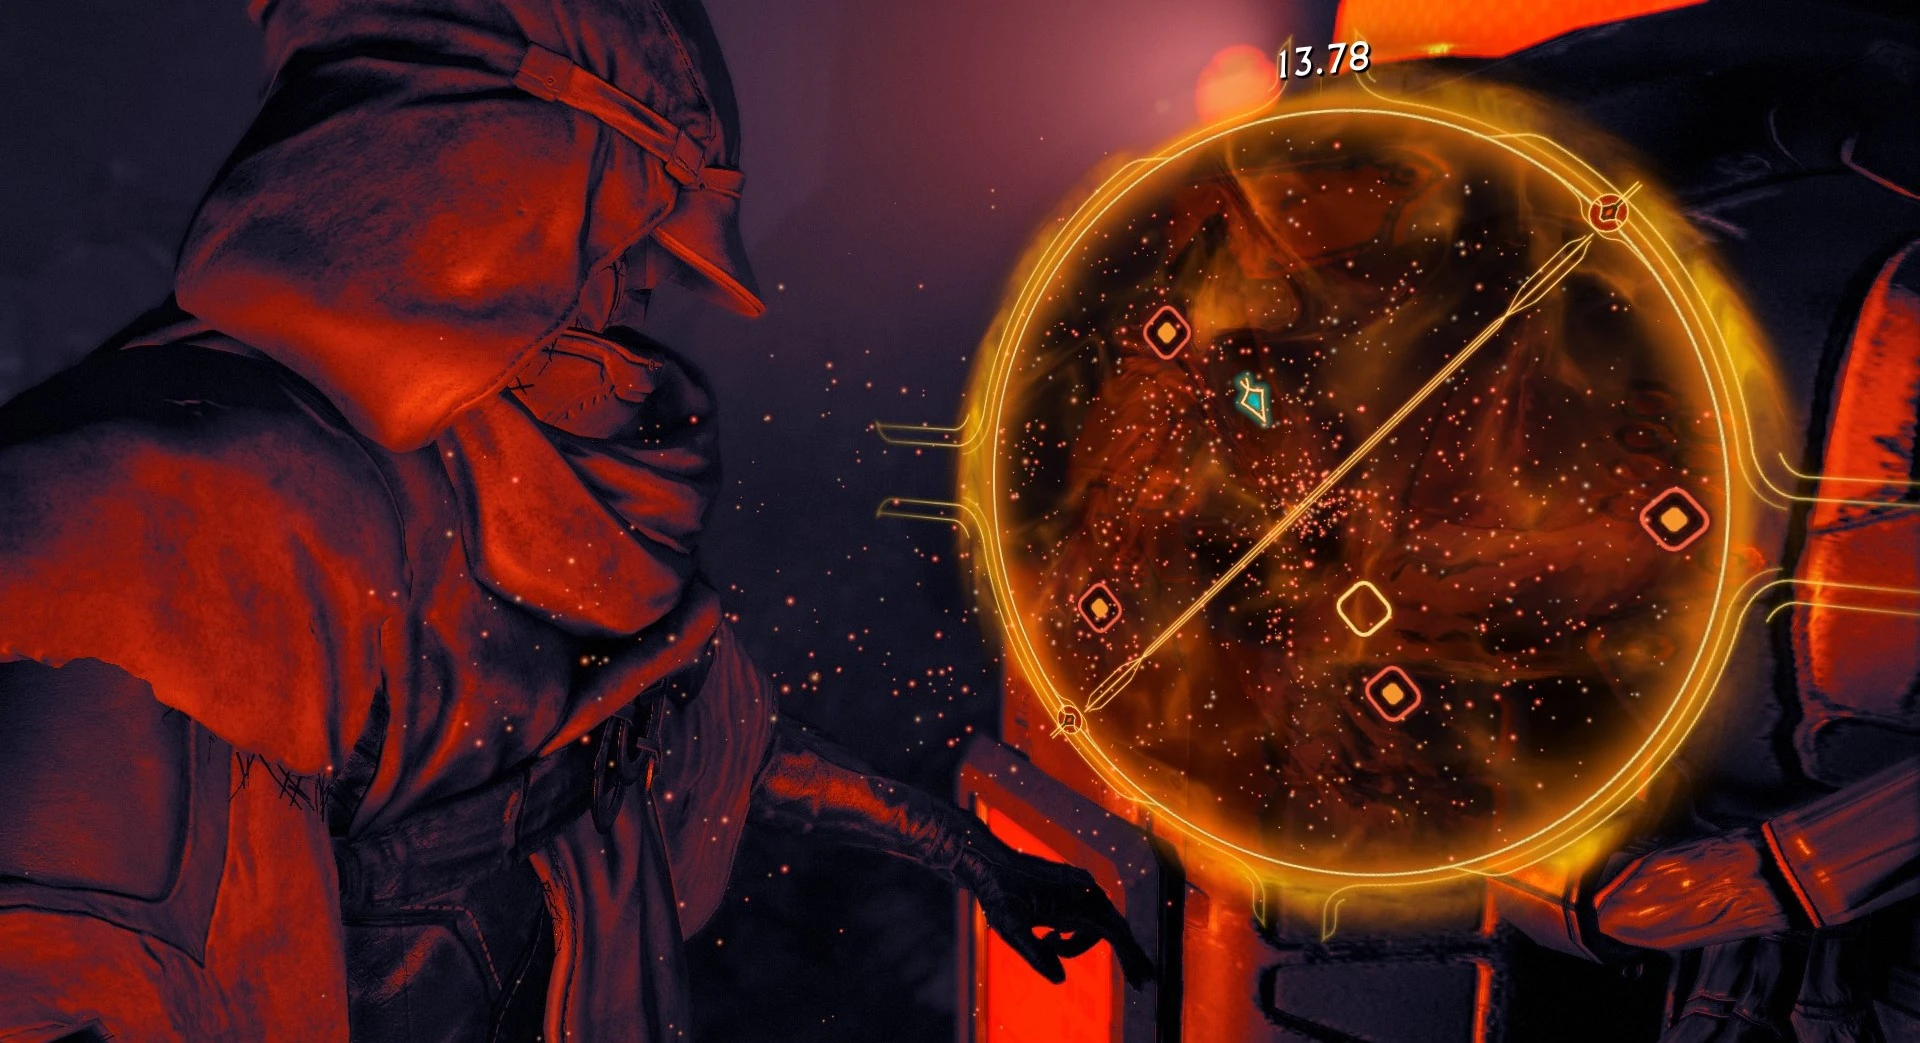
The Rise of Narmer[]
Narmer console hacking
The player is taken back to the login menu, with only The New War logo on display. After the player logs in, a cutscene shows Ballas sitting atop a throne as a crowd before him chants "Narmer". With the Tenno banished, the Sentients have won, with Ballas as the sovereign of a system-wide rule of Narmer, twisting history to defame the Tenno and favor himself as much as possible.
A mysterious figure disembarks from a Tusk Bolkor and lands on Earth.
They have a unique pistol and melee. This pistol has 10 rounds and pressing the reload button while reloading while under the white brackets that appear halfway through the reload will immediately finish the reload and overcharge the next shot.
They have three abilities:
Their first ability Restorative heals them with a 13 second cooldown.
Their second ability Smoke Screen deploys an invisiblity field with a 30 second cooldown.
Their third ability Target Radar shows nearby friendlies and enemies with a 20 second cooldown.
Like Kahl and Veso, the mysterious character can not double jump, or bullet jump.
An Ostron with a Narmer Veil
The figure approaches a Narmer Outpost. The Security Links feature a new hacking type with a split screen and using the cursor to press nodes on the opposite side. 10 imprisoned Ostrons can also optionally be freed along the way, using Target Radar to find them, however completing the optional objective does not provide any bonus.
Encounter with Archon Nira
Deep within, the figure discovers the Narmer are using the same mask implants Ballas attached to Teshin, known as Narmer Veils, to brainwash Grineer and Ostron. The figure is discovered by the newly veiled Ostron, alerting the Sentients. After clearing the field, they approach the veiled Ostron but are unable to remove the mask, summoning an Archon and forcing them to flee the complex. As they escape on the Tusk Bolkor, a closeup of the Archon reveals it to be a Mag Prime with a serpentine head attached to it.
Drifter's Camp[]
The figure, codenamed Drifter by Nora Night, retreats to their camp: a cavern on Earth hiding the Orbiter. As they approach the rear, their hood is removed, revealing the Drifter to be an aged Operator. Ordis, now a floating Sentinel, has been tending to what's left of the Eidolon Lotus. The Drifter leaves, telling Ordis that the Cephalon knows someone who can help. Requiring a Corpus Dropship to be able to move more easily in the Origin System, they head to Fortuna, Venus.
Stolen Plates[]
The Drifter slowly descends into Fortuna as the brainwashed Solaris sing praises to Narmer and Ballas. They must carefully avoid the patrolling Narmer Deacons as they approach the Orb Vallis elevator. Along the way they are contacted by Little Duck, who has managed to avoid capture. She instructs the Drifter to take a K-Drive to Spaceport and use a Narmer Veil to bypass security. As the Drifter dons the mask, they struggle with distorted visions of the Lotus that attempts to twist the past to say it was Ballas who was their father figure and that the Lotus was manipulating them.
While they are able to bypass initial security, the Drifter still must take care to avoid the Deacons inside the Spaceport as they can remotely detonate the veil should they detect anomalies. After careful maneuvering and reaching deep inside, they are unable to handle the veil's deception any longer and a quick-time event using the melee button (default E ) repetitively prompts the mask's removal. They reach the end console that destroys the Narmer Veil factory, and commandeer a Condor Dropship to escape.
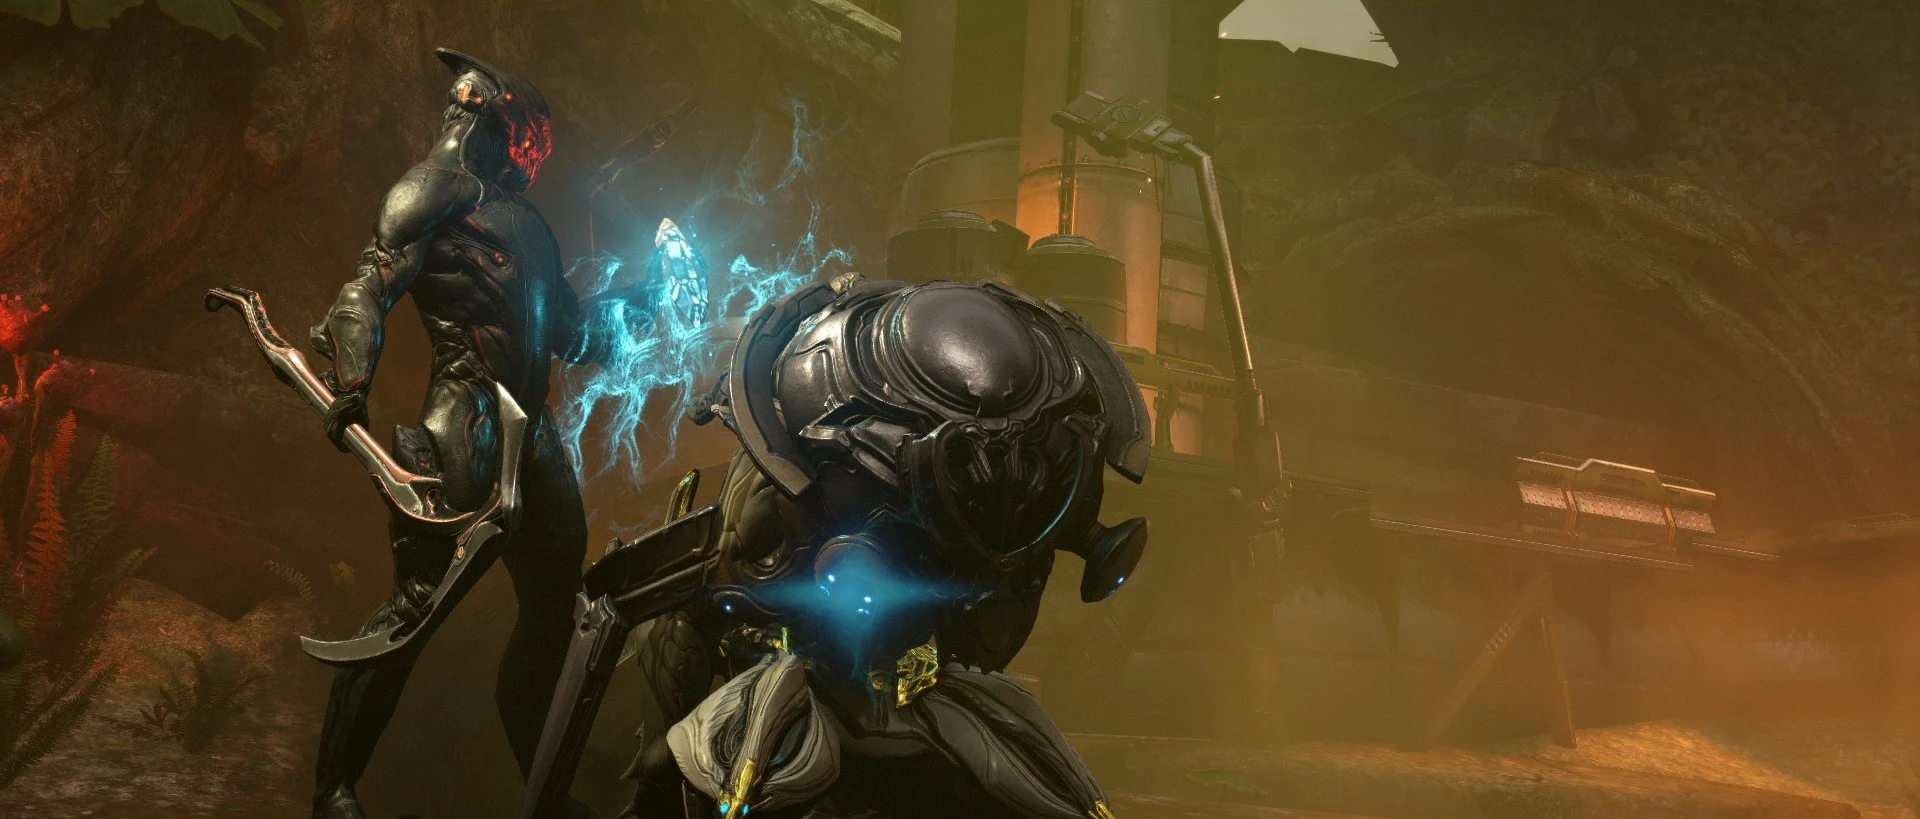
Enemy of Enemies[]
The Drifter heads to Uranus. Moving into the base, they are accosted by Disciple Ka-Nuteru's Narmer forces, but are aided by the Stalker. Deep within, the Stalker brings the Drifter to Hunhow; agreeing that they both want the Lotus to be free, they form an unlikely alliance. Hunhow explains the Archons are twisted abominations of Warframe remains: Archon Boreal the Owl commands a twisted trident and a piercing cry, Archon Amar the Wolf attacks with a fury of flame, slashes, and a pack of mirror clones, and Archon Nira the Snake attacks with crackling whip, lightning, and a deadly petrifying gaze. Each Archon also has powers to raise dead Sentients, which may be used to save the Lotus.
As they leave, Hunhow bestows them Nataruk, a Sentient bow. He tests them with their skill in the bow: releasing shortly before fully charged will fire an even more powerful shot. The Drifter must backtrack and return to the surface to escape, this time facing both Narmer and Sentient interceptors blocking their way.
Temporal Axioms[]
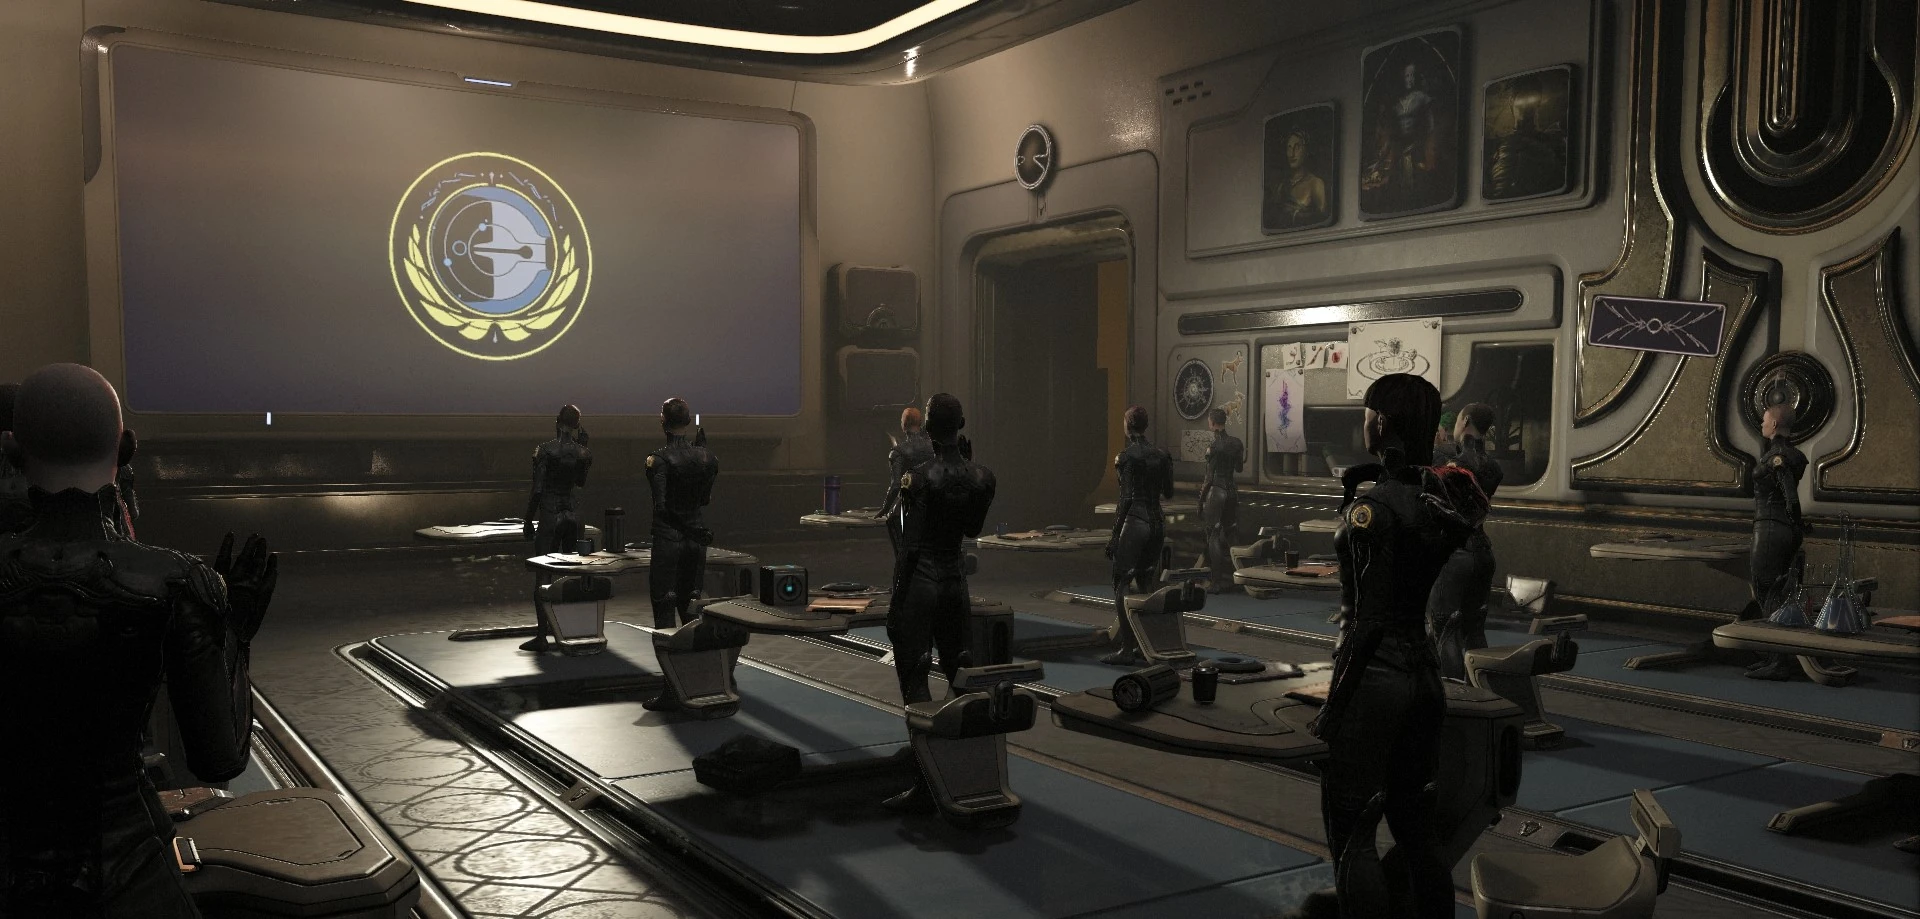
Students taking a pledge at the beginning of class
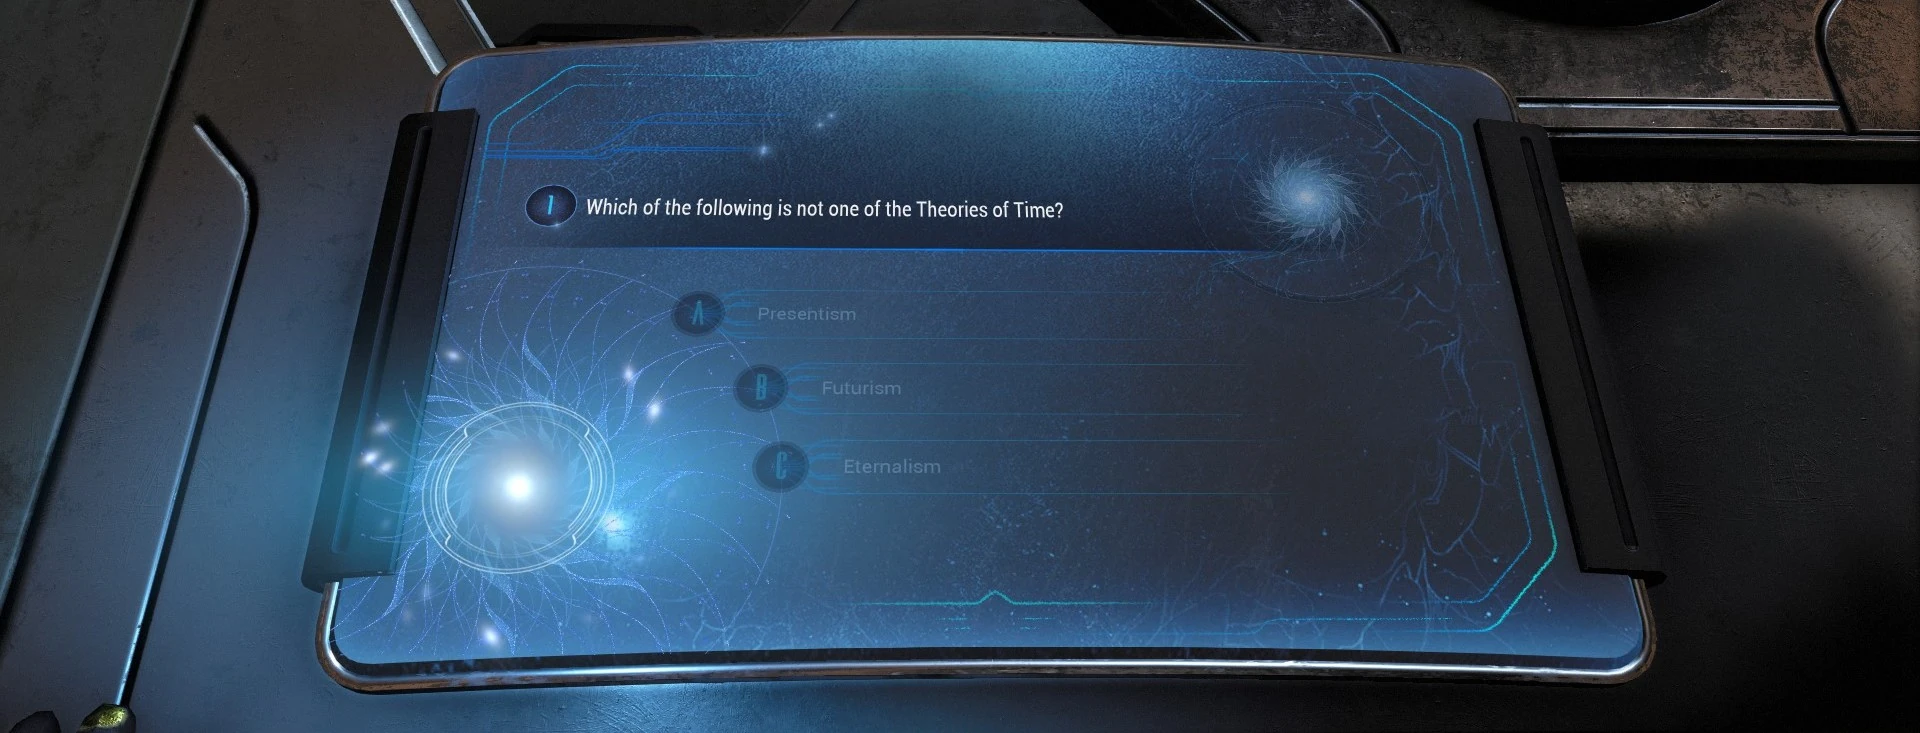
With the Drifter assigned "homework" by Hunhow, the scene cuts to first-person view in the Zariman Ten Zero where Cephalon Melica instructs a classroom, sitting in the far back of the room alongside students Mathon and Jenva. For an unknown reason, the player character is puzzled at being present in the classroom, and is slow to respond to pledges being held. The class studies Temporal Axioms of Void travel narrated by Euleria Entrati, and are quickly quizzed:
Which of the following is not one of the Theories of Time?
A) Presentism
B) Futurism
C) Eternalism
What is the principal failing of Presentism?
A) It considers the Present to be the only reality.
B) It has never been endorsed by an Archimedean of unblemished standing.
C) It lacks elegance.
D) It is not true.
Lintana's parents have been captured, but she has a choice. The button that opens her mother's cell door will flood her father's cell with deadly radiation, and vise versa. She presses one of the buttons. Under Eternalism, which of the following statements is universally true?
A) Only one of her parents will survive.
B) Only one of her parents will die.
C) Her parents will survive. Her parents will die.
The player is not penalized for wrong answers. Upon answering the final question, the class is interrupted as the Zariman makes a Void jump.
The Wild Hunt[]
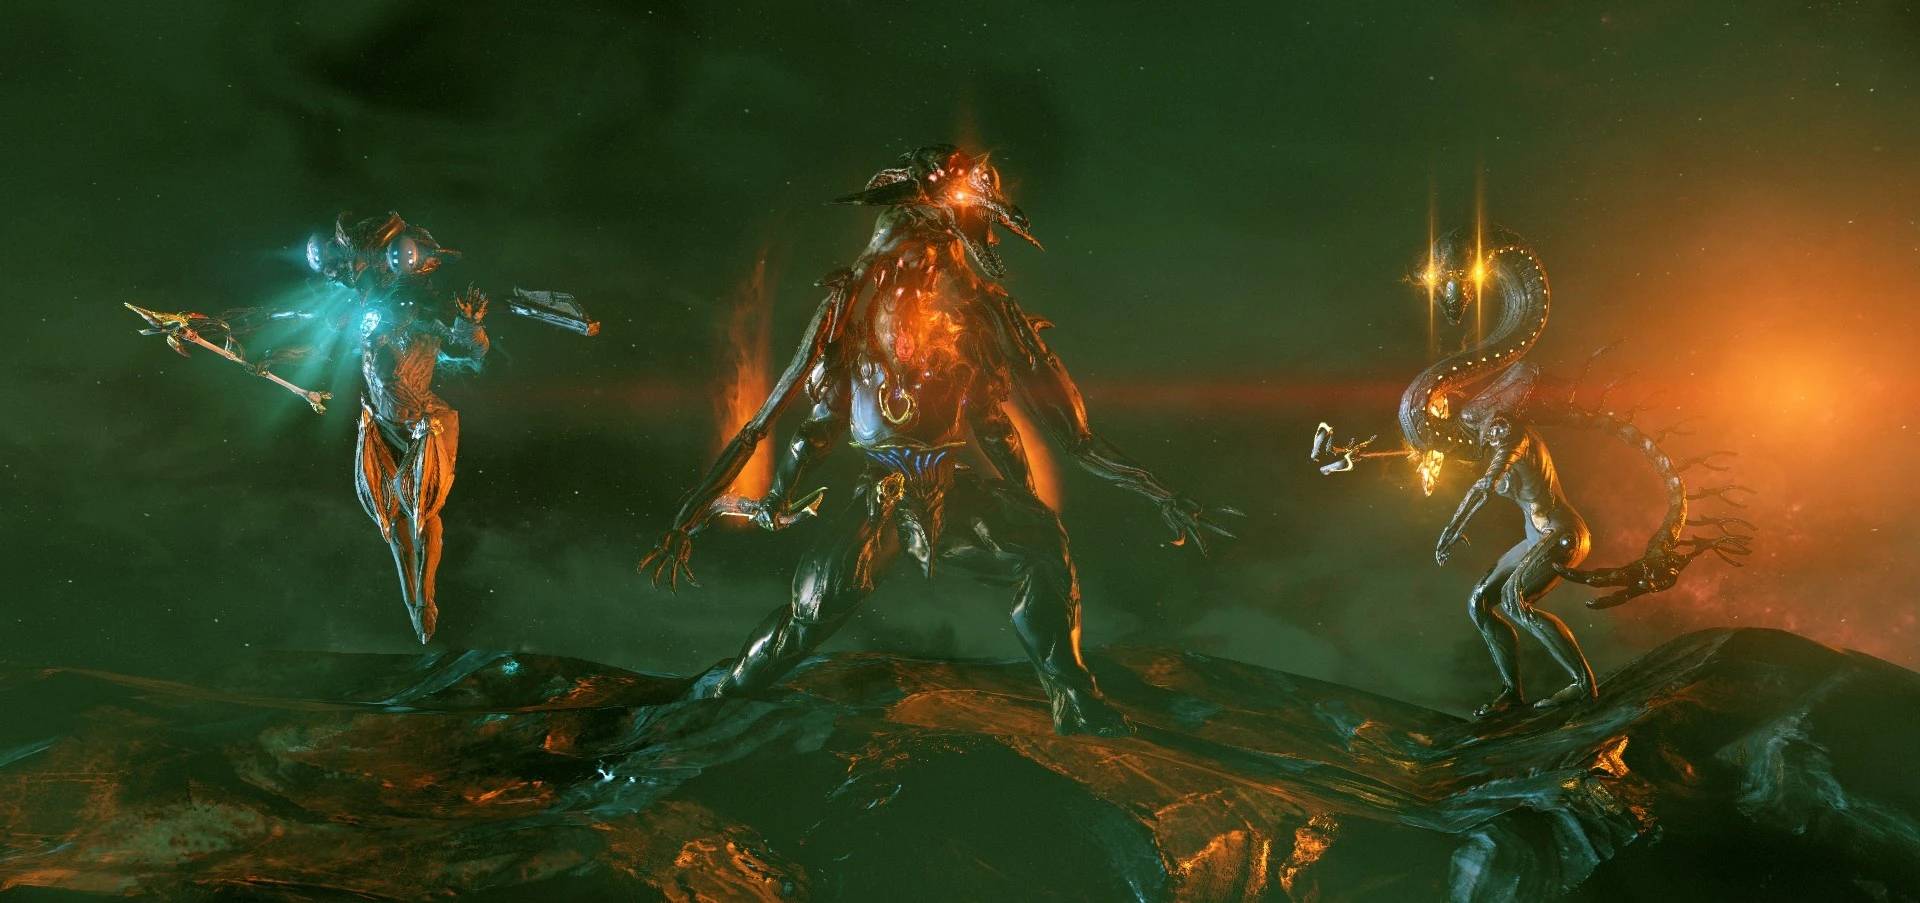
The 3 Archons: Boreal (left), Amar (center), Nira (right).
Back in the present, the Drifter checks on the Lotus. Hunhow instructs them to defeat the Archons and take their power to heal her. Ordis asks why the Drifter doesn't use their Void powers, only for them to reveal they didn't lose them, but instead have not received them yet.
The three Archons are spread across different planets of the Origin System. They may be challenged in any order; two are required to progress the quest to the next stage.
All the Archons can teleport and resurrect Sentients to swarm the player and shield them. At low health, the Archon becomes invulnerable and grapples the Drifter to prompt a quick-time event to break free by rapidly pressing E , and then will flee once. On the first downing by an Archon, the Stalker will appear to revive the Drifter.
Erra questions Hunhow's interference, refusing to believe Hunhow's argument that he is being used by Ballas. Hunhow demands Erra to stand down, as he is behaving like a Dax in servitude to the Orokin. Erra swears that they will find and bring back Natah.
Archon Boreal[]
Archon Boreal is located on Earth, and has an Owl head attached to a Loki Prime's body. He primarily attacks with focused Electricity beams and uses the Korumm trident to drop hazardous fields on the ground. His screech releases a slowly expanding pulse field that pushes the Drifter away, blocks outside fire, and heals him; the pushback can be negated with Smoke Screen and the screech can be interrupted with a shot from inside the field.
Archon Amar[]
Archon Amar is located on Mars, and has a Wolf head attached to a Rhino Prime's body. He throws Heat projectiles with Nepheri daggers, and can charge or leaping stomp. His primary defense is to clone himself and hide amongst them while he heals; the real one, the one holding weapons as well as having noticeably different visual effects, can be detected with Target Radar.
Archon Nira[]
Archon Nira is located on Jupiter, and has a Snake head attached to a Mag Prime's body. She hurls Toxin projectiles, can strike from afar with her Verdilac whip, and can ripline across the walls before performing a leaping bite. Nira can use her whip to create a shield that heals her slightly before releasing a forward shockwave. Finally, she can screech and release a piercing gaze to petrify the Drifter if they do not look away.
The Aftermath[]
First Archon Shard[]
Stalker finishing an Archon
After depleting the first Archon's health, the Archon rises in front of the exhausted Drifter, only for the Stalker to reveal himself, deliver the final blow and rip out its shard. The Drifter takes the shard back to the Lotus, partially restoring her body. She demands more before suddenly snapping at the Drifter.
Cutting back to the Zariman Ten Zero incident, the player's Operator has barricaded the classroom door as the Void had made their parents crazed and deranged. The operator is exceptionally calm and pragmatic, and consoles Terolee:
[Sun] Something went wrong with the jump...
Something went wrong with the jump. But we'll survive. Promise.
[Neutral] We need to stay quiet...
Just, just try to keep quiet... and don't let him fall asleep, okay?
[Moon] We're in this together...
I don't know. But we're going to figure it out together. Okay?
Oh please, would you snap out of it? We're on our own now.
[Neutral] We'll be your family for awhile...
No. She's not. We're going to be your family for a while, okay?
[Moon] Your mom will come...
I know, but go on. Just for now.
They then walk toward a Tenno tapping on the wall. Offering their light, the tapper turns around, revealed to be The Man in the Wall.
Second Archon Shard[]
After the Drifter deals the decisive blow, they rip out the second Archon shard. They give it to the Lotus, restoring more of her body. However, not recognizing the Drifter, she suddenly turns hostile, forcing them to evade her attacks.
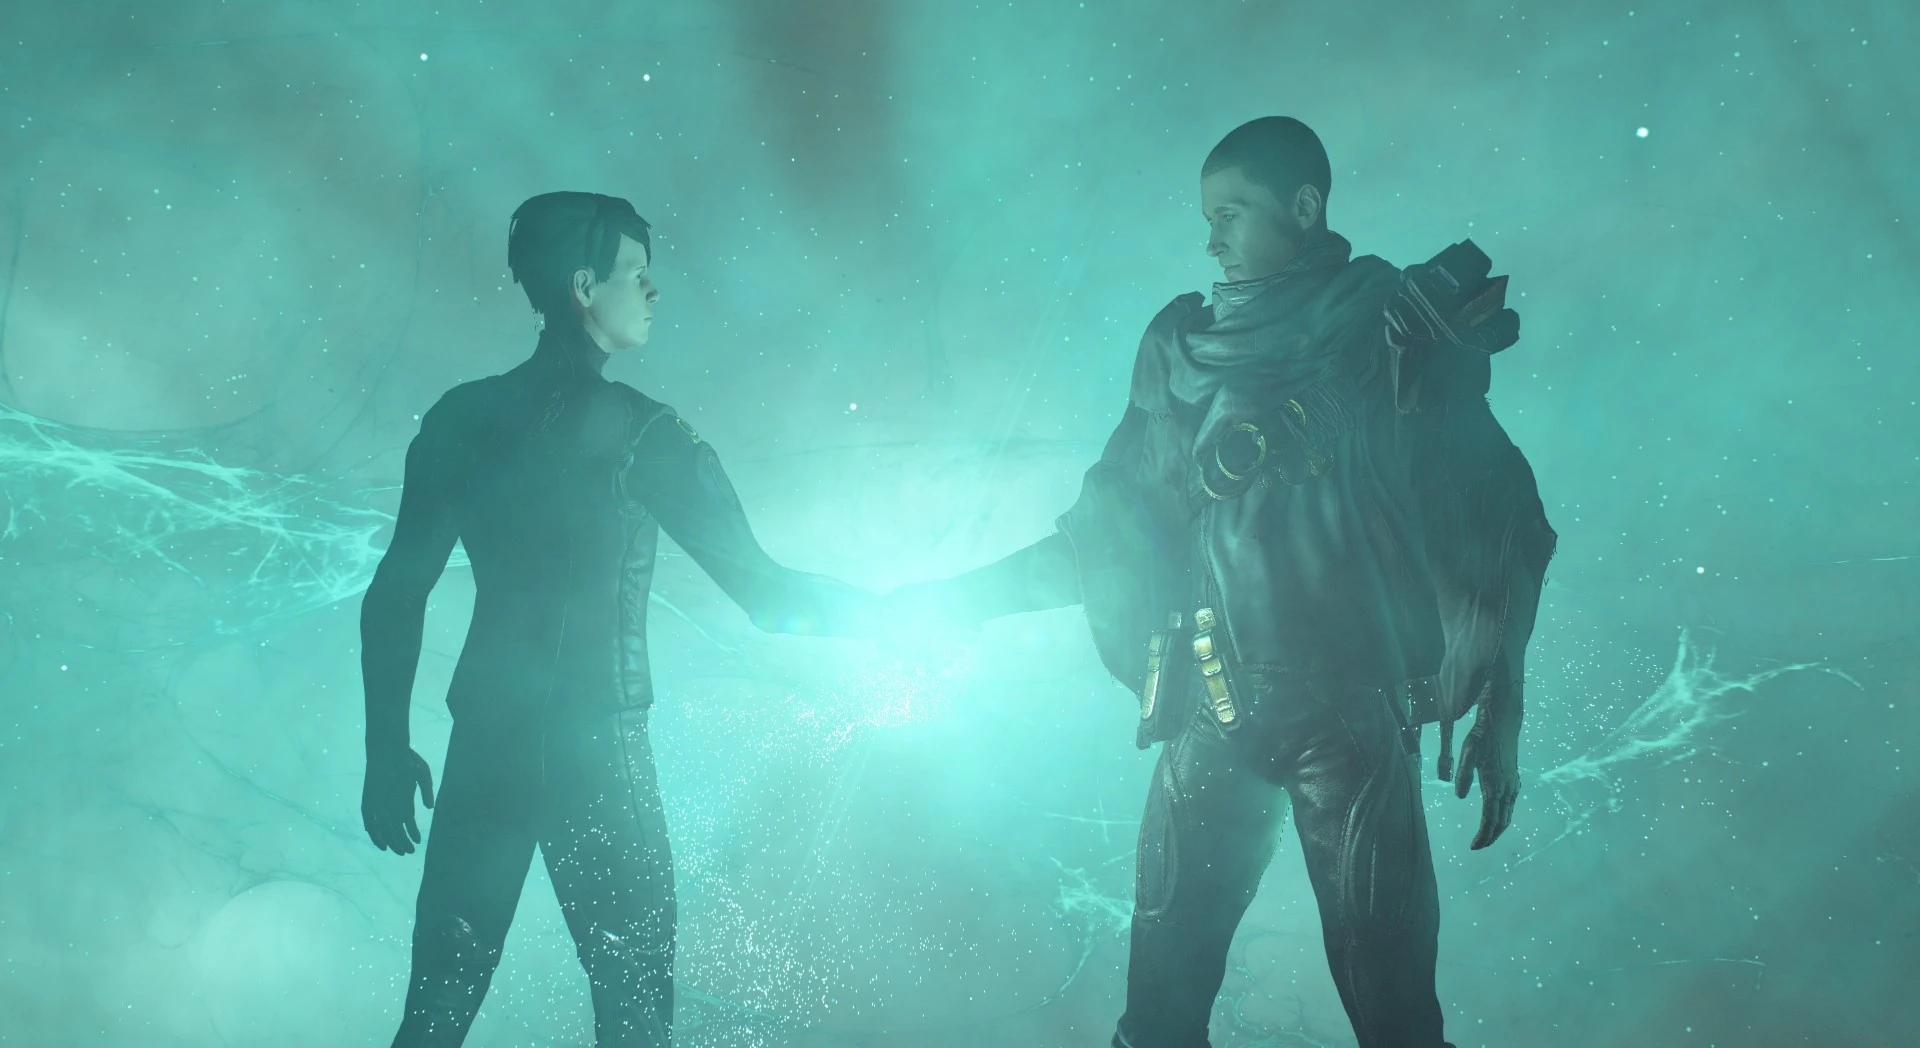
Drifter and Operator shaking hands during the deal
The Lotus eventually corners the Drifter, prompting Ordis to sacrifice his drone body to shield them. The scene cuts back to the Operator accepting The Man in the Wall's Void powers which also seem to have passed on to the Drifter, who fires a Void Beam to repel the Lotus's attack. She eases upon seeing the Operator having taken the place of the Drifter after the smoke clears, and departs.
Table for Two[]
Meanwhile, Ballas senses the Tenno's return, his fury remotely detonating the veils on his nearby Deacons. He instructs Erra to recall the Sentient fleet, as Natah will come to them and he will command her to kill the Tenno.
The Operator heads to the Zariman Ten Zero which appears to have come out halfway from a portal to the void. Picking up a Globelight, they follow visions of and whistling from the Drifter. Arriving at a Dormizone, they sit down at a table and are greeted by the Drifter, revealed to be an alternate reality's version of the Operator. Following the "Eternalism" theory first presented in Temporal Axioms, the Drifter is a version of the Operator who never had Void powers and was never rescued, presumed to have refused The Man in the Wall's deal, and hence never escaped the Zariman Ten Zero. Further, the Drifter does not explain how they managed to leave the Void and replace the Operator, especially how they recovered the Lotus's body from the Void.
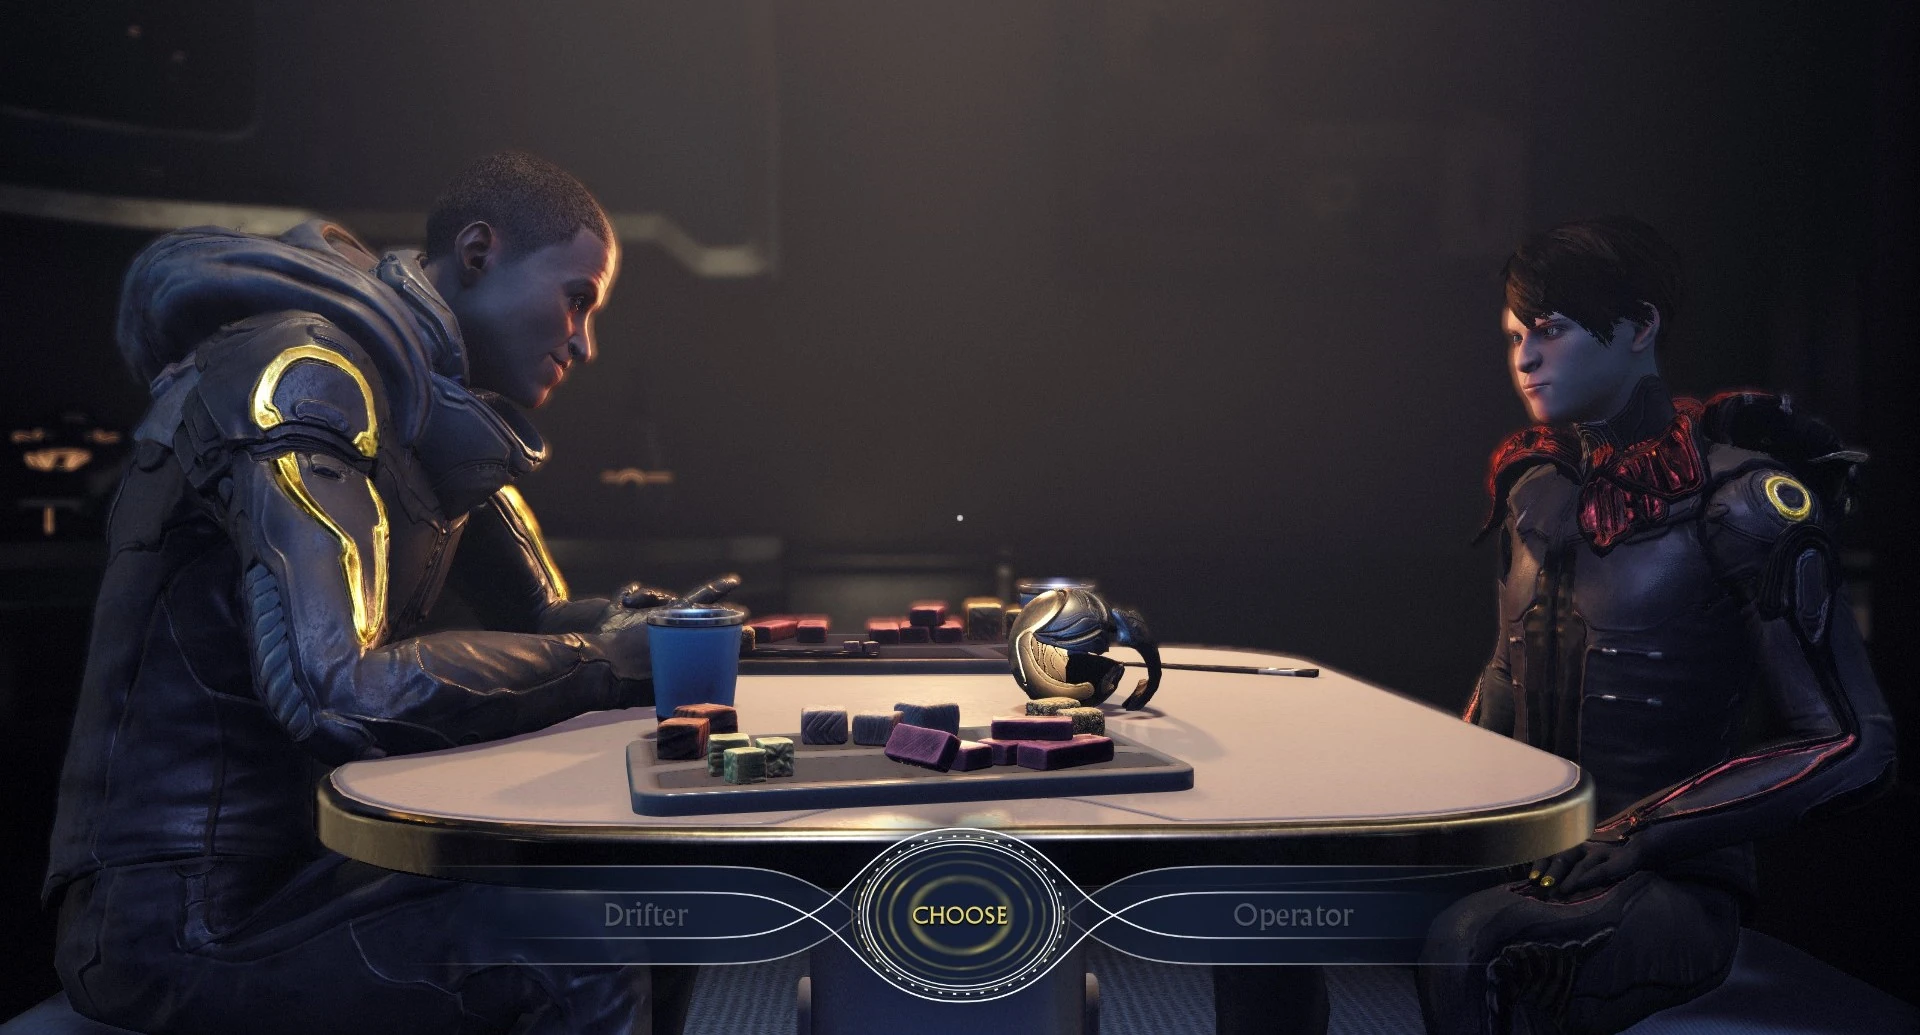
Choice: Drifter vs Operator[]
As the paradox allows only one of them (Drifter or Operator) to exist in regular space, the player is prompted to pick who will take on Ballas. This choice is purely cosmetic and simply affects the visuals and dialogues in the remaining parts of the quest, but does not affect the combat or gameplay in any other way. The Drifter, having received Void powers, now has functional gameplay to the Operator including their base health and shields being bumped up to 350, and no longer has their unique melee or abilities. Once the quest is complete this choice will no longer matter, as the player will have access to identical features regardless of the choice made here.
The Tenno awakens in the Orbiter, while Ordis has lifted the Orbiter from stasis and Exodus protocols. The Tenno are able to access their Warframe and equipment, as well as a rebuilt version of the Paracesis stolen by Ballas. They then discover through the Lotus's helmet that she is headed to Cetus to commandeer a Murex.
She Gives, We Live[]
Cetus[]
The player must equip Paracesis for this mission. If they did not build one prior to starting the quest, they will temporarily have an unranked Paracesis auto-equipped in their loadout, which cannot be modded and will be removed after completion of the quest.
The Tenno enters through the back of The Quills base, but their Warframe cannot proceed due to an Orphix field. They are able to tear off the Narmer Veil affecting Konzu using Void Sling and a quick-time prompt. They must also rescue Fisher Hai-Luk, Master Teasonai, and Hok, and optionally 10 other Ostrons. Note that Ostrons cannot be rescued if a Deacon has spotted the Tenno and begun to pursue them. The Deacon patrols remain invulnerable, but can be avoided with careful use of Void Mode and by sticking to the rooftops and awnings.
With Konzu's help, the Tenno take a blimp to the Unum Tower. They recover their Warframe and can optionally save more Ostrons inside. The Tenno must use their Void damage to activate Reactive Crystals to help them scale the tower. At the top, the Murex prepares to retreat; the Tenno has 60 seconds to activate two crystals, reawakening the Unum who stops time around the Tenno and allowing them to board the Murex.
Murex[]
Aboard the Murex, the Lotus engages the Sentients but warns the Tenno that "this is not [their] fight". As they move forward, the Lotus gains control over the Sentient forces as she reveals Ballas's plans to use the Sentient Mothership Praghasa to consume the Origin System's sun, fulfilling its original purpose from the Old War. Deep within the Murex, the Lotus attacks the Tenno with an energy beam, automatically forcing them into Drifter/Operator form; her attack will be held at bay and must be redirected onto her bodyguard Battalysts. The Tenno are then knocked out of the Murex due to the mechanism she uses to leave, but are picked up by Cy and their Railjack.
No Railjack Crew will be present during this mission. The Tenno opens a hole through the enemy Murex blockade weakened by the Lotus with the Railjack's Tunguska Cannon to clear the way for a Void jump to the sun.
Approach Praghasa[]
Railjack[]
The sun's intensity slows the Railjack and periodically produces intense heat waves that deals significant damage, requiring use of Murex wreckage to take cover. Meanwhile, Ballas openly declares his new plan to destroy the Origin System and sacrifice his Narmer empire, using the sun to fuel the mothership so he can escape to the Tau System, but his speech is interrupted as the Lotus rams her Murex into the Mothership, creating a shockwave that instantly causes a catastrophic breach. Once the breach has been dealt with and the Tenno are able to get close enough, they launch their Necramech into the Sentient Mothership.
On Praghasa[]
The Necramech is confronted by a Typholyst on arrival but it is destroyed by Erra, forming a truce after having realized, although too late, that Ballas's machinations will also doom the Sentients. Erra guides the Tenno forward and leads them to the final Archon, holding debris to allow them to proceed before seemingly being crushed.
The Tenno, in their Drifter/Operator form, must disable the three Orphix generators in the field and their Sentient guardians, allowing their Warframe to be summoned and finish off the final Archon and harvest their shard.
The Final Showdown[]
The Lotus approaches Ballas, who demands her to kneel and beg. The Tenno arrive, Paracesis in hand, distracting the Lotus as Ballas attacks her and prompting the Tenno to push her aside and take the blow. After forcing the Tenno to drop the Archon shard, Ballas claims and absorbs it, taking control of the Lotus and turning the mother against her child.
Any damage against the Warframe instantly puts the Tenno in their Drifter/Operator form, who takes continual damage due to the sun's presence. The Tenno must wait for the Lotus to attack their Drifter/Operator form to redirect her beam onto the round Narmer lenses in the room. They must then dispatch the Narmer Deacons reinforcements. This repeats until all five projections are destroyed, weakening the control over the Lotus, who attacks Ballas before collapsing.
Ballas turns his attention to the Tenno, firing a continual beam, which must be lured to one of the four Narmer lenses. Taunting the Tenno, he then attacks the Lotus, lowering his shields and giving an opportunity to attack directly with Void Beam. With all the mirrors destroyed, Ballas makes one final stand and pushes the Tenno aside, seizing their Paracesis and stabs the Lotus with it.
As Ballas seemingly gains the upper hand, the Tenno jump him and force a Narmer Veil from one of the deacons onto him. Seeing Margulis in place of the Lotus, he is deluded into kissing the illusion, allowing the Lotus to reclaim her essence and end Ballas once and for all. Suddenly, The Man in the Wall emerges in the form of a large multi-armed and multi-legged humanoid embedded into a wall, with its Operator mimic sitting atop it. It overwhelms the Lotus, and before mysteriously vanishing, some words are spoken in a distorted voice.
Conclusion[]
The Lotus back on Lua
With The New War over, the Drifter/Operator carry the Lotus back to Lua. She claims she did not see The Man in The Wall and saw "nothing". Narmer has been shattered now that their leader is effectively a martyr, but its voluntary loyalists remain active. As the Lotus struggles to balance her personalities between herself, Natah, and Margulis, the Operator/Drifter replies, "I know", and asks her to choose "one voice to lead the others":
[Sun] Natah
"The times ahead will need decisiveness. Power. I shall be Natah."
[Neutral] Lotus
"I see violence and suffering in our future. We will need compassion and strength in equal measure... I am the Lotus."
[Moon] Margulis
"Narmer has divided the world, leaving a deep wound. We need healing. I am Margulis."
The choice will define both her name and her initial appearance in all interactions with the player after the quest completes. Note that her chosen name will be permanent. Her appearance can still be changed, as well as now being colorable, after the quest by interacting with the Lotus helmet in the Orbiter's Personal Quarters; the chosen and normal Lotus Skins are provided for free, while other skins available for purchase for a one-off price of 165 Platinum each. Her transmissions will now use the customized appearance instead of the purple Lotus hologram from Apostasy Prologue.
Eidolon Skin Partially regenerated and subsisting on Archon Shard energy.
Lotus Skin A friend of the Tenno, basing her face and voice upon their beloved Archimedean Margulis.
Lotus Radiant Skin The form Lotus took at the moment of her victory over Ballas.
Natah Skin The form Natah took when she reverted to her Sentient nature.
Margulis Skin Modelled on the Tenno's beloved Archimedean Margulis to honor her memory and give them comfort.
Lotus Amaga Skin Remember wisdom through renewal.
The player will receive an inbox message from Natah/Lotus/Margulis thanking them and providing the following:
Ballas' Narmer Staff Decoration
The player can now swap between the Operator and Drifter appearances in the Orbiter's Operator Room. Zariman Decorations and Drifter cosmetics as well as Ordis' Sentinel skin become available in the Market.
Various parts of the gameplay and visuals have changed in the aftermath:
Above Earth, the player can change their personal hub location between the Orbiter in space and the Drifter's Camp on land.
Teshin, following his supposed death by Erra's hand for resisting the Veil's influence, is replaced by a gray hologram.
Cetus and Fortuna contain remnants of Narmer design and other layout changes. This does not affect Captura scenes.
In Cetus, asides from Narmer's remnants, a large destroyed piece of Unum Tower can be found on the shore close to the bazaar entrance.
Due to the new map, the NPC that plays the We All Lift Together cutscene is removed.
Murex that orbited the previously Narmer-occupied planets in the Star Chart are now dead/inactive.
The Plains of Eidolon and Orb Vallis both feature signs of battle, such as the wreckage of crashed Murexes in the distance, although no damage is seen on the playable area of Orb Vallis. Captura scenes will remain in pre-New War appearance, however.
The Plains of Eidolon features significant damage, as expected of the initial site of the Sentient invasion. Crashed Condrixes and Grineer Galleons dot the Plains and various landmarks of both Grineer and Sentient origin have been damaged or destroyed.
The Orb Vallis has become warmer; much of the snow has melted and patches of grass can now be seen. The head of Nef Anyo under construction at Temple Fabrication has been replaced with Ballas's likeness.
Narmer is all but decimated, its scattered adherents now rallying in the name of their lost martyr.
The tenuous alliance against a common enemy has crumbled leaving the Origin system struggling to recover.
Now the Tenno face new questions... the paradox of the Drifter's origins and the threads binding them to a nameless Void entity.
Notes[]
The quick-time events to remove the Veils in Stolen Plates and She Gives, We Live and escape the Archon's grapple in The Wild Hunt can be changed between tap or hold inputs in Settings > Accessibility > "Repeated Button Presses".
Veso's Shield Drone can negate status effects and prevent the Breacher MOA from receiving Electricity procs, which is not possible for normal Shield Ospreys.
The player may use their Warframe and Warframe weapons when fighting the final Archon making the fight considerably easier for higher-Mastery Rank players, but is restricted to only use Drifter and Nataruk when fighting the first two Archons.
Decisions made on replaying the quest will not override those that were made on the first playthrough, including the final Lotus/Natah/Margulis choice.
When entering either the Plains of Eidolon or the Orb Vallis in a party with a player who has not yet finished The New War, the open field map that will be used is that of the pre-New War.
Trivia[]
After Narmer takes over, the Star Chart is altered to feature a reddish backdrop and nearly all planets have their mission nodes replaced by the Narmer symbol with one or multiple Murex stationed in orbit.
Saturn and Eris, despite having a Murex, does not have any Narmer nodes as ground strongholds were never established. Conversely, Kuva Fortress does not have a Murex in orbit due to the Fortress being mobile, but has Narmer nodes as ground strongholds.
The Void is not taken over, due to being hazardous to Sentients.
Originally, the Heart of Deimos update was planned for release after The New War, but was moved ahead of schedule due to the COVID-19 pandemic.[1]
Between the Drifter's Camp and The Aftermath parts of the quest, the login screen is changed to feature the player's Drifter standing outside of the Drifter's Camp with a Murex in the backdrop.
Ordis' Sentinel body was first seen in the back of transmissions during The Sacrifice after he "upgrades" to Vitruvian Ordis.
In the Zariman Ten Zero, the Duviri mask can be seen hanged to a tree in the courtyard, and the Kaithe Duviri horse can also be seen in paintings and statues in the classroom.
The Drifter, before performing Transference for the first time, mentions that it "can't be harder than riding a horse."
After Void jumping to the sun, as they approach Praghasa, The Drifter mentions they "shoulda stayed in Duviri."
When idle, the Drifter can be occasionally heard whistling The Duviri Paradox trailer music.
The Duviri Paradox is revealed to run parallel during the early parts of The New War, where the Drifter gets "stabbed" by Ballas as part of Eternalism and shortly afterward the Lotus's severed hand falls into the Drifter's possession. Certain events that Drifter experienced in Duviri allowed them to escape and eventually help the Origin system during the New War. While in Duviri, it is revealed that those same events were actually brought about by the Operator attempting to help the Drifter escape, despite being introduced to them in the New War. Thus, the question of "who helped who first" is a paradox.
Some of the final gameplay differs from what was shown during TennoCon 2021 and in trailers:
Erra now possesses a red swirling physical lens in his eyes and core in-game.
Veso confronted a Bursa before his gameplay showcase ended during TennoCon 2021. That Bursa is entirely absent in-game.
Stalker possessed War in the Official Gameplay Trailer. In-game, he exclusively uses Hate.
Natah transmission easter egg
If Excalibur Umbra is used in the quest, he will remain immobile during cutscenes and in the Praghasa final battle like any other Warframe. This is also true when replaying other cinematic Quests using Umbra except The Sacrifice.
Prior to the quest's release, players may occasionally have Natah appear in Lotus transmissions as an easter egg.[2][3]
Entering Fortuna for the very first time after completion of The New War will still use the Narmer map, also affecting the We All Lift Together cutscene.
The New War quest marks the ending of overarching storylines regarding the Lotus, the origin of the Tenno and Warframes, Ballas, and the major threat from the Sentients. The story takes a major shift towards a new threat in the form of The Man in the Wall, the Operator's own origins and the mysterious entities of the then largely unknown realm of the Void, as emphasized in the Angels of the Zariman story.
The release of the Veilbreaker quest line signals that Narmer's threat is still far from over and remains a force to reckon with.
The Man in the Wall's distorted speech is theorized among the community to be "Oull - Ris - Xata - Vome. Khra - Lohk", referencing the Requiem Mods. This was later confirmed during TennoCon 2022's "Sounds of the System" panel by Erich Preston to be incorrect, and the actual message was revealed in the Whispers in the Walls quest to be "VOULL NE XATA VOK, MARA LOHK?"; although it is possible that Erich had not seen the best community guess at the time given that it was not yet available on Youtube.[4]
The New War set a lot of firsts for quests/expansions. These are just a few:
When, played casually, The New War was the first quest to take at least 4 hours to complete. This time can be drastically reduced if cutscenes are skipped and if the player knows where to go, however, cutting down the quest completion time to around 90 minutes or less.
The New War was the first quest where players got to play different factions.
It was the first quest that required players to sign a written agreement stating they acknowledged the quest had depictions of abuse and other potentially disturbing content.
Typically after large updates, Digital Extremes introduces a smaller update that is themed around reinforcing the previous expansion, called an "Echoes Update". This trend started with Update 31.1: "Echoes of War".
Fixed an issue where you would need to relog or run a mission after completing The New War Quest to access the inbox message that unlocks the Whispers in the Walls Quest.
Fixed the inbox message sent after completing the New War Quest not including the sender based on the end of Quest choice.
Fixed an animation error for the Lotus during The New War epilogue cinematic.
Fixed an explosive barrel in The New War Quest being inconsistent to other barrels. All as one.
Fixed glow FX on the Orphix field locks lingering even after hitting them with Orvius during the Teshin stage of The New War Quest.
Fixed various Codex objects in Orb Vallis unable to be scanned after completing The New War.
Fixed the Codex being accessible during The New War Quest after restarting the game.
Fixed collision in Unum Tower causing shapes to be broken or missing during The New War Quest.
Fixed an issue in The New War Quest where Operator eyes appear too bright.
Fixed function loss caused by attempting to melee as Drifter in a specific segment of the The New War Quest, resulting in a total progression stop.
Fixed being able to interact with the Spectral Drifter in “The Wild Hunt” segment of The New War Quest, resulting in a variety of unintended behaviors.
Fixed an issue in The New War Quest that could prevent Teshin from grappling on Steam Deck.
Updated the pop-up message for The New War Quest requirements to “You Must obtain an Operator Amp to begin this Quest”.
Fixed being able to see through the map by looking into the glass panels on the ground inside of the Central Maintenance location in the post-New War Orb Vallis.
Fixed the Ballas head statue in the post-New War Orb Vallis being unlit.
Fixed an extremely rare case where players could start The New War Quest without owning a Railjack.
Fixed rare cases of a mutant Drifter and Operator appearing when playing through The New War Quest if the Drifter was selected during “Table for Two” stage.
Fixed players who have completed The New War Quest being able to matchmake with and bring players who have not completed the Quest into the post-New War open landscapes.
Fixed a host migration issue when selecting a bounty in the Plains of Eidolon putting the player back in Cetus when that player was originally hosting the squad and had completed the New War Quest and their squadmate had not.
Fixed dying before cinematic in final stages of The New War quest causing you to be unable to proceed.
This also fixes being able to receive damage if you happen to be playing as Operator when that cinematic starts, which would ultimately break the cinematic.
Experience The New War Quest once more, Tenno! Access The New War Quest in the Codex to Replay. Please note with this implementation the Replay is a full time commitment and you will be locked into the Quest as you were in the first run, so plan accordingly.
Please note on Replay (heavy spoilers):
During the “end choice” moment, you’ll be able to select the other choices for strictly experience purposes. The choice you made in your original playthrough will override it each time once complete.
Additionally, 3 ‘The New War’ Somachord Tones have been added to the post-New War Plains of Eidolon and Orb Vallis. Based on player feedback, we have made these Somachord Tones stationary, meaning they will always be in the same spot (different from the original Orb Vallis Somachord Tones) and require 1 scan each. They’ll remain in their spots after Scanned for helpful Tenno who waypoint them for others!
Keep a look out for the following Somachord Tones:
For Narmer
Hybrid Abominations
Sunkiller
NEW WAR REPLAY FIXES
Thanks to everyone who participated in our Public Test Weekend for New War replay functionality (and possibly first-time Quest runs)! Over 200 testers shared their reports spanning the entire New War quest. We’ve done our best to focus on the larger issues, and those that affected replay functionality, in time for this mainline release. We have you to thank for the following issues being resolved:
Fixed misaligned Railjack when entering from Archwing during The New War Quest.
Fixed your Companion appearing in a cutscene in The New War Quest.
Fixed holding a light incorrectly during certain parts of The New War Quest.
Fixed being in your default customizations in certain moments during the final mission of The New War Quest.
Fixed a group of Brachiolysts missing some of their Health in the first mission of The New War Quest.
Fixed an infinite loading screen during a pivotal transition moment during The New War Quest.
Fixed a certain character’s Orvius toss being titled ‘Rip Line’. It is now titled ‘Orvius Reach’.
FIXES
Fixed crash with Dx12 enabled and skipping cinematics in The New War.
Fixed functionality loss during the final mission in The New War Quest.
Fixed ability to start a Narmer Bounty in a pre-New War Plains session. This resulted in a handful of progression stoppers.
Fixed a rare Dx12 crash during The New War Quest related to a Transmission.
Fixed a permanent white screen during The New War Quest.
Fixed a softlock when attempting to customize a character in The New War Quest for the first time.
Fixed a Cache being buried in the terrain in the post-New War Plains.
Fixed Escort Drone attempting to path under a fallen tree in the post-New War Plains.
Fixed Void Dashing and rolling in quick succession as a post-New War character resulting in becoming stuck in a broken animation.
Fixed a post-New War character being shown when replaying the cinematics of certain Quests.
Fixed missing Lotus VO when replaying The War Within Quest after completing The New War Quest.
Fixed lingering lighting/FX in the Plains of Eidolon after completing The New War Quest.
Fixed a Fortuna Fragment spawning inside geometry after completing The New War Quest.
Fixed dimmed/black screen if you skipped a cutscene at a certain moment during The New War Quest.
Fixed some foliage clipping during a cinematic in The New War Quest.
Fixed Orphix not despawning during the first mission of The New War Quest.
Fixed certain characters having something on their face after completing The New War Quest and attempting to play the Vox Solaris Quest.
Fixed a crash that could occur when loading into either Orb Vallis or Plains of Eidolon with a squad that contained players who had completed The New War Quest and some that had not.
Fixed inability to Public matchmake into the Cambion Drift if the squad contained players who had completed The New War Quest and some that had not.


