| Preceded by |
|---|
| Orokin Derelict (Planet) since Update 29.0 (2020-08-25) |
Deimos is a moon of Mars where the ![]() Infested is the controlling faction. This heavily mutated moon uses a tileset similar to the Orokin Towers, called the Orokin Derelicts, ancient Orokin vessels that have been left abandoned after their expulsion from the Void and tarnished due to long-term exposure to the Infestation. Since the reemergence of Deimos, these derelict Orokin Towers have become satellites orbiting Deimos. The caverns beneath the moon's surface are home to an Orokin device known as the The Heart of Deimos, the legacy of
Infested is the controlling faction. This heavily mutated moon uses a tileset similar to the Orokin Towers, called the Orokin Derelicts, ancient Orokin vessels that have been left abandoned after their expulsion from the Void and tarnished due to long-term exposure to the Infestation. Since the reemergence of Deimos, these derelict Orokin Towers have become satellites orbiting Deimos. The caverns beneath the moon's surface are home to an Orokin device known as the The Heart of Deimos, the legacy of ![]() House Entrati, which establishes a connection to the Void to power all Orokin technology across the Origin System.
House Entrati, which establishes a connection to the Void to power all Orokin technology across the Origin System.
Deimos becomes accessible after clearing Kadesh, Mars, and does not have a Junction.
The Assassination Targets for Deimos are Lephantis and the Zealoid Prelate, located in the mission nodes Magnacidium and Exequias respectively. Lephantis drops the component blueprints for the parts of the ![]() Nekros Warframe, and The Zealoid Prelate drops the blueprint and parts for the
Nekros Warframe, and The Zealoid Prelate drops the blueprint and parts for the ![]() Pathocyst.
Pathocyst.
Deimos also features a Landscape: the Cambion Drift. Unlike the Derelicts, it consists of a wide, open terrain on the surface of the moon, heavily mutated by the Infestation's Grey Strain. In the northeast lies a large structure home to the Entrati family, the Necralisk Void Research Enclave. Within the cave complexes of the Cambion Drift lies an extensive network of Entrati facilities, the most noteworthy being the Isolation Vaults. Full access to the Cambion Drift requires completion of the Heart of Deimos quest.
Further beneath the surface conceals Albrecht's Laboratories with a hidden base of operations known as Sanctum Anatomica, hiding Albrecht Entrati's secret Void research that is largely unknown even to the main Entrati family. Venturing into these depths requires completion of the Whispers in the Walls quest.
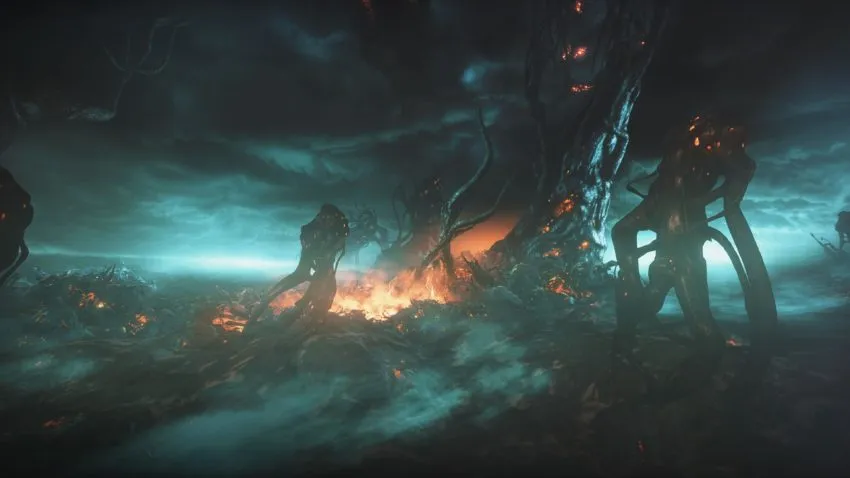
Deimos is one of the moons of Mars, with the other being the heavily contested Phobos. Once a gilded home of the ![]() Orokin, Deimos is now a writhing mass of rock and Infested matter. Bundles of ever-reaching tendrils probe the atmosphere, while billowing clouds of spores blot out the nearby void of space.
Orokin, Deimos is now a writhing mass of rock and Infested matter. Bundles of ever-reaching tendrils probe the atmosphere, while billowing clouds of spores blot out the nearby void of space.
When it first appeared, Deimos became the site of numerous ![]() Corpus and
Corpus and ![]() Grineer expeditions. However, as seen with Eris, their ships were swallowed whole, while any uninfested crew were stranded and left to fend for themselves. Their resource caches, along with those of the Entrati, still litter the moon's surface, available for any brave enough to collect them.
Grineer expeditions. However, as seen with Eris, their ships were swallowed whole, while any uninfested crew were stranded and left to fend for themselves. Their resource caches, along with those of the Entrati, still litter the moon's surface, available for any brave enough to collect them.
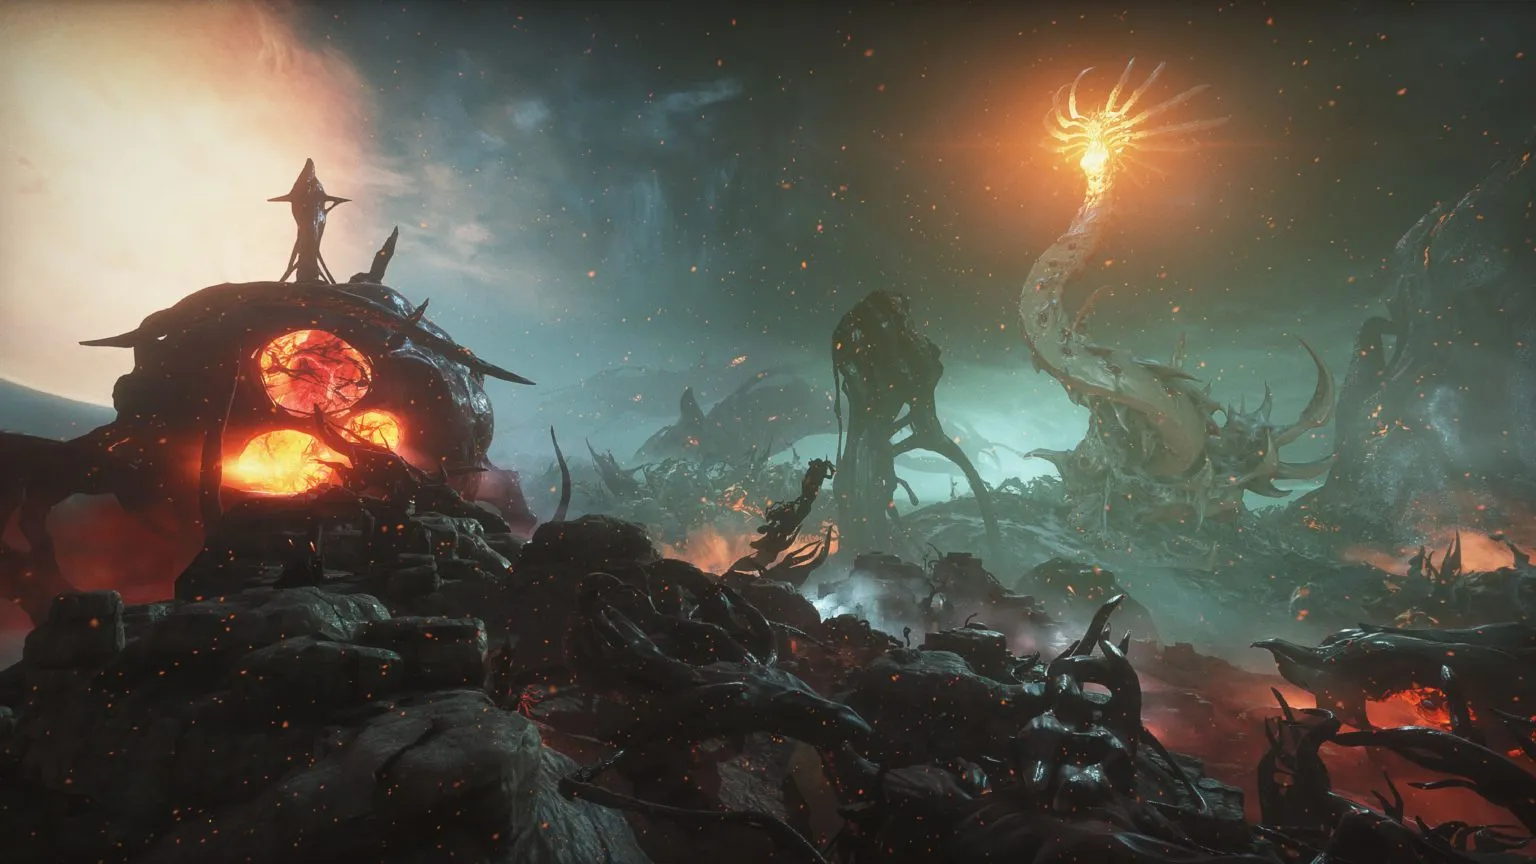
As a result of its now heavily infested nature, Deimos has developed a unique environment and ecosystem not seen anywhere else in the Origin System, evolving in a form akin to a large living organism than a moon.
Unseen bioforms develop within the bowels of the planet, while the surface creatures endlessly hunt and prey upon each other. Their behavior waxes and wanes with the appearance of the Wyrms; large infested entities that act as the Deimos' day-night cycle. The dominant brother, Fass, compels the rest of the Grey Strain to become more active, while his sister, Vome, compels them to return to the arteries in which they rest.
Deimos was the location of the first Void expedition in Orokin history, conducted by Albrecht Entrati, the former head of the Entrati Family. In an attempt to prove the usefulness of the Void, Albrecht would use himself as a test subject, venturing into it through a large Void gate located in the bowels of Deimos. The voyage would prove successful, but at a cost; Albrecht lost his sight and voice. Despite this, he would continue to learn about the Void, constructing the Isolation Vaults and the Heart to aid in his research.
During the Old War, lovers Belric & Rania, master foundry operator and celebrated Void engineer respectively, released a bio-bomb on Deimos, causing the spread of the Infestation in an effort to repel the Sentients. In their last moments, their guardian Warframe, ![]() Citrine, crystallized their bodies in order to keep them together.
Citrine, crystallized their bodies in order to keep them together.
After the Heart begins to fail, the Entrati have no choice but to re-phase Deimos back into reality. Eventually, Deimos would reappear, but now as a large, Infested mass.
Despite its now heavily Infested nature, the moon has now become the target of raiders and treasure hunters. Some of the items they acquired were the crystallized remains of the lovers. Rania's remains were taken to Tyana Pass on Mars, while Belric's remains were taken to Venus. Their love formed a tunnel-like Void portal, which now forever connects the two lovers.
| Target | Name | Type | Level | Credit Reward | Additional Credit Reward | Tile Set | Mastery EXP | Internal Name | Hidden Node |
|---|---|---|---|---|---|---|---|---|---|

|
Sanctum Anatomica | Hub | 0 - 0 | 0 | 0 | Albrecht's Laboratories | 0 | SolNode714
|
❌ |
|
|
Necralisk | Hub | 0 - 0 | 0 | 0 | Necralisk | 0 | DeimosHub1
|
❌ |

|
Horend | Capture | 12 - 14 | 2,100 | 0 | Orokin Derelict | 0 | SolNode706
|
❌ |
|
|
Phlegyas | Exterminate | 13 - 15 | 2,200 | 0 | Orokin Derelict | 0 | SolNode708
|
❌ |
|
|
Formido | Sabotage | 14 - 16 | 2,300 | 0 | Orokin Derelict | 0 | SolNode710
|
❌ |
|
|
Dirus | Mobile Defense | 15 - 17 | 2,400 | 0 | Orokin Derelict | 0 | SolNode709
|
❌ |
|
|
Hyf | Defense | 15 - 20 | 2,400 | 0 | Orokin Derelict | 0 | SolNode707
|
❌ |

|
Magnacidium | Assassination | 20 - 25 | 2,900 | 0 | Orokin Derelict | 0 | SolNode712
|
❌ |

|
Cambion Drift | Open World | 20 - 35 | 0 | 0 | Cambion Drift | 0 | SolNode229
|
❌ |
|
|
Terrorem | Survival | 25 - 35 | 3,400 | 0 | Orokin Derelict | 0 | SolNode711
|
❌ |

|
Exequias | Assassination | 30 - 35 | 3,900 | 0 | Orokin Derelict | 0 | SolNode713
|
❌ |

|
Cambire | Alchemy | 55 - 60 | 6,400 | 0 | Albrecht's Laboratories | 0 | SolNode718
|
❌ |
|
|
Persto | Survival | 55 - 60 | 6,400 | 0 | Albrecht's Laboratories | 0 | SolNode717
|
❌ |
|
|
Nex | Exterminate | 55 - 60 | 6,400 | 0 | Albrecht's Laboratories | 0 | SolNode716
|
❌ |
|
|
Munio | Mirror Defense | 55 - 60 | 6,400 | 0 | Albrecht's Laboratories | 0 | SolNode719
|
❌ |
|
|
Armatus | Disruption | 55 - 60 | 6,400 | 0 | Albrecht's Laboratories | 0 | SolNode721
|
❌ |

|
Effervo | Assassination | 55 - 60 | 6,400 | 0 | Albrecht's Laboratories | 0 | SolNode715
|
❌ |
|
|
Testudo | Netracells | 220 - 240 | 22,900 | 0 | Albrecht's Laboratories | 0 | SolNode720
|
✔️ |
Defense and Survival Deimos missions will have a chance to yield one of the following every 5 waves/minutes. Rotations are as such: A-A-B-C. Deimos Sabotage has optional hidden caches that can be found. Vault requires that a special Orokin Vault be found in certain Deimos missions and opened using one of four Dragon Keys.
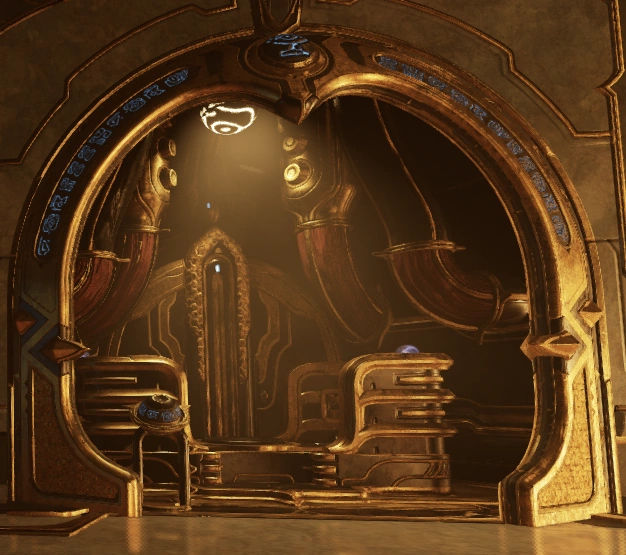
The Orokin Vaults, also known as Dragon Key Vaults and "The Golden Door" by the Ostrons[1], are special vaults found in the Orokin Derelict tileset on Deimos missions which require a unique void key to unlock, called a Dragon Key.
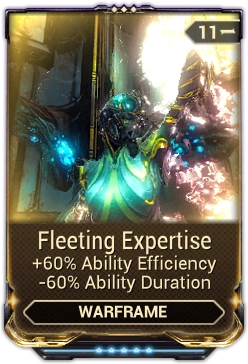
Corrupted Mods are a class of rare mods that affect one stat beneficially (a bonus) and another one detrimentally (a penalty). Those available for Warframes are characterized by extremely high bonuses outweighed by major penalties. Those available for weapons provide bonuses of a similar strength to their standard mod analogues, while still also having a penalty. Corrupted mods can be obtained from the Orokin Derelict tileset on Deimos (not to be confused with the Orokin Tower tileset on the Void) using special Dragon Keys to unlock Orokin Vaults located within. They are untransmutable. Visually, they do not have any special distinguishing mark and appear as any other mod of Rare rarity (i.e. gold-colored).
| Name | Description | Polarity | Rarity |
|---|---|---|---|
| Increases ability strength Reduces ability efficiency |
Rare | ||
| Guarantees that Shield gating duration scales from 0.33s to 1.33s based on your maximum Shield values, regardless of what they are Reduces max shield capacity |
Rare | ||
| Increases ability efficiency Reduces ability duration |
Rare | ||
| Increases ability duration Reduces ability range |
Rare | ||
| Increases ability range Reduces ability strength |
Rare | ||
| Increases ability strength Reduces ability duration |
Rare |
The primary enemy of this tileset features a new enemy faction called ![]() The Murmur, sentient geometric constructs with human-like limbs that have arrived from the Void.
The Murmur, sentient geometric constructs with human-like limbs that have arrived from the Void.
The Necramech guards that once served the ![]() Entrati have long since malfunctioned, no longer able to differentiate the real Albrecht and The Indifference, and joined forces with the very enemy they were meant to destroy, now targeting the Tenno and any other intruder that wanders the laboratories. These Necramechs are new mechanical enemies called Rogue Culverin and Rogue Arcocanid, though much weaker in design than the ones encountered on the Cambion Drift. Culverins have weakspots on their shoulders where corrosive fluid is stored, and destroying both will cause the mech to go into a short self destruct period, before exploding, destroying the rest of it's health in the process.
Entrati have long since malfunctioned, no longer able to differentiate the real Albrecht and The Indifference, and joined forces with the very enemy they were meant to destroy, now targeting the Tenno and any other intruder that wanders the laboratories. These Necramechs are new mechanical enemies called Rogue Culverin and Rogue Arcocanid, though much weaker in design than the ones encountered on the Cambion Drift. Culverins have weakspots on their shoulders where corrosive fluid is stored, and destroying both will cause the mech to go into a short self destruct period, before exploding, destroying the rest of it's health in the process.
Unlike most other tilesets that may have mission wide alerts that either lock down doorways or have a chance to summon tougher enemies, Rogue Culverin units may rush to a Necramech dispensers and attempt to summon a Rogue Voidrig or a Rogue Bonewidow. A glowing red icon as well as an alarm will sound for a few seconds during this process, which can be interrupted by destroying the Culverin attempting to spawn them. If not prevented, a Rogue Necramech will be deployed from the station and go on the offensive, which can be a significantly tougher threat than the usual enemies in the area.
Pom-2 computers are new hacking consoles that can summon the player's personally owned Necramech into the field via the above Necramech dispenser. Each computer can only be used once and shares a universal cooldown.
Voca are physical manifestations of the Voidtongue's cries, moans, and whispers, and act as Syndicate Medallions for ![]() Cavia. Every mission within Albrecht's Laboratories will have up to 8 total Voca. Much like Syndicate missions, the
Cavia. Every mission within Albrecht's Laboratories will have up to 8 total Voca. Much like Syndicate missions, the ![]() Shrill Voca,
Shrill Voca, ![]() Bellow Voca, and
Bellow Voca, and ![]() Echo Voca will be hidden throughout the map to be picked up, and are worth 500 Standing, 1,000 Standing, and 2,000 Standing Standing, respectively.
Echo Voca will be hidden throughout the map to be picked up, and are worth 500 Standing, 1,000 Standing, and 2,000 Standing Standing, respectively.
Lohk Surges are Void interactables that provide a range of buffs to Tenno. Interacting with a surge will spawn an Eximus unit. The surges last 45 seconds and have a 10 minute cooldown. Up to three Lohk Surges can spawn in a mission.
Floating Grimoires can be found throughout the tileset, spawning a hostile Operator doppelganger miniboss called a Whisper. This miniboss has two health bars, upon depleting the first health bar it becomes protected by a Whisper Grimoire that spawns at another part of the tileset while attempting to recover its lost health. Its defeat awards a Melee Arcane Enhancement and an Albrecht's Notes Fragment.
Named after the Requiem Word for Decay, Netracells are the private research vaults of the prominent ![]() Orokin scientist, Albrecht Entrati. They were often sealed with hazardous Keyglyphs; unique keys designed by Albrecht as an added security measure to give the lab’s defenses an advantage, should a Keyglyph fall into unknown hands.
Orokin scientist, Albrecht Entrati. They were often sealed with hazardous Keyglyphs; unique keys designed by Albrecht as an added security measure to give the lab’s defenses an advantage, should a Keyglyph fall into unknown hands.
All manner of Albrecht's personal items and treasures were stored within the cells. The Netracells hold many resource containers that yield Credits Credits and ![]() Entrati Obols. The main cache is guaranteed to drop an
Entrati Obols. The main cache is guaranteed to drop an ![]() Entrati Lanthorn and one of the following: Archon Shards (
Entrati Lanthorn and one of the following: Archon Shards (![]() Crimson (
Crimson (![]() Tauforged),
Tauforged), ![]() Amber (
Amber (![]() Tauforged), or
Tauforged), or ![]() Azure (
Azure (![]() Tauforged)), Melee Arcane Enhancement, or
Tauforged)), Melee Arcane Enhancement, or ![]() Melee Arcane Adapter; the contents of the reward is not revealed until players successfully extract.
Melee Arcane Adapter; the contents of the reward is not revealed until players successfully extract.


Hotfix 35.5.1 (2024-03-27)
Update 35.5 (2024-03-27)
Drusus Leverian owes a debt to Parvos Granum, who seeks a total takeover of the Leverian. Without enough donations, funding ran short, and he took a deal with Parvos that could spell the end of the Leverian. Visit Dante’s Leverian to discover just exactly what’s been happening, to both listen to Dante’s story and Parvos’ power grab to remove Drusus from his own museum.
Murmur Disruption can be accessed via the ARMATUS node on Deimos from either the Star Chart or the Laboratory Navigation in the Sanctum Anatomica. It can also appear as a Bounty at Fibonacci.
How to Unlock Node: Complete The Deadlock Protocol and the Whispers in the Walls Quests. This is due to the fact that they provide substantial lore context to the mission!
What to Expect
Reaching out to the Tenno to act as field associates, Drusus asks you to retrieve high-value Entrati artifacts from Albrecht’s Conduit system to bolster his financial resistance. Enter the Laboratories once more to defend the Arterial Conduits from hulking Obol-adorned Necramech Demolishers and the Key-consuming Gruzzlings (learn more about this new enemy in its dedicated section below!) to earn new rewards.
How To Play
The Gruzzlings hold the keys known as Dockets, each correlating to the Void Tongue symbols of Xata, Lohk, Khra and Vome, instead of the square, triangle, circle and diamond seen in regular Disruption missions. Any enemy destroyed can drop a Docket, like regular Disruption, but you can eliminate roaming Gruzzlings to earn a guaranteed Docket drop.
Insert the Docket into a Conduit, and expect burdens: enemy buffs or environmental dangers. Or, perhaps Loid will reverse a detriment to become a boon as you face off against any Demolishers.
Rewards
Rotation Rewards:
Visit the Official Warframe Drop Tables for more information.
Update 35.1 (2024-02-20)
Update 35.0 (2023-12-13)
Deep within the Necralisk, a dormant precept known as The Kalymos Sequence has been activated. You must return to Deimos and investigate Albrecht’s hidden, subterranean Laboratories for any clues he may have left behind.
Whatever he was working on, you will quickly discover that his Laboratories are the source of many unknowns...
The Whispers in the Walls Quest acts as an introduction into Warframe’s next major chapter. As with all research, discoveries often lead to more questions...
Quest Prerequisites
You must have the following Quests completed to access the Whispers in the Walls Quest:
Quest Rewards
Impressive though they may appear, the Laboratories are not without dangers of their own. You’ll find the gilded alcoves patrolled by abandoned Necramechs faithfully defending their departed master’s secretive research.
These majestic halls constitute a brand-new Warframe tileset, expanding outwards directly from the tunnels beneath the Necralisk. Gilded rooms filled with instruments are not all that can be found below... A haunting but familiar presence also lingers within the labyrinth. Weaved in with Albrecht’s place of research are vast bleak spaces where an unending storm rages on, a clear demonstration of The Man in the Walls’ influence.
Known by many names, The Murmur are the hands (and feet, and eyes, and... you get the idea) of The Indifference. They are attempting to break through Albrecht’s Laboratories into the Origin System - something Tenno will need to stop at all costs.
The Fragmented
On the rare occasions when Murmur fragments assemble themselves into a whole, the result is a monstrous and potent entity. It may manifest in three different forms, the Suzerain, Zelator and Anchorite, with a fourth form, The Fragmented One, being the most formidable of all. Together, as heralds of the Indifference, they tether down the Strands of Khra which their bizarre master must travel.
The Severed Warden
Brutally cut from the Indifference in order to protect the greater whole, its three hands bestow the Void’s twisted blessing upon its allies, so long as they remain attached.
The Anatomizer
A vortex of clinical destruction, it hurls explosive charges, intent upon dismembering opponents as it was itself dismembered.
The Hollow Vein
Albrecht Entrati was unsure whether this awkward composite was the result of the Indifference’s incomplete understanding of human anatomy, or an attempt at creative rearrangement thereof.
Shuffling Fragment
In its calcified chaos, the Indifference is disjointed even from itself.
Lumbering Fragment
These sundered limbs have only partly fused. Lumbering, mindless horror is the result.
Hurling Fragment
Clings to the cliffs and walls, hurling masonry on anything unfortunate enough to be traveling below.
Rupturing Fragment
This lumbering fragment, unconcerned with self-preservation, is liable to rupture violently when in proximity to its target.
ROGUE NECRAMECH ENEMIES
Originally designed to defend Albrecht’s Laboratories from outsiders, these Necramechs have gone rogue and will attempt to destroy any interlopers who cross their path.
Rogue Culverin
An experimental Necramech, optimized for ranged combat, built for Albrecht Entrati by his son-in-law. It now fights alongside the very Murmur foes it was meant to repel.
Rogue Arcocanid
An experimental melee Necramech, a variant on the Tombjockey class, built for Albrecht Entrati by his son-in-law. It now fights alongside the very Murmur foes it was meant to repel.
Rogue Voidrig
A robust, if primitive, war-engine initially developed by Albrecht Entrati’s son-in-law to fight in the Old War and now repurposed as a laboratory guardian. Confused as to who its true master is, it now sides with the Murmur, contradicting its original precepts.
TILESET GAMEPLAY FEATURES
The Laboratories are brimming with instruments and research technologies that can be used to your advantage!
Summon Personal Necramech
Colorless antiques pepper the Laboratories and contain archaic hacking technology. Convince the system to let you in by matching the corresponding icons to the sequence.
Inserting the incorrect sequence (red icons) will increase corruption levels, which risks failing the hacking attempt. Correctly matching the sequence will reward you by delivering your personal Necramech and your Squad’s to nearby dispensers. Once a terminal has been used, it is disabled for the rest of the mission and the ability to summon a Necramech is put on cooldown. Seek out new terminals once the cooldown has expired to once again dispatch your Necramech!
Vitriol Phials
As one might expect, the Laboratories contain a multitude of health and safety hazards beyond the enemies that patrol the halls. Most notable being the Vitriol Phials - destroying them releases their Corrosive contents which can aid against foes but watch your step! Vitriol does not distinguish friend and foe.
Lohk Surges
Lohk Surges are inescapable reminders that the Void has leaked into the Laboratories… Interact with them to provide you and your squad a buff. Be wary that doing so will spawn a foe!
TILESET COLLECTIBLES
There is much to discover in the Laboratories. If you can brave the dangers within, your searches within its long and winding corridors will prove fruitful.
Codex Fragments: Albrecht’s Notes
Much has unfolded within the confines of Albrecht’s Laboratories and he made sure to document the events of his research in great detail. These notes are bound tightly within his Grimoire, which can materialize in the Laboratories, but be forewarned… unbinding it and looking into Albrecht’s lost notes summons something that cannot be easily banished. If you are successful in eliminating it, a note from Albrecht’s Grimoire may be left behind in its stead.
Voca
Physical manifestations of Voidtongue cries, moans, and whispers. There are three kinds of Voca: Shrill Voca, Bellow Voca, and Echo Voca.
The following resources can be found by exploring Albrecht’s Laboratories, killing enemies within them, and completing the new Deimos missions.
Entrati Obols
During the Orokin era, these obols were a commonly recognized mark of the Entrati family. Some Archimedeans even used them as good luck talismans.
Necracoil
This experimental array transmutes Void energy into high voltages with low currents.
Stela
This Void-touched stone contains an ominous essence.
Look out for a unique resource cache and destroy it to wrest the Stela from its grip. Stela can also be obtained by collecting Vosphene Glyphs in Mirror Defense on Munio, Deimos, completing Sanctum Anatomica Bounties, and defeating enemies in Albrecht’s Laboratories.
Completing the Whispers in the Walls Quest unveils five new nodes on Deimos to continue your excursions throughout Albrecht’s Laboratories. One of these new nodes feature a brand new mission type called Alchemy and four feature existing mission types (Assassination, Mirror Defense, Survival, and Exterminate) with an Entrati twist. All of these nodes are also available on The Steel Path!
There is also a special weekly mission type called Netracell that is exclusively accessed in the Sanctum Anatomica hub on Deimos. Read on to learn more!
The Netracells are secured by hazardous Keyglyphs found only in the Anchorhold. They contain highly sought after valuables and can only be opened by using the correct Keyglyph. The Keyglyphs were designed by Albrecht Entrati to open his secretive Netracells. Each one imposes a heavy burden on its carrier. An added security measure to give the lab’s defenses an advantage, should a Keyglyph fall into unknown hands.
Note On Difficulty:
This game mode is intended to be very challenging, and specifically tuned for full squads. Be sure to prepare accordingly! The following restrictions apply to all Netracell missions:
How To Access:
A specific member of the Cavia Syndicate in the Sanctum Anatomica knows how to enter the Anchorhold. Visit them and select the “Enter the Anchorhold” option to begin the hunt for a Netracell.
A maximum of 5 Netracells can be found and unlocked per week for rewards (resets every Monday at 0:00 UTC). You can still play the mission after you have completed the weekly allowance, you just won’t receive any rewards for doing so until the next weekly reset.
How To Play:
Upon entering the Anchorhold you and your squad will be required to select and carry the four randomized Keyglyphs presented. Each impose their own debilitating burden onto their bearer.
There is no limit to how many Keyglyphs one person can shoulder - coordinate with your squad who will carry which type (and how many) before beginning the search.
Exit the Anchorhold by hacking the terminal located at the bottom of the stairs and begin your search for the Netracell. Terminals are located and marked on the map to help narrow down the search radius, should you require aid. Upon finding the Netracell, the security level needs to be reduced by eliminating the enemy threat before gaining access to open it up. After successfully doing so, the player with the required Keyglyph will need to interact with the console to unlock its doors.
Collect your hard earned rewards in the Netracell and make your way to Extraction.
Rewards
Notable rewards for opening a Netracell include:
Alchemic devices in Albrecht’s Laboratories known as Crucibles allow elemental powers to be wielded and fused into complex forces. The Cavia are is requesting your assistance to ensure they remain operative for a greater goal.
How To Access:
Select the Cambire node (normal and Steel Path) on Deimos from the Star Chart or from the Laboratory Navigation in the Sanctum Anatomica.
How To Play:
Crucibles within the Laboratories are capable of mixing complex elements, provided you can supply the elemental forces required. Killed enemies drop Amphors full of Heat, Cold, Toxin, or Electricity. Throw Amphors into the Crucibles to mix the requested complex element to 100%. They can also be lobbed at enemies as concentrated elemental grenades!
Once you have filled it with the required elements, the Crucible will begin its mixing process and a random Crucible Overflow buff will be applied to the squad for the duration of the mix. Ensure the stability of this high powered mixing process by breaking distressed pipes to drop the pressure if it gets too high.
Rewards
Notable rewards for successfully completing a Crucible include:
Ready to go toe-to-toe with something that almost certainly has way more toes than you do? Seek out and destroy The Fragmented, a nightmarish assembly of Murmur fragments.
How To Access:
Select the Effervo node (default and Steel Path) on Deimos from the Star Chart or from the Laboratory Navigation in the Sanctum Anatomica.
How To Play:
Seek out an Atropos Probe and inject its serum into a Vitreum to begin scanning. Defend the Vitreum while it scans for Murmur’s Eyes. Prevent the scan from being interrupted by keeping the search radius around the Vitreum clear of enemies. Once Murmur’s Eyes have been exposed, they will become visible to you for a limited amount of time. Collect them quickly before they fade from view.
Atropos Probes power the Vitreums for a limited amount of time, so once it has been depleted, new Probes and Vitreums must be found to continue the process. Collecting the required amount of Murmur’s Eyes will pinpoint The Fragmented’s location. Upon arrival, you will face off against one of the three variants (Suzerain, Zelator, or Anchorite). Dispatching it will reward you!
Rewards
Notable rewards for successfully defeating The Fragmented include:
The Murmur is staging an attack against Albrecht’s Laboratories! They have pinpointed the Laboratories best defenses against them and it is up to you to protect against the onslaught.
How To Access:
Select the Munio node (default and Steel Path) on Deimos from the Star Chart or from the Laboratory Navigation in the Sanctum Anatomica.
How To Play:
Protect the Vitreum and the Auricle as the enemies alternate their attacks between the two. A rotation is complete once both have been defended.
Vosphene Glyphs are the key to triggering the Laboratories’ automated security system. Gathering the required amount will bolster the active defense target by surrounding it with offensive turrets. Doing so will also reward 3x Stela (5x on Steel Path).
Rewards
Notable rewards for completing a round of Mirror Defense include:
The Murmur is not backing down, so it’s time to whittle down their numbers.
How To Access:
Select the Persto node (default and Steel Path) on Deimos from the Star Chart or from the Laboratory Navigation in the Sanctum Anatomica.
How To Play:
Your classic Survival mission! Head into Albrecht’s Laboratories and see how long you can hold out against the Murmur and the Rogue Necramechs waiting within.
Rewards
Notable rewards for completing a round of Survival include:
A section of Albrecht’s Laboratories needs to be cleared out.
How To Access:
Select the Nex node (default and Steel Path) on Deimos from the Star Chart or from the Laboratory Navigation in the Sanctum Anatomica.
How To Play:
Your classic Exterminate mission! Eliminate all of The Murmur and Entrati enemies to reduce the danger in this area.
Upon completion of the Whispers in the Walls Quest, you have access to Cavia, a new Syndicate located in the Sanctum Anatomica on Deimos.
Build rapport with Cavia members and work your way up from the Assistant Rank.
To avoid spoilers from The Whispers in the Walls Quest, the names of each member has been redacted in the sections below.
Wares & Shiny Treasures Vendor
A peculiar Vendor is nested atop one of the platforms in the Sanctum Anatomica, and offers the following items that can be acquired using Standing:
This Vendor also enjoys all things that sparkle and shine and has Shiny Treasures available to trade for resources. Decorate your Orbiter with Entrati splendor - we promise these versions are significantly less breakable than the ones found in-mission.
Arcane Dissolution & Voca Vendor
Located next to terminals in the Sanctum Anatomica, a key member of the Cavia stands as your access point to Arcane Dissolution, exchanging Voca for Cavia Standing and resources for Voca.
Bounty Giver
Contained and sodden, this grandiloquent Cavia member hands out Bounty assignments and is your contact to increase your Cavia Rank.
Netracell Guide
Only this Cavia member knows how to enter the Anchorhold to find the Netracells located throughout Albretch’s Laboratories.
All of the new Deimos nodes and mission types are available as Bounties! Accessible from the Bounty giver in the Sanctum Anatomica hub on Deimos, these Bounties offer a variety of enemy levels to really test your expertise in navigating and conquering the Laboratories.
In addition to playing the standard mission, you must also complete a special objective (for example: Eliminate 2 Rogue Voidrigs) in order to extract and complete the Bounty.
Successfully completing a Bounty will reward you with Standing towards the new Cavia Syndicate, as well as several other potential rewards:
Hotfix 34.0.2 (2023-10-19)
Update 31.6 (2022-06-09)
Hotfix 31.5.2 (2022-04-28)
Update 30.5 (2021-07-06)
Hotfix 29.5.5 (2020-11-27)
Update 29.5 (2020-11-19)
Update 29.2 (2020-09-29)
Hotfix 29.0.4 (2020-08-27)
Hotfix 29.0.2 (2020-08-26)
Update 29.0 (2020-08-25)